
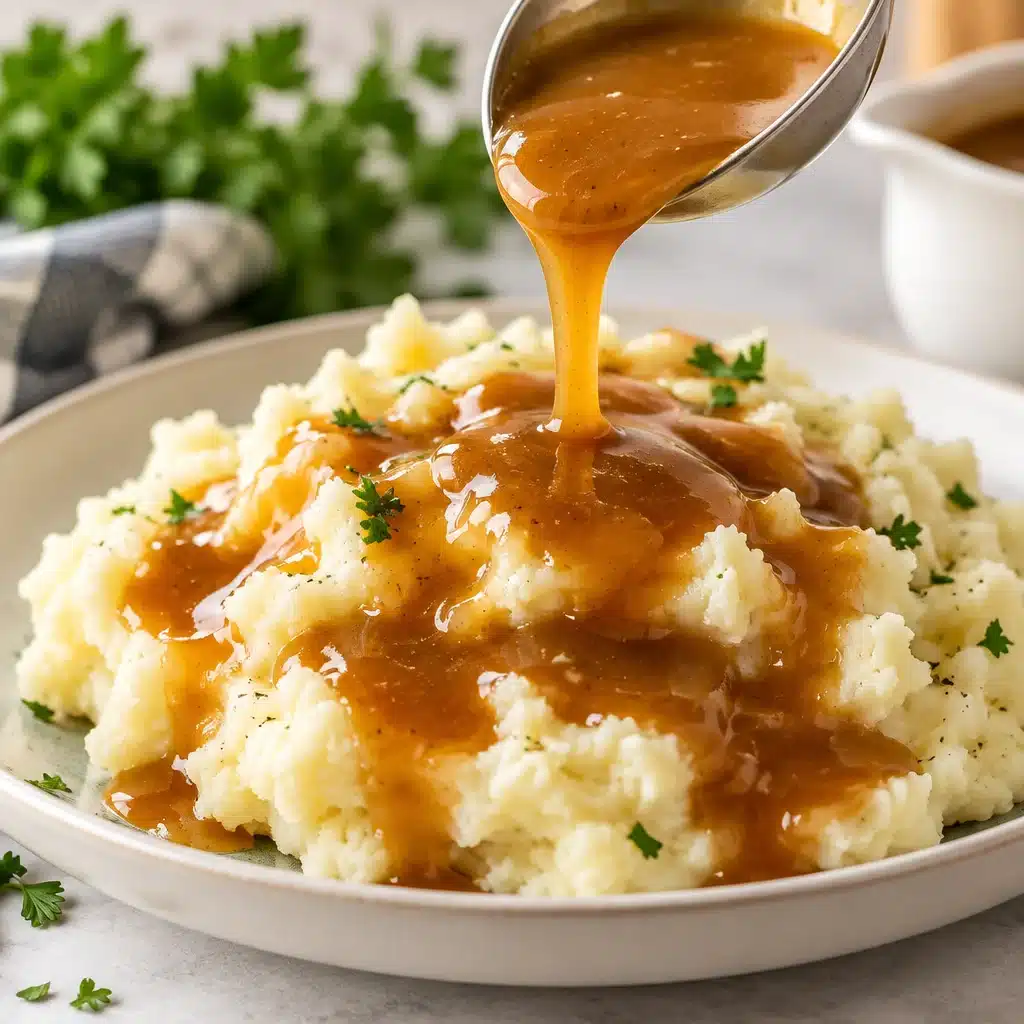
homemade brown gravy is one of those things I always want, right when I have the least amount of time. Like when the mashed potatoes are ready, the chicken is resting, and everybody is hovering in the kitchen asking, “Is there gravy?” The catch is I do not always have pan drippings, and honestly, I do not always want to plan a whole roast just to get them. This recipe is my comfy, reliable answer because it’s rich, savory, and comes together fast with everyday ingredients. It also tastes like you actually tried, even if you threw it together on a weeknight.
What Makes Homemade Brown Gravy So Flavorful
The big secret is that flavor does not only come from drippings. It comes from building layers. You start by cooking butter and flour together until it smells a little toasty. Then you add a good broth, plus a few small boosters like bouillon and a splash of something savory.
For me, homemade brown gravy hits that sweet spot between cozy and bold. It is salty enough to wake up bland mashed potatoes, but still smooth and mellow. And because you control everything, it tastes fresher than most packets.
One more thing. Gravy tastes better when it has a tiny bit of time to simmer. Even 5 minutes makes it rounder and more “real.”
Ingredients You Need for Brown Gravy
You probably have most of this already. Here’s what I use for a basic batch that serves about 4 to 6 people.
- Butter (about 3 tablespoons)
- All-purpose flour (about 3 tablespoons)
- Beef broth (2 cups, warm if possible)
- Bouillon (optional but recommended, 1 teaspoon or 1 cube equivalent)
- Onion powder (a pinch to 1/2 teaspoon)
- Garlic powder (a pinch to 1/2 teaspoon)
- Black pepper (to taste)
- Salt (only if needed after tasting)
- Worcestershire sauce (1 to 2 teaspoons, optional but so good)
If you want a little deeper color, you can add a tiny splash of soy sauce. Not enough to make it taste like soy sauce, just enough to deepen things. I do this a lot when I’m serving it with something simple.
Also, if you are into cozy comfort meals, you might like this crockpot chicken and gravy recipe. It is basically made for nights when you want dinner to handle itself.
Best Beef Broth and Bouillon Choices
Broth matters. If you use a weak broth, your gravy will taste like warm salt water with ambition. I usually reach for low-sodium beef broth, then add bouillon to control the punch. That way you can build flavor without accidentally making it too salty.
Here’s what works well:
Broth options: boxed low-sodium beef broth, homemade beef stock, or even a mix of beef and chicken broth if that’s what you have.
Bouillon options: paste-style concentrates, cubes, or granules. Paste dissolves the easiest, but all of them work.
If your broth is already intense and salty, skip bouillon and just do Worcestershire plus pepper. You can always add more later, but you cannot un-salt gravy without a little effort.
How to Make a Smooth Butter and Flour Roux
A roux sounds fancy, but it is really just butter plus flour cooked together. The goal is a smooth paste with no dry flour pockets. That paste thickens the gravy and gives it a richer taste.
Here’s my no-stress method:
Start with medium heat. Melt the butter fully. Sprinkle in the flour while whisking. Keep whisking until it turns into a smooth paste. Let it cook for about 1 to 2 minutes for a lighter gravy taste, or 3 to 4 minutes if you want it toastier and slightly deeper in flavor.
The key is not rushing. If the heat is too high, the roux can brown too fast and taste a little burnt. Medium heat is your friend.
How to Make Brown Gravy From Scratch
This is the part you came for, and it’s honestly simple once you do it once. I make this in a small saucepan, and I keep a whisk nearby the whole time.
Step by step directions
1) Melt butter over medium heat.
2) Whisk in flour until smooth. Cook 2 to 4 minutes, depending on how deep you want the flavor.
3) Slowly pour in beef broth while whisking. Go a little at a time at first, because that helps prevent lumps.
4) Add bouillon, onion powder, garlic powder, pepper, and Worcestershire sauce.
5) Bring it to a gentle simmer, whisking often. Let it bubble lightly for 5 to 8 minutes until it thickens.
6) Taste and adjust. Add salt only if it truly needs it.
This homemade brown gravy is my go-to when I’m serving simple meatballs or chicken cutlets. And if you ever want a fun twist for dinner, I’ve made this gravy on the side of this cheesy, weeknight-friendly butter chicken flatbread recipe. It is not traditional, but it is delicious.
How to Get the Right Gravy Thickness
Thickness is personal. Some people want it pourable. Some want it almost spoonable. The longer it simmers, the thicker it gets. Also, gravy thickens a little as it cools, so do not overdo it too early.
If you want a classic “coat the back of a spoon” gravy, simmer about 6 to 8 minutes after it starts bubbling. If you want it thinner, stop earlier and add an extra splash of broth.
How to Prevent Lumps in Gravy
Lumps usually happen when broth hits flour too fast, or when you stop whisking at the wrong time. My best tips are very boring, but they work every time.
Anti-lump tips:
Whisk the flour into fully melted butter first. Then add the broth slowly while whisking constantly, especially for the first 30 seconds. If your broth is warm, it blends even easier.
If you still end up with lumps, do not panic. Keep whisking and simmering, and many lumps will smooth out. Worst case, strain it through a fine mesh sieve and pretend it never happened.
How to Fix Gravy That Is Too Thin or Too Thick
Gravy is forgiving, which is one reason I love making it from scratch.
If it is too thin, let it simmer longer. That is the easiest fix. If you are in a hurry, mix 1 teaspoon cornstarch with 1 tablespoon cold water, then whisk it in and simmer 1 to 2 minutes.
If it is too thick, whisk in broth a splash at a time until it loosens up. Water works in a pinch, but broth keeps the flavor strong.
Easy Ingredient Substitutions
This is a very flexible recipe, which is great for real life cooking.
Butter: you can use drippings from cooked sausage or bacon if you have them, but the recipe is designed to work even when you do not.
Flour: all-purpose is best, but a gluten-free 1 to 1 flour blend usually works too. Just simmer gently and whisk well.
Beef broth: you can use chicken or veggie broth. It will taste lighter, but still good. Add an extra splash of Worcestershire if you want more “brown gravy” vibes.
How to Make Brown Gravy Without Drippings
This is exactly why I make it this way. You are creating that rich base using butter and flour, then building the meaty flavor with broth and bouillon. So yes, homemade brown gravy can be deeply savory without any pan bits at all.
If you really want it to taste like it came from a roast pan, add a tiny pinch of smoked paprika and a small splash of Worcestershire. That little combo gives a roasted, savory feel without making it taste smoky.
Low-Sodium and Flavor Adjustments
If you are watching sodium, you can still have great gravy. Start with low-sodium broth, skip bouillon, and lean on flavor builders that are not salty.
Try these:
Black pepper, garlic powder, onion powder, a pinch of dried thyme, or even a tiny splash of balsamic vinegar for depth. Add salt at the very end only if needed, and do it a pinch at a time.
What to Serve With Brown Gravy
My favorite thing about this is how it can rescue a plain plate. I swear it makes basic mashed potatoes feel like a holiday side dish.
Here are a few easy ideas:
- Mashed potatoes, rice, or egg noodles
- Meatloaf, burgers, or sausage patties
- Roasted veggies like carrots or mushrooms
- Open-faced sandwiches with turkey or beef
And after dinner, if you are in a dessert mood, I love keeping something fun in the fridge like these deliciously fudgy brownies with banana. Sweet and cozy is kind of my theme.
How to Make Gravy Ahead of Time
You can totally make this earlier in the day, or even the day before. In fact, it tastes even better after it sits a bit because the flavors settle down.
Make it, cool it, then store it in the fridge. When it is time to serve, warm it gently and whisk in a splash of broth to bring it back to that silky texture.
If you are planning a bigger meal and want an easy treat ready too, these frosted Christmas brownies are a crowd-pleaser, even when it is not Christmas.
How to Store, Freeze, and Reheat Gravy
Store leftover gravy in a sealed container in the fridge for up to 4 days. It will thicken as it chills, so do not be surprised.
To freeze, pour cooled gravy into a freezer-safe container and leave a little space at the top. Freeze up to 3 months. Thaw overnight in the fridge for best texture.
To reheat, warm it in a saucepan over low heat, whisking often. Add broth a tablespoon at a time until it is smooth and pourable again. Microwaving works too, but do it in short bursts and whisk in between so it stays smooth.
Brown Gravy FAQs
Q and A
Q: Can I use water instead of broth?
A: You can, but it will taste flat. If you have to use water, add bouillon and Worcestershire to bring the flavor back.
Q: Why does my gravy taste like flour?
A: The roux probably did not cook long enough. Next time, cook the butter and flour for a few extra minutes before adding broth.
Q: Can I make it dairy-free?
A: Yes. Use a plant-based butter and double check your broth and bouillon labels. The method stays the same.
Q: How do I make it darker?
A: Cook the roux a bit longer and use a darker beef broth. A tiny splash of soy sauce also deepens color fast.
Q: Can I make this gluten-free?
A: Yes. Use a gluten-free flour blend, or thicken at the end with a cornstarch slurry instead of flour.
A Cozy Little Send Off (Go Make the Gravy)
If you take anything from this, let it be this: homemade brown gravy is not hard, and you do not need drippings to make it taste rich and comforting. Once you get the roux down, the rest is just whisk, simmer, taste, and adjust. If you want to compare methods, I also like checking recipes like Brown Gravy Recipe – No Drippings Needed! – The Cozy Cook and Easy Brown Gravy Recipe (No Drippings) – Persnickety Plates because it’s nice to see little variations. Now go grab a saucepan and make your dinner feel extra cozy, and if you have leftovers, do yourself a favor and pour it on tomorrow’s potatoes too.
And if you want a cheerful baking project for later, these delicious strawberry brownies are such a fun change from the usual chocolate routine.
Print
Brown Gravy
- Total Time: 20 minutes
- Yield: 6 servings 1x
Description
A quick and savory homemade brown gravy recipe that doesn’t require pan drippings, perfect for elevating your meals.
Ingredients
Base Ingredients
- 3 tablespoons Butter (Can substitute with drippings if available.)
- 3 tablespoons All-purpose flour (Gluten-free flour blend can be used.)
Flavor Enhancers
- 2 cups Beef broth (Use low-sodium broth if preferred.)
- 1 teaspoon Bouillon (Optional but recommended.)
- 1/2 teaspoon Onion powder (Use a pinch to taste.)
- 1/2 teaspoon Garlic powder (Use a pinch to taste.)
- to taste Black pepper
- to taste Salt (Add only if needed after tasting.)
- 1–2 teaspoons Worcestershire sauce (Optional, but adds great flavor.)
Instructions
Preparation
- Melt the butter over medium heat in a small saucepan.
- Whisk in the flour until it forms a smooth paste. Cook for 2 to 4 minutes based on desired depth of flavor.
- Slowly pour in the beef broth while whisking continuously to prevent lumps.
- Add the bouillon, onion powder, garlic powder, black pepper, and Worcestershire sauce.
- Bring the mixture to a gentle simmer, whisking often. Allow to bubble lightly for 5 to 8 minutes until thickened.
- Taste and adjust seasoning, adding salt if necessary.
Notes
If the gravy is too thin, simmer longer to thicken. To fix gravy that is too thick, whisk in more broth a splash at a time. Store any leftover gravy in the fridge for up to 4 days or freeze for up to 3 months.
- Prep Time: 10 minutes
- Cook Time: 10 minutes
- Category: Sauce, Side Dish
- Cuisine: American
Nutrition
- Calories: 90
- Sodium: 400
- Fat: 7
- Saturated Fat: 4
- Carbohydrates: 6
- Protein: 1










 Appetizers & Sides
 Main Dishes
 Drinks & Wellness
 Desserts & Baking