Instant Pot Ribs are my answer to that very specific craving when you want sticky BBQ ribs tonight, not “sometime this weekend after an all day smoke session.” I love slow cooked ribs, but real life is busy and I still want that juicy, tender bite that makes everyone quiet at the table. This method gets you super close to the backyard BBQ vibe, with way less waiting. The best part is how repeatable it is once you learn a couple small tricks. If you have ever had ribs turn out tough, dry, or weirdly chewy, I’ve been there, and this fixes it.
Why Instant Pot Ribs Are the Fastest Way to Get Tender, Juicy BBQ Ribs
Pressure cooking is basically a shortcut to tenderness. Ribs have connective tissue that normally needs time to relax and soften. The Instant Pot speeds that up, so you get tender meat without babysitting a smoker or oven for hours.
Also, it’s a lot easier to control the results. You set the time, let it do its thing, then finish with sauce under the broiler for that sticky glaze. It’s weeknight friendly, but still “wow” enough for guests.
And if you’re building a cozy dinner menu, I love pairing ribs night with soup earlier in the week. This Instant Pot ham cheese broccoli soup is one I rotate in when I want comfort food without a ton of effort.
Types of Pork Ribs for Instant Pot Cooking (Baby Back vs Spare Ribs vs St. Louis Style)
You can make Instant Pot Ribs with pretty much any pork rib cut, but they do behave a little differently.
Baby back ribs are leaner and a bit smaller. They cook faster and are usually the “crowd favorite” because they’re tender and easy to eat.
Spare ribs are bigger, meatier, and have more fat. That fat means flavor, but they may need a touch more time.
St. Louis style ribs are spare ribs that have been trimmed into a more even rectangle. I like them because they fit the Instant Pot more neatly and cook more evenly.
If you’re new to ribs, start with baby backs because the timing is a little more forgiving.
Ingredients for the Best Instant Pot Ribs (Dry Rub, BBQ Sauce & Seasonings)
This is where you can keep it super simple or go full DIY. I usually land right in the middle. Here’s what I grab most of the time.
- Pork ribs (baby back, spare, or St. Louis style)
- Dry rub (store bought or homemade)
- BBQ sauce for finishing (thick sauce works great)
- 1 cup liquid for the pot, like water, broth, apple juice, or a mix
- Optional flavor boosters: apple cider vinegar, Worcestershire, hot sauce, liquid smoke (just a tiny bit)
Dry rub tip: If your rub already has salt, go easy adding extra. Too much salt can make ribs taste “cured” instead of BBQ.
BBQ sauce tip: Save the sauce for the end. Saucing before pressure cooking can burn and taste bitter.
How to Remove the Membrane from Ribs for Maximum Tenderness
If there’s one small step that makes a big difference, it’s removing the membrane. That papery layer on the back of the ribs can turn leathery, and it blocks seasoning from soaking in.
How I do it without making it a big production:
Flip the ribs so the bone side is up. Look for a thin, shiny layer. Slide a butter knife under it between two bones, then grab it with a paper towel and pull. It usually comes off in one big sheet if you get a good grip.
If it tears, just keep going. Even removing most of it helps a lot.
Step-by-Step Instant Pot Ribs Recipe (Pressure Cooker Method)
Here’s my go to method. It’s simple, and once you do it one time, you’ll feel like you’ve been making Instant Pot Ribs forever.
What you will do (quick and clear)
- Cut the rack into sections so it fits your pot (usually 2 to 4 pieces).
- Remove the membrane if needed, then pat ribs dry.
- Rub the ribs all over with dry rub. Don’t be shy.
- Pour 1 cup liquid into the Instant Pot and add the trivet.
- Arrange ribs standing on edge, curling them around the pot.
- Pressure cook, then finish with sauce under the broiler.
When I’m meal planning, I like balancing “hands off” recipes like this with other set it and forget it dinners. If you’re in that season of life too, this list of 10 easy crockpot recipes is super helpful for filling the week without thinking too hard.
Natural Release vs Quick Release: What Works Best for Ribs
For Instant Pot Ribs, I strongly prefer a short natural release first. Here’s why: a full quick release can make the meat seize up a bit, and you lose some tenderness.
My sweet spot is: let the pot naturally release for about 10 minutes, then carefully quick release the remaining pressure. It keeps the ribs juicy, and you’re not waiting forever.
If you’re aiming for super fall apart ribs, that little natural release window matters more than you’d think.
How Long to Cook Ribs in the Instant Pot (Timing Guide for Different Cuts)
Timing is the part people stress about, but it’s not complicated once you match the cut. Use this as your baseline, then adjust next time based on how you like them.
My general guide (at high pressure):
Baby back ribs: 23 to 27 minutes
St. Louis style ribs: 25 to 30 minutes
Spare ribs: 28 to 33 minutes
Then do that 10 minute natural release, followed by quick release.
Two important notes:
1) Thicker racks need more time than thinner ones.
2) If you plan to really caramelize them under the broiler for a bit longer, stay on the lower end of the cook time so they don’t over soften.
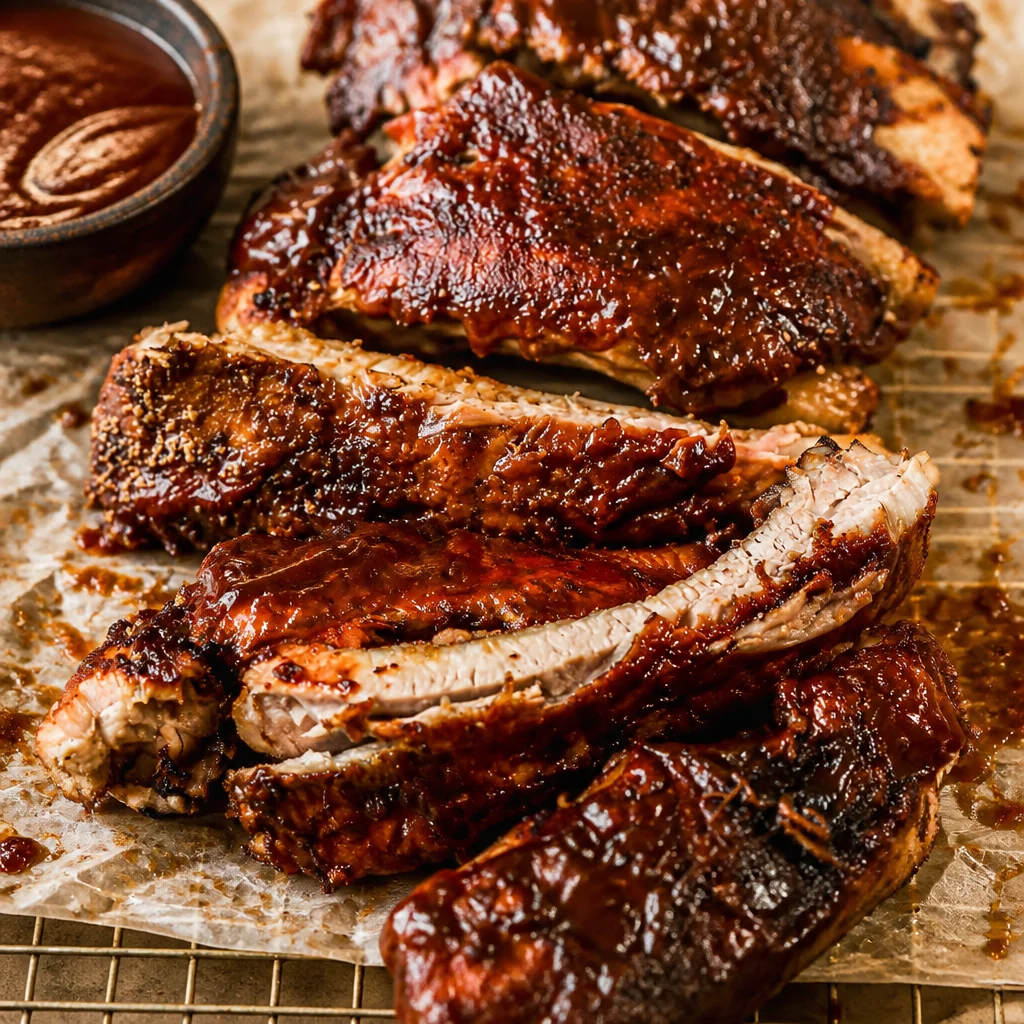
How to Finish Ribs in the Oven or Broiler for Sticky BBQ Glaze
This is where the magic happens. Pressure cooking makes them tender, but it does not give you that sticky, slightly charred BBQ top. You need a quick blast of high heat.
What I do:
Set ribs on a foil lined baking sheet. Brush with BBQ sauce. Broil 2 to 4 minutes, then brush again and broil another 1 to 3 minutes. Watch closely because sauce can go from glossy to burnt fast.
No broiler? Bake at 425 F for about 8 to 12 minutes, saucing once or twice. It takes longer, but it still works.
Tips for Making Ultra-Tender Fall-Off-The-Bone Instant Pot Ribs
If you want the “fall off the bone” style (not everyone does, but I totally get it), these tips help:
Use enough rub so every bite has flavor.
Do not skip the membrane removal if it’s still on.
Do a 10 minute natural release before quick release.
Let the ribs rest for 5 minutes before saucing and broiling. They stay together better.
Broil on a sturdy pan and handle gently with tongs. They can get very soft.
If they’re tender but not quite there, add 2 to 3 minutes next time. Small changes go a long way.
Common Mistakes to Avoid When Cooking Ribs in a Pressure Cooker
I’ve made all these mistakes so you don’t have to.
Mistake 1: Putting sauce in the pot. It can burn on the bottom and give you that scorched taste.
Mistake 2: Skipping the trivet. You want the ribs steamed and pressure cooked, not boiled in liquid.
Mistake 3: Overcooking because you want them “extra tender.” They can turn mushy fast. Use the broiler step for texture and caramelization, not extra pressure time.
Mistake 4: Cutting before resting. A short rest helps the juices settle so the meat stays moist.
Flavor Variations for Instant Pot Ribs (Smoky, Spicy, Honey BBQ, Korean-Style)
This is the fun part. Once you have the basic Instant Pot Ribs method down, you can change the vibe with almost no extra effort.
Smoky: Add a tiny splash of liquid smoke to the cooking liquid, and use a smoky rub (paprika forward).
Spicy: Add cayenne to the rub and finish with a spicy BBQ sauce or a little hot sauce mixed in.
Honey BBQ: Stir honey into your BBQ sauce before broiling for a sweet glossy finish.
Korean-style: Use a sauce with soy, brown sugar, garlic, and a bit of gochujang. Broil until bubbly and sticky.
Quick note: Korean style ribs are amazing with a cozy starter like Asian potsticker soup when you want a dinner that feels special but still easy.
What to Serve with Instant Pot Ribs (Classic BBQ Side Dishes)
Ribs are the main event, so I keep sides simple and comforting. Here are a few that always make the plate feel complete:
- Coleslaw
- Corn on the cob
- Baked beans
- Potato salad
- Mac and cheese
- Pickles and sliced onions for crunch
And if you want another cozy option for the week, this 4 ingredient potato soup is one of those low effort recipes that tastes like you tried way harder than you did.
How to Store, Reheat, and Freeze Instant Pot Ribs
Leftover ribs are a gift, honestly.
To store: Keep ribs in an airtight container in the fridge for up to 4 days. I like storing them with a little extra sauce so they stay moist.
To reheat: Oven is best. Wrap in foil and warm at 300 F for 15 to 25 minutes, depending on thickness. Unwrap, add sauce, then broil for 1 to 2 minutes if you want that sticky top again.
To freeze: Freeze cooled ribs in freezer bags or a sealed container for up to 2 to 3 months. Thaw overnight in the fridge before reheating.
Meal Prep and Make-Ahead Tips for Busy Weeknights
This recipe is sneaky good for planning ahead.
Prep ahead: Remove membrane, cut into sections, and rub with seasoning up to 24 hours in advance. Keep covered in the fridge.
Cook ahead: You can pressure cook the ribs earlier in the day, chill them, then sauce and broil right before dinner. That makes dinner feel basically instant.
Use leftovers: Chop rib meat into sandwiches, tacos, or even loaded baked potatoes. Add a little sauce and it feels like a new meal.
Common Questions
Do Instant Pot Ribs taste like smoked ribs?
Not exactly, but they’re still really satisfying. The broiler step plus a smoky rub gets you close enough for a weeknight craving.
Can I stack ribs in the Instant Pot?
Yes. Just stand them on edge and curl them around the pot. As long as steam can circulate, you’re good.
Why are my ribs tough after pressure cooking?
Usually they need a bit more time, or the release was too fast. Next time add 2 to 4 minutes and do a 10 minute natural release.
Can I use frozen ribs?
It’s possible, but seasoning does not stick well and timing gets tricky. I recommend thawing first for the best results.
How do I keep ribs from falling apart when I move them?
Let them rest a few minutes, then use tongs and a wide spatula to lift from underneath. They’re tender, so treat them gently.
Go Make Ribs Tonight, You’ve Got This
If you want tender, juicy Instant Pot Ribs without spending your whole day cooking, this is the method I’d tell a friend to try first. Season well, pressure cook with the right timing, do a short natural release, then finish under the broiler for that sticky glaze. If you’d like to compare approaches, I’ve also found helpful tips from Instant Pot Pork Ribs recipe – Tastes Better from Scratch and Instant Pot Ribs | Easy, Ultra Tender, and Foolproof! – Well Plated. Now grab some napkins, pick your sauce, and make it happen. Once you do it once, you’ll be craving ribs on random Tuesdays like it’s totally normal.

Instant Pot Ribs
- Total Time: 1 hour
- Yield: 4 servings
Description
Quick, tender BBQ ribs made easily in the Instant Pot for a delicious weeknight meal. Perfectly seasoned and finished under the broiler for a sticky glaze.
Ingredients
Main Ingredients
- 2 pounds Pork ribs (baby back, spare, or St. Louis style) (Choose based on preference; baby backs are softer.)
- 1 cup Liquid for the pot (water, broth, or apple juice) (Use a mix or one type.)
Dry Rub & BBQ Sauce
- 0 Dry rub (store-bought or homemade) (Use a blend that you prefer.)
- 0 BBQ sauce for finishing (A thick sauce is recommended.)
- 0 Optional flavor boosters (Options include apple cider vinegar, Worcestershire sauce, hot sauce, and liquid smoke.)
Instructions
Preparation
- Cut the rack into sections to fit your Instant Pot (2-4 pieces).
- Remove the membrane from the bone side of the ribs if necessary.
- Pat ribs dry and rub them generously with the dry rub.
Cooking
- Pour 1 cup of liquid into the Instant Pot and add the trivet.
- Arrange ribs standing on edge, curling around the pot.
- Cook on high pressure for the appropriate time based on rib type: 23-27 minutes for baby back, 25-30 minutes for St. Louis style, or 28-33 minutes for spare ribs.
- Perform a 10-minute natural release, then quick release any remaining pressure.
Finishing
- Preheat broiler.
- Place ribs on a foil-lined baking sheet and brush with BBQ sauce.
- Broil for 2-4 minutes, brush with sauce again and broil for another 1-3 minutes. Watch closely to avoid burning.
Notes
Helpful tips include allowing 10 minutes for natural release to increase tenderness. For variations, add a splash of liquid smoke for a smoky flavor, add spices for heat, or mix honey into BBQ sauce for a glossy finish.
- Prep Time: 30 minutes
- Cook Time: 30 minutes
- Category: dinner, Main Course
- Cuisine: American, BBQ
Related posts:
 Heavenly Italian Sausage & Pepper Casserole
 Deliciously Easy Cheesy Potato Egg Scramble
 Delicious Cottage Cheese and Spinach Crustless Quiche
 Quick Spicy Buffalo Chicken Wraps
 Creamy and Cheesy Spinach Pasta | Healthy Palak Pasta Recipe
 Moqueca Brazilian Fish Stew Recipe (Easy, Authentic & Coconut Milk Seafood Stew)

 Main Dishes
 Drinks & Wellness