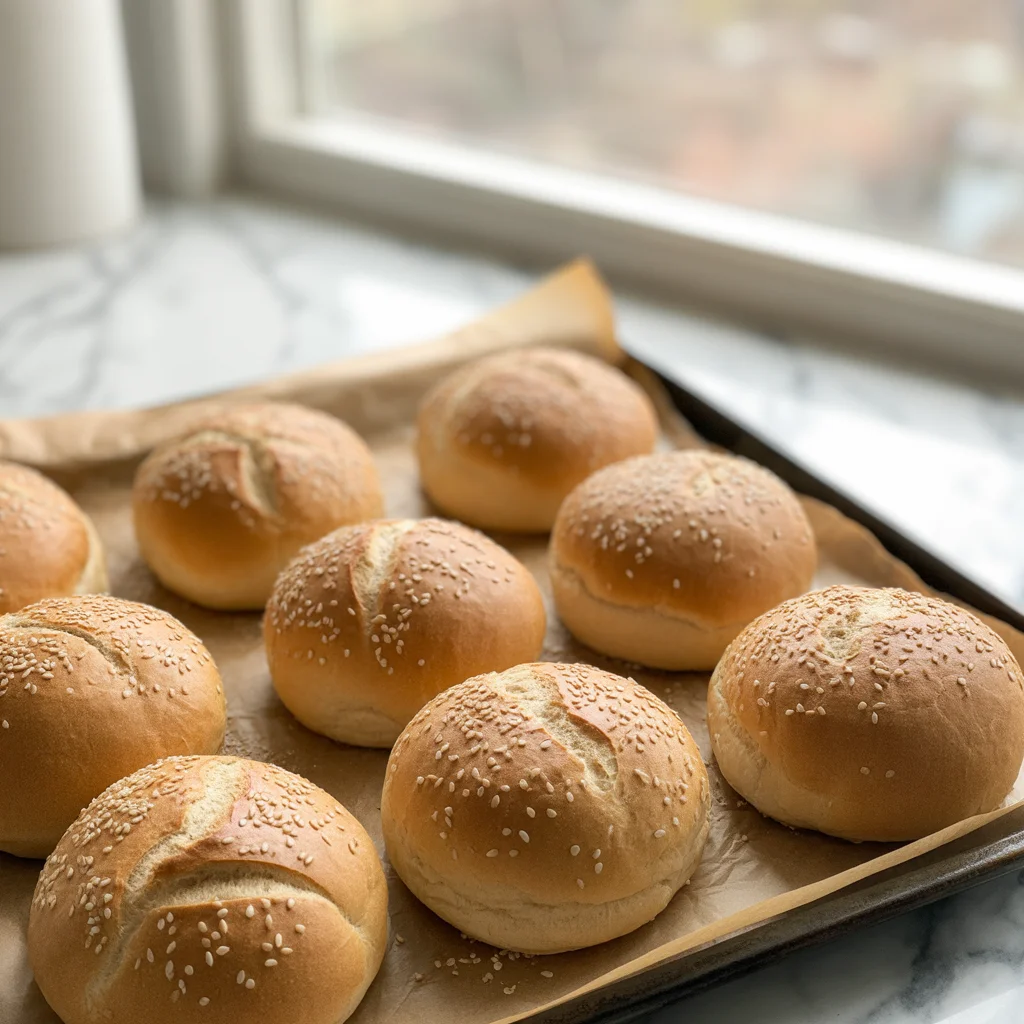
Sourdough Hamburger Buns are the absolute best when your burger deserves more than a bland, store-bought bun. Ever bitten into one of those dense, sad hamburger buns and thought, “wow, this could have been so much more?” Yeah, same here.
Making them at home sounds fancy, but honestly, it’s a heck of a lot simpler than folks make it out to be. Here’s the kicker: you get flavor, texture, and bragging rights. If you want the detailed play-by-play, Follow my go-to sourdough hamburger bun guide. Let me show you why this bun business is worth the hype.
What Makes Sourdough Buns Different from Regular Buns
Sourdough Hamburger Buns just hit different. The tangy flavor and chewy bite? You don’t get that from a regular packet bun. They’re made with wild yeast from a starter, not those little packets from the store, so the flavor is bigger and the crumb (fancy word for inside part) gets that signature soft-crunchy vibe.
Plus, they hold up under a juicy burger without instantly going mushy.
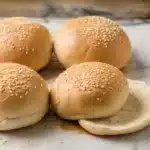
Sourdough Hamburger Buns
- Total Time: 2 hours 30 minutes
- Yield: 8 buns
Description
Delicious and chewy sourdough hamburger buns made with a bubbly starter that elevate your burger experience.
Ingredients
For the dough
- 1 cup Active sourdough starter (Bubbly and ready)
- 3 cups Bread flour (Or a mix of all-purpose and whole wheat)
- 1 cup Water (Filtered is best)
- 1 tbsp Sugar or honey (For flavor)
- 1 tsp Salt (Good sea salt if available)
- 2 tbsp Butter (Softened, or olive oil as an alternative)
- 1 large Egg (For brushing)
Instructions
Preparation
- Mix your sourdough starter, flour, water, and sugar in a large mixing bowl. Let it sit for about 1 hour.
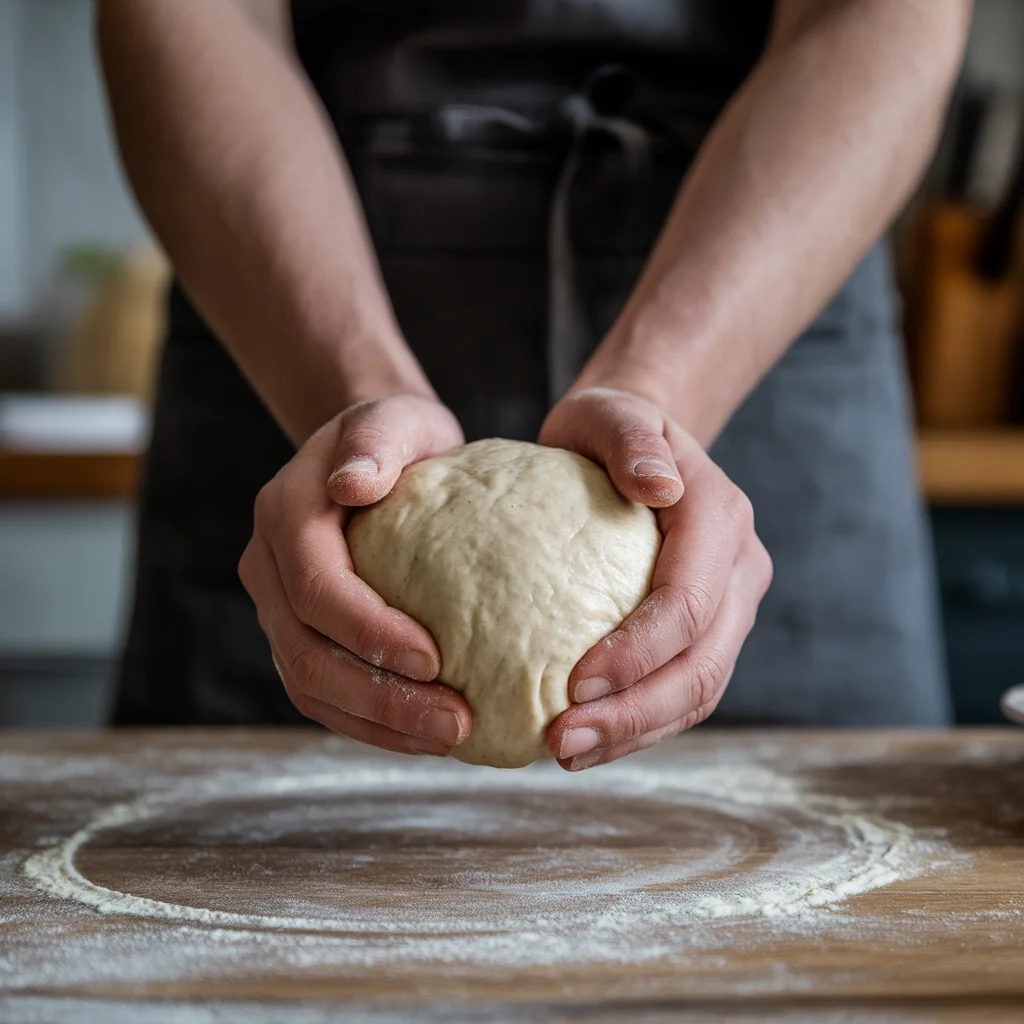
- Add salt and soft butter to the mixture. Knead until the dough is smooth and somewhat sticky.
- Cover the dough and let it rise in a warm place for 3 to 5 hours until it’s puffy.
- Transfer the dough onto a lightly floured counter and divide it into 8 equal pieces.
- Shape the pieces into round buns and place them on a parchment-lined baking sheet.
- Gently press the buns to flatten slightly, then cover and allow to proof for 2 to 4 hours.
- Preheat the oven to 375°F (190°C). Brush the tops of the buns with the egg wash.
- Bake for about 20 minutes until golden brown.
- Remove from the oven and let cool completely before slicing.
Notes
For best results, plan to bake on a day when you can allow plenty of time for rising and proofing.
- Prep Time: 2 hours
- Cook Time: 20 minutes
- Category: bread, Side Dish
- Cuisine: American
That’s a small miracle. I’ve tried a bunch of buns in my time, none gave me that “five-star restaurant” thrill like homemade sourdough does. I mean, my backyard burgers became the talk of the block.
Essential Ingredients for Sourdough Hamburger Buns
Okay, ingredient time. You’re not gonna need anything wild or expensive. Here’s what you want on your kitchen counter:
- Active sourdough starter (bubbly and ready, don’t use the sad, sleepy stuff)
- Bread flour, all-purpose, or mix in a bit of whole wheat (more on that below)
- Water (filtered is best, but let’s not be too precious)
- Sugar or honey (just a touch for some oomph)
- Salt (good sea salt if you’ve got it)
- Butter (or olive oil if you must, but butter’s better, I swear)
- Egg (for brushing, shiny tops are the dream)
That’s it. Really. See? Ain’t so scary.
Choosing the Right Flour (All-Purpose vs Bread Flour vs Whole Wheat)
Let’s chat flour. This trips a lot of people up, but it doesn’t need to. Bread flour gives you buns that stand up tall, a little bit chewier, more “bakery” feel. All-purpose makes softer buns, a bit lighter and fluffier. Whole wheat? Well, it’s hearty, but don’t go all-in or your buns get dense. I usually go bread flour mixed with just a little all-purpose. That’s my sweet spot. If you love that nutty flavor, toss in maybe 10 to 20 percent whole wheat with your bread flour. Just remember, too much whole wheat = hockey pucks.
Tools You’ll Need to Make Sourdough Buns at Home
You know what’s great? You don’t need special gadgets. I guarantee you already own most of this stuff. You’ll need a big bowl for mixing the dough, a kitchen scale (really makes life easier), a dough scraper or just your hands, and a baking sheet. I like parchment paper so nothing sticks. Oh! And a wire rack for cooling, unless you want soggy-bottomed buns. Lastly, a pastry brush for that egg wash. Nothing fancy, promise.
Step-by-Step Guide: How to Make Sourdough Hamburger Buns
This is the part that sounds intimidating. It’s really just a bunch of rest and fold. Let’s break it down:
- Mix your sourdough
Mix your sourdough starter, flour(s), water, and sugar. Let it sit for about an hour, a handy thing called autolyse (don’t worry, you don’t need to remember that word).
- Add salt and soft butter
Add salt and soft butter. Knead till it’s smooth-ish. It’s gonna be sticky. That’s normal. Go with it!
- Cover and let rise
Cover and let rise somewhere cozy, about 3-5 hours. You want it puffy, not doubled in size.
- Plop the dough
Plop dough on a lightly floured counter. Divide into 8 pieces (weigh them for evenness if you want pro vibes).
- Shape the pieces
Shape them into little rounds. Plop them on your baking sheet.
- Press gently
Press gently, everyone says “barely flatten” but, honestly, I go for a fat hockey puck shape. Cover and proof (rest) for 2-4 hours. You want them to look pillowy.
- Bake at 375°F
Brush with egg. Bake at 375°F for about 20 minutes, till golden.
- Let it cool
Cool before slicing (annoying, but totally worth the wait).
Smells unreal, right out of the oven.
Baking Schedule: Morning to Evening Timeline for Beginners
Here’s how I time things out, because yes, it’s gonna take you all day if you want the best results. But most of it’s hands-off. I usually feed my starter before bed. In the morning, I get mixing by 8 a.m. First rise by 9 or so, and it hangs out till lunch. Shaping’s at noon. Second proof can hang out all afternoon, depending on your kitchen temp. So by dinnertime, you’ve got buns that are bakery-worthy. Plan it on a lazy Saturday, and you’ll look like a baking champ by dinnertime.
Serving Ideas: Best Ways to Enjoy Sourdough Buns
Sometimes you just want to keep it classic, but here are a few fun ways to enjoy these:
- Stack them with smoky grilled burgers or barbecue pulled chicken.
- Make breakfast sandwiches, eggs, bacon, melty cheese, all piled high.
- Use them for mini sliders at parties, people will actually talk about the buns!
- Soak up homemade gravy or serve with soup. Seriously comforting.
If you want more ideas for what sourdough can do, check out my go-to sourdough french toast recipe.
Advanced Baker’s Tips: Hydration Levels, Baker’s Percentages, and Dough Temperature Control
Ready for some nerdy-but-useful tips? Hydration is everything. I keep mine at 70-75 percent for buns, feel free to go wetter once you’re braver. Warmer kitchens, faster rises. Cooler kitchens, slower flavor. That’s sourdough magic for you. If you’re curious about percentages, use an online calculator so your dough ratios are always spot-on. Don’t stress too much, though. My first buns looked weird but still tasted dreamy.
How to Store and Freeze Sourdough Buns Properly
Just made a big batch? Cool ‘em completely before stashing away. Room temp, they’ll keep soft for about two days in a plastic bag. Any longer and I really suggest freezing. Slice before freezing, then pop them right into the toaster (or oven) when you need ‘em. Don’t refrigerate, or they get a bit rubbery. Trust me, it’s not worth it.
Troubleshooting Common Problems
“Help, my buns turned out flat,” or “they taste sour as lemon drops!” Been there, done that. Usually, flat buns mean the dough over-proofed (waited too long to bake). Too sour? Starter may be too old or you proofed for way too long. Dense buns can mean not enough rising time, or your starter isn’t strong enough yet.
Pairing Ideas: Best Homemade Sauces, Toppings, and Sides for Sourdough Buns
There’s just something joyful about piling up a sourdough bun. I love classic toppings: sharp cheddar, lettuce, juicy tomato. Sometimes I get wild, caramelized onions, sriracha mayo, or pickled jalapeños. Homemade aioli? Go for it. Serve with fries or crunchy coleslaw for full effect. And hey, if you want to go all-in, try homemade spicy ketchup on the side.
Seasonal and Event Uses for Sourdough Buns (BBQs, Holidays, Game Day, Family Gatherings)
Look, these buns aren’t just for summer. I’ve rolled them out for Thanksgiving leftover sammies, winter chili nights, football game sliders, and rowdy backyard BBQs. I even served them at my cousin’s birthday picnic, everybody wanted to know the recipe (humble brag). Basically, if it’s a gathering, sourdough hamburger buns fit right in.
Common Questions
Honestly, you can, but the flavor and rise won’t be as good as with a fed, happy starter.
It should look puffy and jiggle a bit if you shake the tray. If you poke it, the indent should mostly stay.
Yes, but don’t rush the rises. The slow ferment is what gives these buns their unique texture and taste.
Don’t worry! Your buns will just be a little pale, but they’ll still be tasty.
Absolutely. Cold proofing can make the flavor even better. Just give ’em time to come to room temp before baking.
Ready to Make the Best Burger Buns Ever?
Alright, there you have it, the whole scoop on why you need sourdough hamburger buns in your life, how to actually make them, and a bunch of tips I learned the hard way. Baking these is not only doable, it’s ridiculously satisfying when you take that first bite. Hungry for more? Dive into how to make sourdough garlic bread for a little extra bread magic. Start your oven and make something awesome!
Related posts:
 Deliciously Simple Easter Egg Peanut Butter Haystacks Recipe
 Irresistibly Easy Sourdough Monkey Bread
 Best Thumbprint Cookies Recipe with Jam, Fruit Preserves, and Curd Fillings
 Healthy Mango Mousse Recipe (3 Ingredients, Easy No-Bake Dessert)
 Refined Sugar Free Mango Sorbet Recipe (Quick & Creamy)
 Japanese Honeydew Bread (Melon Pan) Recipe – Soft Fluffy Japanese Sweet Bread

 Main Dishes
 Drinks & Wellness