Chicken Parm Sandwich: Easy Steps for a Perfect Italian Classic
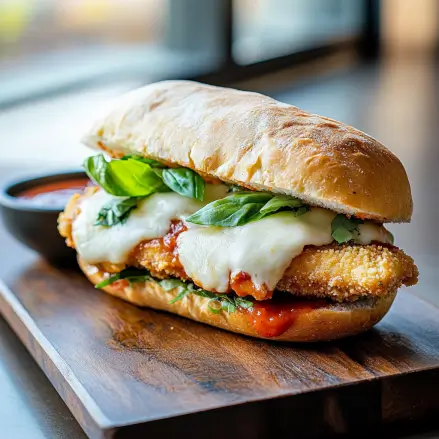
There’s something magical about biting into a Chicken Parm Sandwich—the crispy, golden breaded chicken, the rich marinara sauce, and that gooey, melted mozzarella, all nestled in a soft, toasted roll. It’s comfort food at its finest, and trust me, once you make it at home, you’ll never settle for takeout again!
As a home cook who loves Italian-inspired dishes, I can confidently say this chicken parmesan sandwich is one of the most satisfying meals you can whip up in your own kitchen. Whether you’re craving a quick weeknight dinner or looking for a crowd-pleasing sandwich to impress your family, this recipe has got you covered. The best part? It’s surprisingly easy to make with just a few simple ingredients!
In this guide, I’ll walk you through step-by-step instructions to create the ultimate chicken parm sub, complete with crispy, juicy chicken, the perfect cheese-to-sauce ratio, and a toasted bun that holds it all together. Plus, I’ll share some pro tips on how to keep your sandwich from getting soggy and the best way to reheat leftovers (if there are any!).
So, let’s get cooking and make a homemade chicken parmesan sandwich that’s better than any restaurant version!
Ingredients You Need for the Best Chicken Parm Sandwich
When it comes to making the best Chicken Parm Sandwich, every ingredient matters. You want crispy, juicy chicken, rich marinara sauce, and the perfect blend of cheeses, all hugged by a hearty roll that holds up to the flavors. But don’t worry—I’ve got you covered. Let’s break down exactly what you need to make this Italian classic taste like it came straight from a top-tier restaurant (or better!).
1. The Chicken: Crispy, Juicy, and Flavor-Packed
At the heart of every great chicken parmesan sandwich is the chicken itself. You want a cut that cooks evenly and stays juicy while getting that irresistible crispy coating.✔ Best Choice: Boneless, skinless chicken breasts or chicken cutlets✔ Pro Tip: If using whole chicken breasts, slice them in half horizontally and pound them to about ½ inch thick. This ensures even cooking and maximum crispiness.✔ Why It Matters: A thicker piece won’t cook through properly, and an uneven cut could result in one side being overcooked while the other stays underdone.
2. The Breading: The Secret to That Perfect Crunch
That satisfying crunch in every bite? It all starts with a well-seasoned breading process. Here’s how you get it just right:🔹 Flour: Helps the egg mixture stick and creates a base layer for the breadcrumbs.🔹 Egg Wash: A beaten egg mixed with a splash of milk gives the breading something to cling to.🔹 Breadcrumbs: The real game-changer! Use Panko breadcrumbs for extra crunch or Italian-style breadcrumbs for more flavor.🔹 Parmesan Cheese: Mixing grated Parmesan into your breadcrumb coating adds a rich, nutty depth.🔹 Seasonings: A little garlic powder, onion powder, salt, pepper, and Italian seasoning takes your chicken from good to incredible.Pro Tip: For a restaurant-style crispy crust, double-dip your chicken—first in flour, then egg, then breadcrumbs. Let it rest for a few minutes before frying so the coating sticks better.
3. The Sauce: Homemade or Store-Bought?
A great marinara sauce ties the whole sandwich together. You can make your own or grab a high-quality jarred sauce—either way, you want something rich, tangy, and slightly sweet.🥫 If Using Store-Bought: Go for a brand with simple ingredients and no added sugar. Look for ones made with San Marzano tomatoes for the best flavor.🍅 Homemade Option: A quick sauce made with crushed tomatoes, garlic, olive oil, basil, and a pinch of salt and sugar will take your sandwich to the next level.✔ Pro Tip: Simmer your sauce for at least 15 minutes to deepen the flavors. If it’s too acidic, add a tiny pinch of sugar to balance it out.
4. The Cheese: The Ultimate Melty Goodness
The best chicken parmesan sandwich isn’t complete without that stretchy, melty, gooey cheese pull. Here’s what you’ll need:🧀 Mozzarella Cheese: This is your star. Use fresh mozzarella for the best melt or low-moisture mozzarella for a more traditional flavor.🧀 Parmesan Cheese: Adds sharpness and depth. Use real Parmigiano-Reggiano if possible.🧀 Optional: A sprinkle of provolone or fontina for extra creaminess.Pro Tip: Place your cheese on the hot chicken right after frying, then broil the sandwich for a minute to get that bubbly, golden finish.
5. The Bread: The Foundation of the Sandwich
Your choice of bread can make or break this dish. A good chicken parm sub needs a roll that’s sturdy enough to hold the sauce and cheese without getting soggy.🥖 Best Bread Options:✔ Ciabatta – Crispy on the outside, airy on the inside, perfect for soaking up sauce.✔ Sub Roll – Classic for a reason! Holds everything together beautifully.✔ Brioche Bun – If you like a slightly sweeter contrast to the rich chicken and sauce.Pro Tip: Always toast your bread before assembling! It creates a slight barrier that helps prevent sogginess and adds a delicious crunch.
Final Thoughts: Quality Ingredients = A Next-Level Sandwich
Now that you know exactly what you need, you’re already halfway to making an unforgettable homemade Chicken Parm Sandwich. The magic happens when you use high-quality ingredients and simple techniques that bring out the best flavors.✔ Juicy, crispy chicken✔ A rich, flavorful marinara sauce✔ Melted, gooey mozzarella and Parmesan✔ A perfectly toasted rollTrust me—once you take a bite, you’ll wonder why you ever ordered this from a restaurant. Ready to put it all together? Let’s get cooking!
How to Make Chicken Parm Sandwich at Home
Nothing beats the satisfaction of making a Chicken Parm Sandwich from scratch. You get to control every element—the crispiness of the chicken, the richness of the sauce, and the perfect cheese melt. Plus, let’s be real, homemade always tastes better than anything you’d grab from a restaurant. If you’re ready to dive in, I’ll walk you through each step so you can create a sandwich that’s crispy, cheesy, saucy, and downright irresistible.
Step 1: Prepping the Chicken for Maximum Flavor and Crunch
The foundation of a great chicken parmesan sandwich is juicy, crispy chicken. To get it right: ✔ Choose the Right Cut: Use boneless, skinless chicken breasts and slice them in half horizontally if they’re too thick for even cooking. ✔ Pound It Thin: Flatten to ½ inch thick to ensure it cooks quickly and stays tender. ✔ Season Well: Sprinkle salt, pepper, garlic powder, and Italian seasoning on both sides to build bold flavors before breading.
Step 2: The Crispy Breading Technique That Never Fails
A crispy crust starts with the right breading process: 🔹 Flour: Creates a dry surface for the egg to adhere to. 🔹 Egg Wash: Helps bind the breadcrumbs to the chicken. 🔹 Breadcrumbs + Parmesan: Use Panko breadcrumbs and grated Parmesan for extra crunch and flavor. ✔ Pro Tip: Let the breaded chicken rest for 5-10 minutes before frying to ensure the coating stays intact.
Step 3: Fry or Bake? Here’s the Best Way to Cook Your Chicken
🔥 Frying (Best for Crispiness) – Heat ½ inch of vegetable oil in a skillet to 350°F. – Fry for 3-4 minutes per side until golden brown. – Drain on a wire rack to keep it crispy. ♨️ Baking (Healthier Alternative) – Preheat oven to 425°F. – Place breaded chicken on a parchment-lined baking sheet. – Lightly spray with cooking oil and bake for 20-25 minutes, flipping halfway. ✔ Pro Tip: Use an air fryer at 375°F for 10-12 minutes for a crispy result with less oil.
Step 4: Assembling the Perfect Chicken Parm Sandwich
🥖 Choose the Right Bread: A toasted sub roll, ciabatta, or brioche bun adds the perfect bite. 🍅 Layer the Marinara: Spoon just enough warm marinara sauce to enhance, not soak, the breading. 🧀 Melt the Cheese: Add fresh mozzarella and Parmesan, then broil for 1-2 minutes for a gooey finish. 🌿 Add Freshness: Top with basil leaves or a drizzle of garlic butter for extra flavor. ✔ Pro Tip: Toast the inside of the bread with olive oil before assembling to prevent sogginess.
Step 5: Serve and Enjoy Every Bite
Your homemade Chicken Parm Sandwich is ready! The crispy chicken, rich marinara, and melted cheese come together for a sandwich that’s pure comfort food. 💡 Serving Ideas: Pair it with garlic fries, a Caesar salad, or tomato soup for the ultimate meal. 🍽 Now take a bite and enjoy—the best Chicken Parm Sandwich, made right at home!
Best Tips for a Crispy and Flavorful Chicken Parm Sandwich

Making a Chicken Parm Sandwich that stays crispy, golden, and packed with flavor isn’t just about following a recipe—it’s about using the right techniques that separate a good sandwich from an unforgettable one. If you want that perfect crunch in every bite, that melted cheese that stretches just right, and a sandwich that holds up without turning soggy, these pro tips are your secret weapon.
Choosing the Right Breading – Panko vs. Regular Breadcrumbs
Not all breadcrumbs are created equal. If you want that light, airy, and extra crispy coating, Panko breadcrumbs are the way to go. These Japanese-style breadcrumbs are larger and flakier than regular ones, creating that golden, crunchy texture you get in restaurant-style chicken parmesan sandwiches.
✔ Panko Breadcrumbs: Ultra crispy, light, and stays crunchy even after adding marinara sauce.
✔ .Regular Breadcrumbs: A finer texture that creates a denser crust but can absorb more oil and turn soggy faster.
✔ Best of Both Worlds: Try mixing Panko with finely grated Parmesan cheese for a crispier, more flavorful breading.
💡 Pro Tip: Always toast your Panko breadcrumbs lightly in a dry pan before breading your chicken. This gives them an extra layer of crunch before even hitting the oil.
Secrets to a Crispy Crust – Double Breading & Proper Oil Temperature
Ever wonder why some chicken parmesan sandwiches have that irresistible crunch while others fall flat? The secret lies in double breading and oil temperature control.
✔ Double Breading: After dipping the chicken in flour, egg wash, and breadcrumbs, let it rest for 5 minutes, then dip it back in egg wash and breadcrumbs one more time. This extra layer locks in maximum crispiness.
✔ Oil Temperature Matters: The ideal frying temperature is 350°F (175°C). If your oil is too hot, the breading burns before the inside is cooked. Too cold, and the chicken absorbs excess oil, making it greasy.
✔ Don’t Crowd the Pan: Fry in batches so each piece gets evenly crispy. Overcrowding lowers the oil temperature and results in soggy breading.
💡 Pro Tip: If frying isn’t your thing, an air fryer at 375°F for 10-12 minutes can give you a crispy, golden crust without deep frying.
Best Cheese for Melting – Why Fresh Mozzarella Works Best
What’s a Chicken Parm Sandwich without gooey, stretchy cheese? The type of mozzarella you use makes a huge difference in how your sandwich turns out.
✔ Fresh Mozzarella: Melts beautifully, creating that signature cheese pull. Opt for low-moisture fresh mozzarella to avoid excess liquid.
✔ Low-Moisture Mozzarella: If you prefer a firmer texture that doesn’t release too much moisture, this is a solid choice.
✔ Parmesan for Extra Flavor: Don’t forget to sprinkle grated Parmesan on top of your mozzarella before broiling—it adds a sharp, nutty depth that complements the sandwich perfectly.
💡 Pro Tip: To get that beautiful bubbly, golden cheese topping, broil your sandwich for 1-2 minutes just before serving.
How to Prevent a Soggy Sandwich – Drain Fried Chicken and Layer Ingredients Properly
A soggy chicken parm sub is every home cook’s nightmare. You’ve done all that work to create the crispiest chicken cutlet, only to have it turn soft and mushy. The fix? Layer your ingredients the right way.
✔ Drain Your Chicken on a Wire Rack: Instead of placing fried chicken on paper towels (which trap steam and soften the crust), let it rest on a wire rack. This allows air to circulate, keeping the breading crispy.
✔ Use Just Enough Sauce: Too much marinara will soak into the bread and turn your sandwich into a soggy mess. Spoon just enough to add flavor, keeping most of it on top of the cheese instead of directly on the chicken.
✔ Toast Your Bread First: A quick toast in the oven or on a skillet adds a barrier that prevents sogginess while adding extra crunch.
💡 Pro Tip: For extra crunch, butter the inside of your bread and toast it lightly before assembling your sandwich.
How to Store and Reheat Chicken Parm Sandwich
If you’ve got leftovers (which, let’s be honest, doesn’t happen often with a sandwich this good), you’ll want to store and reheat it the right way to keep it crispy, fresh, and full of flavor.
Refrigeration Tips – How Long Does It Stay Fresh?
A homemade chicken parmesan sandwich can last up to 3 days in the refrigerator, but the key is storing it properly.
✔ Store the Components Separately: If possible, keep the chicken, bread, and sauce separate. This keeps everything from turning soggy.
✔ Use an Airtight Container: Place the chicken cutlets in a container lined with paper towels to absorb excess moisture.
✔ Wrap Bread in Foil or Keep in a Paper Bag: This helps maintain its texture. Storing it in plastic makes it soft and chewy.
💡 Pro Tip: If you know you’ll have leftovers, only assemble as many sandwiches as you plan to eat. Keep the rest of the chicken and bread separate for later use.
Best Way to Reheat Without Getting Soggy – Oven, Air Fryer, or Skillet Method
Reheating a Chicken Parm Sandwich in the microwave is a one-way ticket to rubbery chicken and limp bread. Instead, use one of these methods to bring it back to life.
🔥 Oven Method (Best for Keeping it Crispy)– Preheat your oven to 375°F (190°C).- Place the chicken cutlet on a wire rack over a baking sheet.- Bake for 10 minutes, then add cheese and let it melt for another 2-3 minutes.- Toast the bread separately for 2-3 minutes before assembling.
♨️ Air Fryer Method (Fast & Effective)– Preheat your air fryer to 375°F.- Heat the chicken cutlet for 5-7 minutes, adding cheese in the last 2 minutes.- Toast the bread separately and reassemble.
🔥 Skillet Method (For a Quick Fix)– Heat a pan over medium heat.- Add the chicken cutlet and cover with a lid to warm through evenly.- Add cheese, cover again for 1-2 minutes, then transfer to your toasted bread.
💡 Pro Tip: If you’re reheating a fully assembled sandwich, wrap it loosely in foil and bake it at 375°F for 10-12 minutes. This keeps the bread from drying out while warming the filling.
Can You Freeze Chicken Parm Sandwich? – Freezing Tips for Meal Prep
Yes! You can absolutely freeze Chicken Parm Sandwiches, but only if you store them correctly.
✔ Freeze Chicken Separately: Breaded and cooked chicken cutlets freeze well for up to 3 months. Wrap them in foil, then place them in an airtight freezer bag.
✔ Avoid Freezing Fully Assembled Sandwiches: The bread and sauce don’t hold up well in the freezer. Store components separately and assemble fresh when ready to eat.
✔ Reheat from Frozen: No need to thaw! Just bake the frozen chicken at 375°F for 15-20 minutes, then assemble your sandwich as usual.
💡 Pro Tip: If you’re meal prepping, freeze your chicken in individual portions so you can thaw only what you need.
Now you know how to keep your Chicken Parm Sandwich crispy, flavorful, and just as delicious as when it was first made. Whether you’re making it fresh or reheating leftovers, these simple tricks ensure every bite is just as perfect as the first. Ready to dig in? Let’s get cooking!
Final Bite: Your Ultimate Chicken Parm Sandwich Awaits!
By now, you’re fully equipped to make the crispiest, cheesiest, and most flavorful Chicken Parm Sandwich right in your own kitchen. You’ve mastered the secrets to perfectly breaded chicken, picked the best melting cheeses, and learned how to reheat leftovers without losing that crunch. Whether you’re making this for a cozy weeknight dinner, impressing guests, or just treating yourself to a next-level sandwich, this recipe is bound to become a favorite.
Now it’s your turn—grab those ingredients, fire up the skillet, and take that first bite of your homemade Chicken Parm Sandwich. And don’t forget, I’d love to hear how it turned out! Drop a comment below, share your photos, or let me know if you’ve added your own twist to the recipe. Happy cooking! 🍽🔥
FAQs About Chicken Parm Sandwich
How many calories are in a Chicken Parm Sandwich?
It depends on the bread, cheese, and frying method, but on average, a homemade Chicken Parm Sandwich ranges from 600-800 calories per serving.
What’s the best cheese for a Chicken Parm Sandwich?
Fresh mozzarella melts beautifully, but low-moisture mozzarella gives a firmer texture. A sprinkle of Parmesan or provolone adds extra depth.
How do I keep my Chicken Parm Sandwich from getting soggy?
Toast your bread, drain fried chicken on a wire rack, and avoid using too much marinara sauce directly on the chicken.
Can I make a Chicken Parm Sandwich without frying?
Absolutely! Bake breaded chicken at 425°F for 20-25 minutes or air-fry at 375°F for 10-12 minutes for a crispy, healthier option.
What’s the best way to reheat a Chicken Parm Sandwich?
Use the oven (375°F for 10 minutes) or an air fryer (375°F for 5-7 minutes) for the best texture. Avoid microwaving to keep the bread from getting soggy.
Can I freeze a Chicken Parm Sandwich?
You can freeze breaded and cooked chicken cutlets for up to 3 months, but store the bread and sauce separately to assemble fresh.

Chicken Parm Sandwich
Ingredients
For the Chicken:
- 2 boneless skinless chicken breasts (sliced in half horizontally)
- 1 cup all-purpose flour
- 2 eggs beaten with 1 tbsp milk
- 1 ½ cups Panko breadcrumbs
- ½ cup grated Parmesan cheese
- 1 tsp garlic powder
- 1 tsp Italian seasoning
- ½ tsp salt
- ½ tsp black pepper
- ½ cup vegetable oil for frying
For the Marinara Sauce:
- 1 cup marinara sauce store-bought or homemade
- For the Cheese:
- 4 slices fresh mozzarella cheese
- ¼ cup grated Parmesan cheese
For the Bread:
- 4 sub rolls ciabatta, or brioche buns
- 2 tbsp olive oil for toasting
- Fresh basil leaves optional
Instructions
- Prepare the Chicken: Slice the chicken breasts in half horizontally and pound to ½ inch thickness. Season both sides with salt, pepper, garlic powder, and Italian seasoning.
- Bread the Chicken: Coat each piece in flour, then dip in egg wash, and finally, press into the breadcrumb and Parmesan mixture until fully coated. Let rest for 5-10 minutes.
Fry or Bake:
- Fry: Heat ½ inch of vegetable oil to 350°F (175°C). Fry chicken 3-4 minutes per side until golden brown. Drain on a wire rack.
- Bake: Preheat oven to 425°F (220°C). Place chicken on a parchment-lined sheet, lightly spray with oil, and bake for 20-25 minutes, flipping halfway.
- Assemble the Sandwich: Toast the rolls with olive oil. Place crispy chicken on the bottom half, spoon over warm marinara sauce, top with mozzarella and Parmesan.
- Melt the Cheese: Place sandwiches under the broiler for 1-2 minutes until cheese is bubbly.
- Finish & Serve: Garnish with fresh basil leaves and enjoy immediately!
Notes
- Refrigerate: Store leftover chicken separately for up to 3 days in an airtight container.
- Reheat: Bake at 375°F for 10 minutes, air-fry at 375°F for 5-7 minutes, or pan-fry over medium heat.
- Freezing: Freeze breaded chicken cutlets (before assembling the sandwich) for up to 3 months. Reheat directly from frozen.
Now that you’ve got all the tips and tricks, it’s time to make your perfect Chicken Parm Sandwich. Let’s get cooking!
Related posts:
 Alice Springs Chicken Recipe: How to Make Outback’s Favorite in 30 Minutes
 Venison Chili Recipe You’ll Love: Bold Flavors in Every Bite
 The Best Chicken and Gravy Recipe You’ll Ever Try
 How to Make the Best Lipton Meatloaf Recipe
 Easy Homemade Chicken and Dumpling Casserole
 15 Irresistible Japanese Street Foods You Can’t Miss