Yokan is one of those treats that kind of sneaks up on you. You see those cute, jelly-like blocks sitting in a bakery window in Tokyo or maybe squeezed between candies at an Asian grocery store and you wonder, “Is it candy, is it dessert, is it snack?” I used to be intimidated (seriously, it looks so fancy, right? like five-star dessert-level stuff).
But making easy yokan at home is honestly a breeze. Plus, you really don’t need anything super weird or hard to find. So hang with me and let’s tackle this together, because everyone deserves a bite of homemade yokan at least once.
Why You’ll Love This Yokan Recipe
Print
Yokan
- Total Time: 1 hour 15 minutes
- Yield: 8 servings
Description
A delightful and easy-to-make Japanese jelly-like dessert made from red bean paste, agar powder, and sugar. Perfect for satisfying sweet cravings without being overly sugary.
Ingredients
Main Ingredients
- 1 cup Water (For dissolving agar powder)
- 1 cup Red bean paste (anko) (Opt for smooth for the best texture)
- 3 tablespoons Granulated sugar (Adjust according to sweetness preference)
- 1 teaspoon Agar powder (Plant-based thickener)
Optional Ingredients
- 1 tablespoon Matcha powder (For added flavor and color)
- 1/2 cup Chopped chestnuts (For a nutty kick)
Instructions
Preparation
- In a saucepan, combine agar powder with water (generally 1 teaspoon to 1 cup of water), stirring well.
- Heat the mixture until the agar dissolves completely, about 2-3 minutes. Ensure it does not boil over.
- Once dissolved, add sugar to the mixture and stir until fully dissolved.
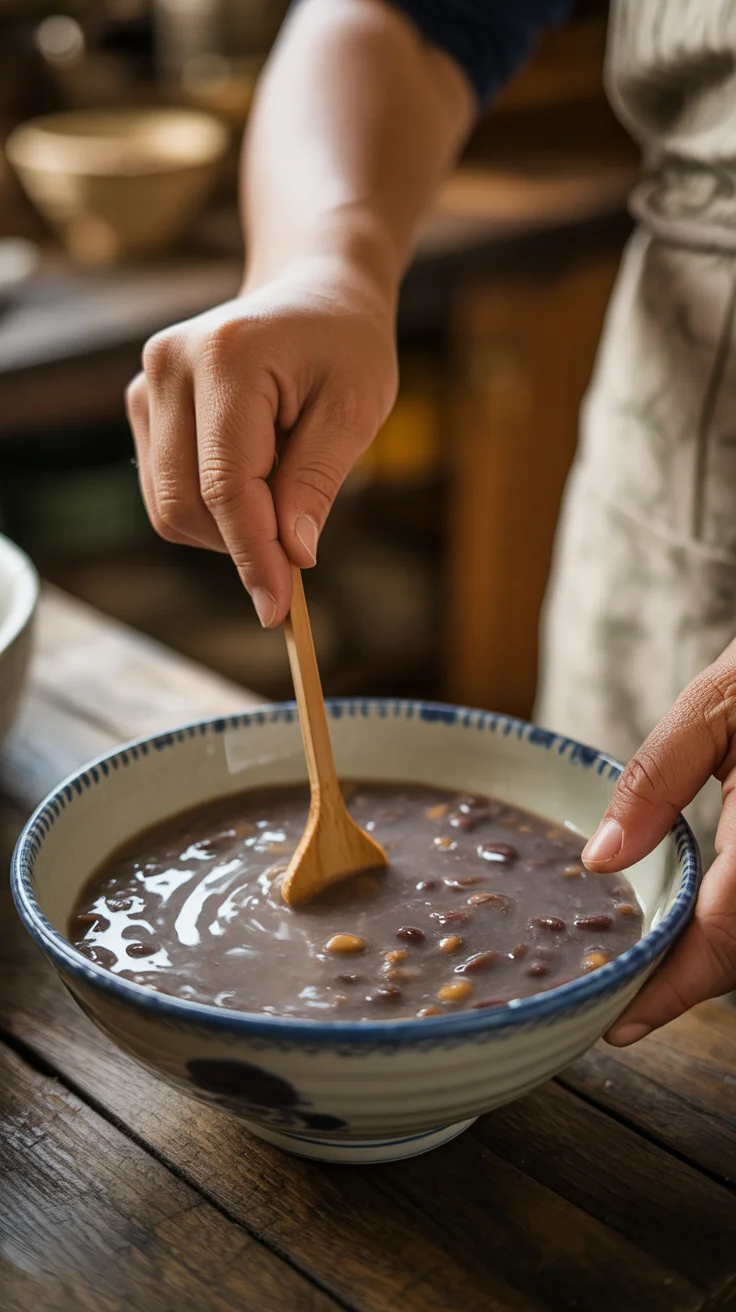
- Add red bean paste to the saucepan and whisk until the mixture is smooth and bubbly. This may require some effort to eliminate lumps.
- Pour the mixture into a lined loaf pan or mold.
- Allow the yokan to cool at room temperature, then refrigerate for 1-2 hours to set.
Notes
Yokan is versatile and can be made with different flavors like sweet potato or served with toppings like whipped cream. It keeps well in an airtight container for up to a week in the fridge. Do not freeze as this can alter the texture.
- Prep Time: 10 minutes
- Cook Time: 5 minutes
- Category: Dessert, Snack
- Cuisine: Japanese
First off, if you’re tired of super sugary desserts, yokan hits just the right spot. It’s like, mellow sweet but still deeply satisfying (my mom calls it sophisticated, but I just call it perfect for those 3 pm cravings). You only need a handful of ingredients, and they’re not fussy or fancy, even if the final thing looks kind of impressive.
Anybody can pull this off, no joke. Plus, it keeps well. So make it once and enjoy for DAYS. It’s also vegan and gluten-free, which means everyone can get in on this treat, allergies or not. You don’t get that with most desserts around here!
“I never thought I could make yokan at home, but this recipe was so easy and absolutely delicious. My family keeps asking for more!” Jenny L.
Essential Ingredients for Authentic Yokan
You really just need three core things for easy yokan: red bean paste (anko), agar powder, and sugar. Go for the smooth kind of red bean paste for that classic vibe, unless you’re a fan of chunky (totally fine, but not my thing).
Agar is a plant-based thickener, sorta like gelatin’s cool cousin, but made from seaweed. Don’t panic about any fishy taste. You will not get that. Just straight-up clean, jelly texture. The sugar? That’s regular old granulated stuff from your pantry.
No secret Japanese sugar needed. That’s honestly it. If you’re feeling wild, you can toss in some matcha or chestnuts, but for the basic deal, these three ingredients got your back.
Where to Find Ingredients
Okay, so maybe you live nowhere near a Japanese market. Been there. Most Asian grocery stores stock both anko (look in the fridge or sweets aisle) and agar powder (sometimes mixed in with other jellies or flours).
But…and this is cool btw, agar powder is sold at many health food stores under “vegan gelatin.” I’ve even seen it at my regular grocery store, honest.
For red bean paste, check the international aisle or canned section.
For sugar, just hit up your usual spot (obviously). I know some folks are all about online shopping. If you can’t find anything local, ordering is totally legit, Amazon, Walmart, you name it. Don’t sweat if you can’t travel for groceries; the internet saves the day yet again.
Special Tools You’ll Need
No need for anything too special here. You’ll need a small saucepan for melting everything together. A whisk helps, because lumps are pretty heinous in yokan, trust me, learned that the hard way. Also, grab a loaf pan or a lunchbox-sized tupperware. Silicone molds are nice if you have ’em, but a regular old glass or metal dish totally works.
Last thing, a spoon or offset spatula for smoothing out the top. Let’s keep it simple, right? The only thing I wish I knew sooner: line your mold with plastic wrap or parchment. That way, it just slips out like magic later on. Easy peasy cleanup, too.
| Ingredient | Description | Where to Buy | Tips |
|---|---|---|---|
| Red Bean Paste (Anko) | Sweetened, smooth bean paste used primarily in Japanese desserts. | Asian grocery stores or online. | Opt for smooth anko for the best texture. |
| Agar Powder | Plant-based gelatin, perfect for creating the jelly texture. | Health food stores or international aisles. | Check the label to confirm it’s pure agar without additives. |
| Granulated Sugar | Common sweetener that balances the flavors. | Regular grocery store. | Adjust the quantity to suit your sweetness preference. |
| Matcha Powder (Optional) | Green tea powder for added flavor and color. | Asian markets or online. | Use culinary grade for baking to get the best flavor. |
How to Make Yokan: Step-by-Step
Okay, the moment of truth. Let’s make some yokan! First, in a saucepan, combine agar powder with water (follow the package: usually one teaspoon to one cup of water). Stir it up and heat it until the agar totally dissolves.
This takes about 2-3 minutes, don’t let it boil over, or you’ll be cleaning up forever! Once it’s dissolved, add your sugar and stir until THAT’s dissolved too. Toss in your red bean paste and keep whisking. Lumpy paste? Whisk harder, or press with a spoon. Once it’s all smooth and bubbly, pour the mix into your lined pan or mold.
Let it cool down to room temp, then pop it in the fridge for an hour or two. The hardest part is waiting, honestly. When it’s firm and bouncy, you’re in business.
Popular Yokan Variations
Way more versatile than folks give it credit for, yokan has all sorts of versions. Add matcha powder for a green tea twist (this is pretty common, and I’m kinda addicted). Some people like mixing in chopped chestnuts, for a nutty kick. Sweet potato yokan? Yep, that’s a thing too. You’ll see multi-layered ones at fancy shops, but honestly, even basic yokan is a winner. What’s awesome is you can control the sweetness, or serve it in funky shapes, or sneak in dried fruit if you’re into that. Tinker away until you find your personal combo.
Serving Ideas for Yokan
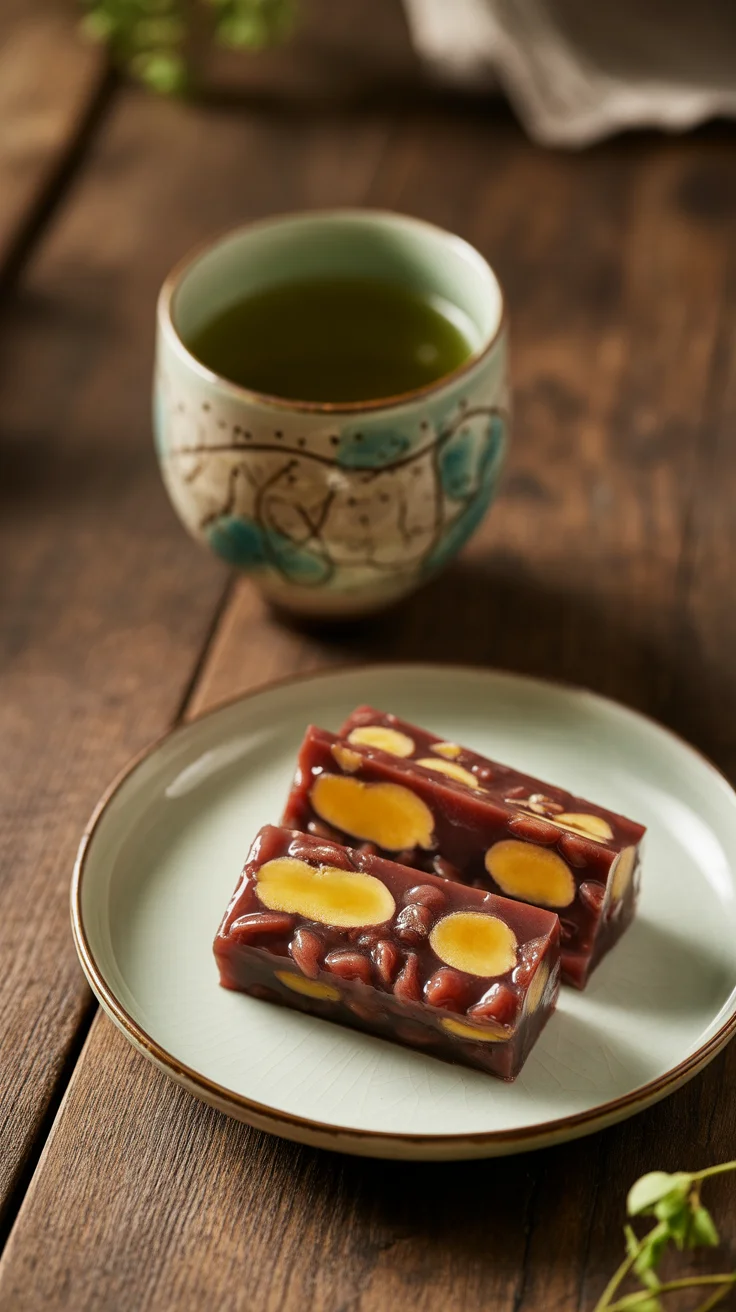
- Slice it up into tidy little rectangles..classic!
- Pair it with green tea for the full Japanese vibe.
- Top it with a bit of whipped cream or fresh berries if you’re feeling bold.
- Serve chilled, straight from the fridge (especially in summer, so refreshing).
Storage Tips
Surprisingly, yokan keeps its cool for a long time. Store leftovers in an airtight container, in the fridge, for up to a week. Don’t freeze it. Texture gets weird and nobody needs that. If you’re gifting it, wrap in parchment or pop into tiny bento boxes. Oh, and it’s a real picnic hero doesn’t melt, doesn’t sweat, just sits there looking cute. Share with friends and watch it disappear. It won’t go stale if you hide it at the back of your fridge, but good luck keeping it hidden from snack hunters!
Common Questions
You totally can, but give them a mash first. Smoother is better here.
Basically, yes. They’re the same seaweed stuff and work the same in this recipe.
Absolutely! Just cut the sugar a bit. The texture will still be solid, promise.
Go for it. Shiro-an (white bean paste) makes a really pretty, lighter yokan.
When you poke it gently and it jiggles but doesn’t stick, you’re set.
So, Ready to Try Easy Yokan at Home?
Making yokan is honestly one of those things that’s way easier than it looks. With just a few ingredients and a little patience, you’ve got a sweet treat that feels pretty special but doesn’t stress you out. If you want to geek out more on Japanese desserts, there are loads of beginner-friendly guides online.
Give this easy yokan recipe a try and don’t be shy with your own spin. It’s meant for sharing, so bring your family or housemates along for taste-testing. Trust me, it’s worth it.
Related posts:
 Sakura Mochi: A Japanese Dessert You Can Easily Make at Home
 Pumpkin Cupcakes Recipe to Savor This Fall
 Deliciously Simple Easter Egg Peanut Butter Haystacks Recipe
 Irresistibly Easy Sourdough Monkey Bread
 Easy 3-Ingredient TikTok Oreo Cake Recipe – Microwave or No-Bake Dessert
 Best Strawberry Scones Recipe with Fresh Strawberries and Cream Glaze

 Main Dishes
 Drinks & Wellness