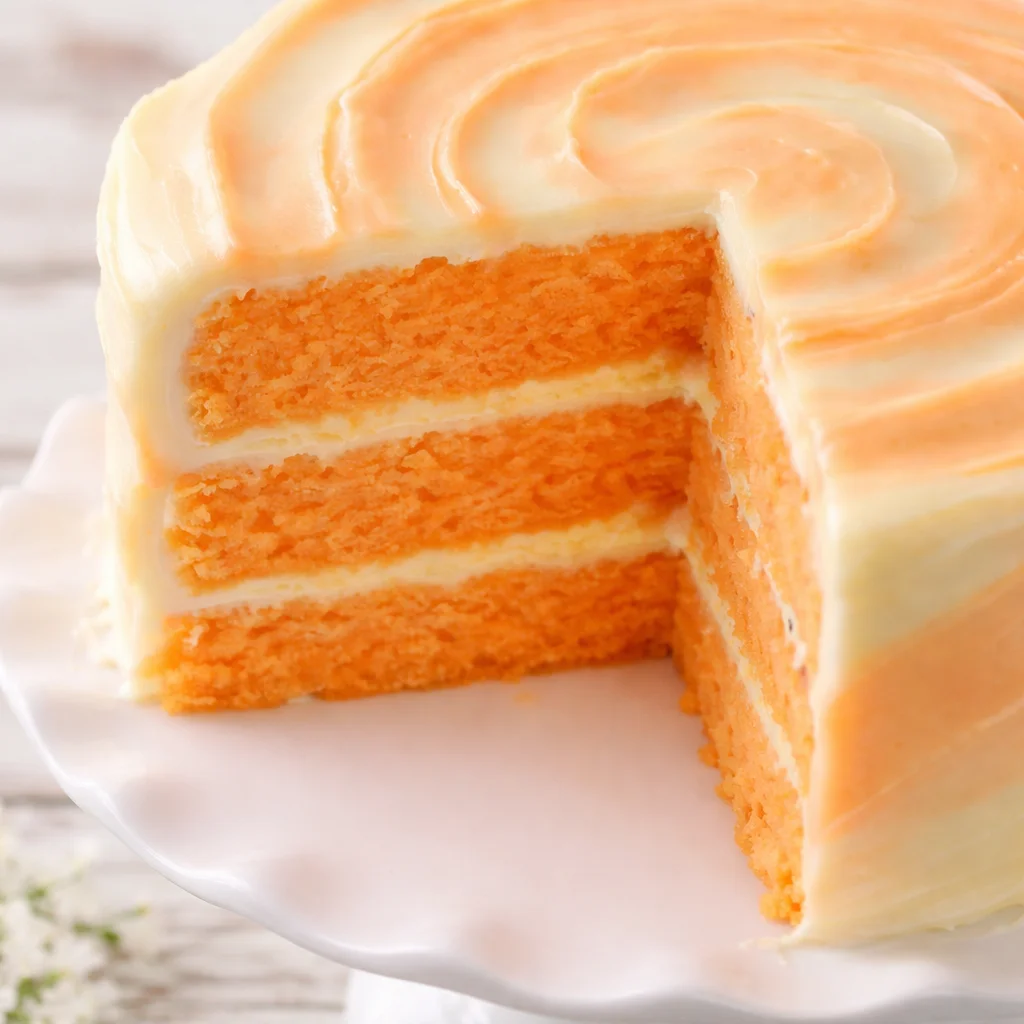
Orange Creamsicle Cake is the kind of dessert I make when I want something sunny, sweet, and a little nostalgic, like those orange and vanilla freezer pops from childhood. If you have ever baked a cake that somehow turned out dry, or the citrus flavor tasted fake, you are not alone.
I have been there, and that is exactly why I love this recipe. It is simple, super forgiving, and it tastes like bright orange plus creamy vanilla in every bite. If you need an easy cake that still feels special, stick with me.
Key Ingredients for the Perfect Orange Creamsicle Cake
The magic here is using a few smart ingredients that bring real flavor and a soft texture. You do not need anything fancy, but you do want to choose decent basics. The better your orange and vanilla, the more your Orange Creamsicle Cake will taste like the real deal.
Here is what you will need (and why it matters):
- All purpose flour for structure without making it heavy
- Baking powder to help the layers rise nice and fluffy
- Salt just a little, it makes the flavors pop
- Unsalted butter for richness and that soft cake crumb
- Sugar for sweetness and moisture
- Eggs for lift and a tender texture
- Fresh orange zest for real citrus flavor
- Orange juice for extra punch (fresh is best, but bottled works)
- Vanilla extract because the creamy part needs to shine too
- Buttermilk or milk plus a splash of vinegar for softness
- Cream cheese and powdered sugar for that creamy, tangy frosting vibe
If you are in an orange mood lately, you might also love making candied orange slices for snacking or topping desserts. They look fancy but are actually pretty easy.
Essential Baking Tools and Equipment for Easy Cake Making
I am not a gadget person, but I do think a few basics make baking less stressful. When everything is ready before you start, you are way less likely to forget the baking powder or overmix while you hunt for a pan.
My go to tools for this cake:
Two 8 inch or 9 inch round cake pans, parchment paper, mixing bowls, a hand mixer or stand mixer, a microplane or fine grater for zest, a rubber spatula, a cooling rack, and a serrated knife for leveling if you want neat layers.
If you like dessert projects that are still low stress, you might want to check out these irresistible no bake cheesecakes too. They are perfect when you do not feel like turning the oven on.
Preparing the Orange Cake Layers – Step-by-Step Guide
This is the part where your kitchen starts smelling like orange candy in the best way. Take your time with the zest, it is doing a lot of work here.
Simple step by step for the cake batter
1) Preheat your oven to 350 F. Grease your pans and line the bottoms with parchment.
2) In a bowl, whisk flour, baking powder, and salt.
3) In a larger bowl, beat butter and sugar until it looks lighter and fluffier, about 2 to 3 minutes.
4) Add eggs one at a time, mixing just until each disappears. Stir in vanilla and orange zest.
5) Add the dry ingredients in two or three additions, alternating with buttermilk and orange juice. Start and end with dry. Mix on low and stop as soon as it comes together.
6) Divide batter evenly into pans. Bake about 22 to 30 minutes, depending on your pans. A toothpick should come out clean or with a few soft crumbs.
7) Cool in pans for 10 minutes, then turn out and cool completely.
Little tip that saved me: zest your orange right over the sugar before you start. Some of the oils fall into the bowl and it smells amazing. Then you get that true creamsicle flavor without needing anything artificial.
Making the Creamy Orange Filling and Frosting
This is where the creamy part really comes alive. I like a frosting that is stable enough to hold layers, but still fluffy on the tongue.
My favorite frosting approach
Beat softened cream cheese and butter until smooth. Add powdered sugar a little at a time so you do not end up in a sugar cloud. Then mix in vanilla, orange zest, and a tiny splash of orange juice. If you want the color to look more orange, use a drop of orange food coloring, but it is optional.
If your frosting feels too soft, chill it for 15 to 20 minutes. If it feels too thick, add a teaspoon of milk. I also like adding a pinch of salt to keep it from tasting flat.
On days when I am craving creamy desserts with a different vibe, I make this one pot Lotus Biscoff cheesecake. It is ridiculously cozy.
How to Assemble and Layer Your Orange Creamsicle Cake
Once the layers are completely cool, it is time to stack. If you frost a warm cake, it turns into a slippery mess. Ask me how I know.
Level the tops if needed. Put one layer on your plate, spread a thick layer of frosting, then add the second layer. Do a thin crumb coat first if you want a clean finish, then chill for 15 minutes. After that, add your final frosting layer and swirl it however you like.
If you want extra citrus pop, brush the cake layers with a quick orange soak. Just mix orange juice with a little sugar and dab it on lightly. Do not drench it, just a little moisture boost.
Tips for Achieving a Moist and Fluffy Orange Cake
This part matters because nobody wants a pretty cake that eats like dry bread. Here is what I actually do at home to keep this Orange Creamsicle Cake soft for days.
Moist cake tips that really work:
Measure flour by spooning it into the cup and leveling it off. Do not pack it down. Do not overmix once the flour goes in. Use room temperature butter, eggs, and buttermilk so the batter blends smoothly. Pull the cake out when it is just done, not when it has been sitting in the oven another 10 minutes “just to be safe.” And let it cool fully before wrapping or frosting, so it does not steam itself soggy.
If you like fluffy cake textures, you might enjoy this guide on how to make Japanese cheesecake fluffy jiggly irresistible. Different dessert, same obsession with soft texture.
Flavor Variations: Orange Vanilla, Citrus Twist, and More
I stick to the classic most of the time, but you can totally play around with this cake. The base recipe is friendly like that.
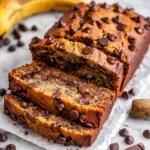
Try adding a little lemon zest along with orange for a citrus twist. Swap vanilla extract for vanilla bean paste if you want a stronger vanilla flavor. You can also fold in mini chocolate chips for a chocolate orange moment. Another fun option is adding a thin layer of orange marmalade under the frosting in the middle. It makes the Orange Creamsicle Cake taste even brighter.
If you are a chocolate and orange person, these orange chocolate truffles are a great little treat to serve on the side too.
Decorating Ideas for a Stunning Orange Creamsicle Cake
You do not need bakery skills to make this look cute. I usually go for simple and a little playful.
Swirl the frosting with the back of a spoon for an easy textured look. Sprinkle extra orange zest on top right before serving for fresh color. Add white sprinkles to lean into the creamsicle vibe. If you want a more “wow” finish, top with small orange slices or those candied ones if you have them.
Sometimes I pipe a border around the top, then chill the cake for 20 minutes so the edges look crisp when sliced.
Serving Suggestions and Pairing Tips for Desserts
This cake is sweet, creamy, and citrusy, so I like pairing it with drinks and sides that keep things balanced. Also, if you are serving a crowd, having one extra dessert option is never a bad idea.
My favorite ways to serve it:
- With hot coffee or a vanilla latte
- With iced tea, especially peach or lightly sweetened black tea
- With fresh berries on the plate for color and a tart bite
- With a scoop of vanilla ice cream if you want the full creamsicle vibe
If you are putting together a dessert table for a party, this Easter poke cake is a fun, colorful option next to the orange cake.
How to Store, Freeze, and Reheat Your Orange Cake
Because of the cream cheese frosting, I store the finished cake in the fridge. Cover it well so it does not pick up random fridge smells. I let slices sit at room temperature for 15 to 25 minutes before eating because the texture gets softer and the flavor pops more.
To freeze, I wrap unfrosted cake layers tightly in plastic wrap, then foil, and freeze up to 2 months. Thaw in the fridge overnight. You can also freeze frosted slices, just freeze them uncovered first until firm, then wrap. I do not really “reheat” cake, but bringing it to room temp is basically the move.
Common Mistakes to Avoid When Baking Orange Creamsicle Cake
I have made every one of these mistakes at least once, so I am saving you the trouble.
Big ones to watch out for:
Using cold ingredients, which can make the batter lumpy. Overmixing after adding flour, which can make the cake tough. Adding too much orange juice, which can throw off the texture. Zesting the white part of the orange, which tastes bitter. And frosting before the cake is fully cool, which turns your frosting into a slippery puddle.
If you keep it simple and follow the steps, your Orange Creamsicle Cake should come out moist, fluffy, and creamy like it is supposed to.
Common Questions
Can I use orange extract instead of zest?
You can, but zest tastes more natural. If you use extract, start small, like 1 quarter teaspoon, then adjust.
Do I have to use buttermilk?
No. You can use milk plus 1 tablespoon vinegar or lemon juice per cup. Let it sit 5 minutes, then use it.
Can I make this cake ahead of time?
Yes. Bake the layers a day ahead, wrap them well, and frost the next day. The flavor is even better after it chills a bit.
Why did my frosting get runny?
Usually the butter or cream cheese was too warm, or you added too much juice. Chill the bowl and beat it again, and add a bit more powdered sugar if needed.
Can I make Orange Creamsicle Cake as cupcakes?
Totally. Bake at the same temperature and start checking around 16 to 18 minutes.
A Sweet Little Wrap Up Before You Bake
If you want a dessert that feels like sunshine, this Orange Creamsicle Cake hits the spot with soft layers and that creamy orange vanilla frosting. Keep your ingredients at room temp, do not overmix, and use zest for the best flavor. If you want to compare another fun take, I also like the classic Orange Creamsicle Cake – Mom On Timeout for extra inspiration. Now go bake it, slice it, and tell me you do not feel just a little happier after that first bite.

Orange Creamsicle Cake
- Total Time: 1 hour
- Yield: 8 servings
Description
A nostalgic dessert that combines bright orange flavor with creamy vanilla, perfect for any occasion.
Ingredients
For the Cake
- 2 cups all purpose flour (Provides structure without heaviness)
- 2 teaspoons baking powder (Helps the layers rise)
- 1 teaspoon salt (Enhances flavors)
- 1 cup unsalted butter (Provides richness)
- 1.5 cups sugar (For sweetness and moisture)
- 4 large eggs (For lift and texture)
- 2 tablespoons fresh orange zest (For real citrus flavor)
- 1 cup orange juice (Fresh is best for flavor)
- 2 teaspoons vanilla extract (For creamy flavor)
- 1 cup buttermilk (Adds softness)
For the Frosting
- 8 ounces cream cheese (For a creamy texture)
- 1 cup powdered sugar (To sweeten the frosting)
- 1 teaspoon vanilla extract
- 1 tablespoon fresh orange zest
- 1 teaspoon orange juice (For extra flavor)
- optional orange food coloring (To achieve desired color)
Instructions
Preparing the Cake Layers
- Preheat your oven to 350°F (175°C). Grease your pans and line the bottoms with parchment paper.
- In a bowl, whisk together flour, baking powder, and salt.
- In a larger bowl, beat the butter and sugar until lighter and fluffier, about 2 to 3 minutes.
- Add eggs one at a time, mixing just until each is incorporated. Stir in vanilla and orange zest.
- Add the dry ingredients in two or three additions, alternating with buttermilk and orange juice. Start and end with dry ingredients. Mix on low and stop as soon as everything is combined.
- Divide the batter evenly into the prepared pans. Bake for about 22 to 30 minutes or until a toothpick comes out clean or with a few soft crumbs.
- Cool in pans for 10 minutes, then turn out and cool completely.
Making the Frosting
- Beat softened cream cheese and butter until smooth. Gradually add powdered sugar to avoid a sugar cloud.
- Mix in vanilla, orange zest, and a tiny splash of orange juice. Chill for 15 to 20 minutes if the frosting feels too soft.
- If too thick, add a teaspoon of milk until desired consistency is reached.
Assembling the Cake
- Once the cake layers are completely cool, level the tops if needed.
- Place one layer on your serving plate, spread a thick layer of frosting, then add the second layer.
- For a cleaner finish, apply a thin crumb coat and chill for 15 minutes before adding the final frosting layer.
- Optionally brush the cake layers with an orange soak made of orange juice and a little sugar for added moisture.
Notes
Store finished cake in the fridge due to the cream cheese frosting. Let sit at room temperature for 15 to 25 minutes before serving for the best texture.
- Prep Time: 30 minutes
- Cook Time: 30 minutes
- Category: Cake, Dessert
- Cuisine: American


 Main Dishes
 Drinks & Wellness