
Fall-Off-The-Bone Dry Rub Ribs are what I make when I want BBQ vibes but I do not feel like babysitting a smoker all day. You know that moment when you are craving sticky, tender ribs, but it is raining, windy, or you just do not want to deal with outdoor cooking? Same. This oven method is my reliable fix, and it gives you that pull apart tenderness without fancy gear. The dry rub does the heavy lifting, and the oven handles the slow cooking while you do literally anything else. If you have ever ended up with tough ribs, do not worry, I will walk you through the parts that actually matter.
Choosing the Best Ribs for This Recipe
The first win is picking the right rack. You can make great ribs with a few different cuts, but they do cook a little differently.
Here is what I usually grab:
Baby back ribs are my go to when I want something a little leaner and a bit quicker to cook. They are curved, smaller, and super popular for a reason.
St. Louis style spare ribs are meatier and a little fattier, which means big flavor and a very tender bite when you cook them low and slow.
Full spare ribs work too, but they are larger and need a little trimming. If you want less fuss, St. Louis style is basically the shortcut.
If you are standing at the store wondering which one will give you that “wow” tenderness, I would say start with baby backs for ease, or St. Louis if you want a bigger, richer rib night.
Ingredients for Dry Rub Ribs
Nothing wild here. The magic is in the mix and the time. This is also a great dinner to build a full comfort food plate around. When I am doing ribs, I love pairing them with something cozy like this Instant Pot ham cheese broccoli soup on colder days. Sounds random, tastes amazing.
- 2 racks of ribs (baby back or St. Louis style)
- Yellow mustard or neutral oil (for sticking the rub, not for flavor)
- Brown sugar
- Paprika (smoked if you have it)
- Garlic powder
- Onion powder
- Salt
- Black pepper
- Chili powder (optional, for warmth)
- Cayenne (optional, for heat)
- BBQ sauce (optional for finishing)
- Foil and a sheet pan
Quick note: if you use a BBQ sauce that is already sweet, you can slightly reduce the brown sugar in the rub. If you like a stronger crust, keep it as written and do a quick broil at the end.
How to Make the Perfect Dry Rub Seasoning
My dry rub is sweet, smoky, and a little peppery. It is not complicated, but it is balanced. And balance is what keeps your ribs from tasting flat.
In a bowl, mix:
Brown sugar for that classic BBQ sweetness and caramelized edges.
Paprika for color and that “BBQ” smell as soon as it hits the heat.
Garlic and onion powder for a savory base.
Salt and pepper to wake everything up.
Optional chili powder and cayenne if you want a little kick.
If you are using smoked paprika, you can skip liquid smoke completely. The ribs still come out smelling like you worked harder than you did, which is honestly the best kind of recipe.
How to Prep Ribs for Maximum Tenderness
This is the part people skip, then wonder why their ribs are chewy. First, pat the ribs dry. If they are wet, the rub slides around and you lose that nice coating.
Next, remove the membrane on the back of the ribs. It is that thin, tough layer that turns leathery. Slide a butter knife under it to loosen, then grab it with a paper towel and pull. If it tears, just keep going. You will get it off in pieces if you have to.
Trim any big flaps of fat that are hanging off. Leave the normal marbling alone because that is flavor and moisture.
Once your ribs are clean and ready, you are already halfway to Fall-Off-The-Bone Dry Rub Ribs that actually deliver.
How to Apply Dry Rub and Marinate Ribs
I like using a thin layer of yellow mustard as a binder. Do not worry, it does not make the ribs taste like mustard. It just helps the seasoning stick and spread evenly. If mustard is not your thing, use a little oil.
Coat both sides lightly, then press the rub on generously. Do not just sprinkle from far away. Get in there and pat it down so it stays put.
Marinating time:
If you have 20 minutes, that is fine for a weeknight.
If you can do 4 to 12 hours in the fridge, that is better flavor.
If you do overnight, wrap the ribs well so they do not dry out.
This is also a great time to plan sides. If you want something different than the usual potato salad, this sweet potato cornbread recipe is ridiculously good with ribs, especially if you like that sweet savory combo.
Oven Baked Fall Off the Bone Ribs Step-by-Step
Alright, here is the method I trust when I want consistent results. It is simple, but the details matter.
Step by step directions you can actually follow
1. Heat your oven to 275 F.
2. Line a sheet pan with foil. Add another layer of foil you can fold over the ribs.
3. Place ribs meat side up, then cover tightly with foil. You want a snug seal so the steam stays inside.
4. Bake for about 2 hours 30 minutes for baby backs, or closer to 3 hours for St. Louis style. The ribs should look relaxed and the meat should pull back from the bone ends.
5. Carefully open the foil. Watch for hot steam.
6. At this point, you can sauce them or keep them dry rub style. Either way, you are close to that Fall-Off-The-Bone Dry Rub Ribs finish line.
My “done” test: pick up the rack with tongs. If it bends easily and starts to crack on top, you are in the right zone. If it feels stiff, it needs more time.
Low and Slow Cooking Method Explained
This recipe works because low heat gives the fat and connective bits time to soften. High heat cooks the outside fast but leaves the inside tough. That is why people think ribs are hard, when really they just need patience.
When ribs cook low and slow in a tightly covered foil packet, they baste in their own juices. It is kind of like creating a tiny rib sauna. Not cute, but very effective.
If you ever made ribs that looked done but were still chewy, it was probably because they did not get enough time at a gentle temperature. With this method, the oven does the job while you get on with your day.
Grilling or Broiling for a Smoky Finish
Oven ribs taste amazing as is, but the finishing step is where you can add that little bit of edge. If you want the top a bit charred and sticky, go broiler.
Broiler method: Move ribs to a clean foil lined pan, brush with BBQ sauce if using, then broil for 2 to 5 minutes. Stay nearby. Sugar burns fast.
Grill method: If you have a grill ready, toss the baked ribs on medium heat for a few minutes per side. You get light smoke, caramelization, and that classic backyard smell.
Either way, you still end up with Fall-Off-The-Bone Dry Rub Ribs, just with a slightly different personality.
Expert Tips for the Juiciest Dry Rub Ribs
I have made a lot of ribs over the years, including a few dry ones that taught me what not to do. Here is what actually helps:
Seal the foil tightly. Leaky foil means lost steam, and lost steam means drier ribs.
Do not rush the bake. If your ribs need another 20 minutes, give it to them.
Rest the ribs for about 10 minutes after baking, especially before slicing. Juices settle and the meat stays moist.
Slice between bones with a sharp knife. If you saw through them, you lose a lot of that tender texture you worked for.
If you want an easy side that cooks in one pan while the ribs rest, this ground beef sweet potato skillet is surprisingly handy for busy nights with hungry people hovering in the kitchen.
Common Mistakes to Avoid When Making Ribs
These are the little mistakes that lead to ribs that are tough, bland, or weirdly dry.
1. Skipping the membrane removal. It really can ruin the bite.
2. Not using enough seasoning. Ribs are thick, so they need a confident rub.
3. Baking uncovered. You want covered time first, then uncovered time only for finishing.
4. Cranking the heat to “speed it up.” That is how you get dry ribs with a stubborn chew.
5. Saucing too early under high heat. BBQ sauce can burn fast, so add it near the end if you are broiling or grilling.
Flavor Variations for BBQ Dry Rub Ribs
Once you nail the base recipe, it is fun to play around. Here are a few easy swaps:
Spicy: Add more cayenne, plus a pinch of crushed red pepper.
Smokier: Use smoked paprika and a tiny bit of ground cumin.
Savory: Reduce the brown sugar and add a little more garlic powder and black pepper.
Sweet heat: Add a touch of cinnamon and a little cayenne. Sounds odd, tastes great.
Just keep the salt level steady, and you can adjust everything else to match your mood.
Serving Suggestions and Best Side Dishes
Ribs are one of those meals that feel like an event, even if you made them on a random Tuesday. I like to serve them family style and let everyone grab what they want.
Some of my favorite sides:
- Coleslaw for crunch and tang
- Baked beans or black beans
- Mac and cheese
- Roasted corn or corn on the cob
- Pickles and sliced onions for that BBQ shop feel
- A sweet side like candied sweet potatoes when you want a real comfort plate
If you are serving a crowd, plan about half a rack per person, especially if you have lots of sides. If it is just two people and you want leftovers, make two racks anyway. Cold rib snacks the next day are a quiet little joy.
Common Questions
How do I know when ribs are truly tender?
They should bend easily when lifted and the meat should pull back from the bone tips. A toothpick should slide into the meat with little resistance.
Do I need BBQ sauce for this recipe?
Nope. The dry rub has plenty of flavor. Sauce is optional for a sticky finish, especially if you broil or grill at the end.
Can I make these ahead of time?
Yes. Bake them covered, cool, then refrigerate. Reheat covered at 275 F until hot, then broil or grill to finish.
Why did my ribs turn out tough?
Usually they needed more time. Ribs can be stubborn. Keep the oven temp low, seal the foil well, and bake a bit longer.
Should I cut the rack before baking?
I do not. Keeping it whole helps it stay juicy. Slice after resting so you do not lose moisture.
A Cozy Rib Night You Can Actually Pull Off
If you follow the low heat, tight foil, and patient timing, you will get Fall-Off-The-Bone Dry Rub Ribs that taste like you put in way more effort than you did. The rub brings the flavor, the oven brings the tenderness, and the quick broil or grill finish makes them feel like real BBQ. If you want to compare another home cook version, I also liked reading Fall-Off-the-Bone Dry Rub Ribs (Easy Oven Baked Recipe) because it is always fun seeing how other people season and finish their racks. And if you are the kind of person who loves collecting rib tips, Fall Off The Bone Ribs – Tornadough Alli is another helpful one to bookmark. Now go make a pan of ribs, grab your favorite side, and enjoy that moment when the first bite practically melts.

Fall-Off-The-Bone Dry Rub Ribs
- Total Time: 3 hours 30 minutes
- Yield: 4 servings
Description
Tender, sticky ribs made in the oven with a flavorful dry rub. Perfect for a cozy night in without outdoor cooking hassles.
Ingredients
For the Ribs
- 2 racks racks of ribs (baby back or St. Louis style)
- as needed tablespoons yellow mustard or neutral oil (for sticking the rub)
- 1/4 cup brown sugar
- 1 tablespoon paprika (smoked if you have it) (for color and flavor)
- 1 teaspoon garlic powder
- 1 teaspoon onion powder
- 1 teaspoon salt
- 1 teaspoon black pepper
- 1/2 teaspoon chili powder (optional, for warmth)
- 1/4 teaspoon cayenne (optional, for heat)
- as needed cup BBQ sauce (optional for finishing)
- 1 sheet foil
- 1 sheet pan sheet pan
Instructions
Preparation
- Heat your oven to 275 F.
- Line a sheet pan with foil. Add another layer of foil you can fold over the ribs.
- Pat the ribs dry and remove the membrane on the back using a butter knife and paper towel.
- Trim any large flaps of fat from the ribs.
- Coat both sides of the ribs lightly with yellow mustard or oil, then apply the dry rub generously.
- Let the ribs marinate for at least 20 minutes, or up to overnight in the refrigerator.
Cooking
- Place the ribs meat side up on the prepared pan and cover tightly with foil.
- Bake for about 2 hours 30 minutes for baby backs, or closer to 3 hours for St. Louis ribs.
- Watch for hot steam when you carefully open the foil.
Finishing
- For added flavor, brush with BBQ sauce and broil for 2 to 5 minutes or grill for a few minutes per side.
Notes
Make sure to seal the foil tightly to keep the steam in. Rest the ribs for about 10 minutes before slicing for the juiciest results.
- Prep Time: 30 minutes
- Cook Time: 3 hours
- Category: dinner, Main Course
- Cuisine: American, BBQ
Related posts:
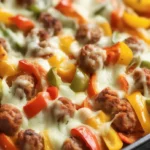 Heavenly Italian Sausage & Pepper Casserole
 Deliciously Easy Cheesy Potato Egg Scramble
 Delicious Cottage Cheese and Spinach Crustless Quiche
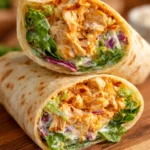 Quick Spicy Buffalo Chicken Wraps
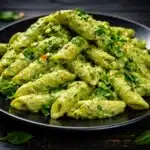 Creamy and Cheesy Spinach Pasta | Healthy Palak Pasta Recipe
 Moqueca Brazilian Fish Stew Recipe (Easy, Authentic & Coconut Milk Seafood Stew)

 Main Dishes
 Drinks & Wellness