This is a loaf you can trust on a tired evening. It gives steady results and a kind of comfort that feels like a warm kitchen, not a show. If you want a homey slice to feed a family or to make into quick garlic toast, this version of sourdough bread keeps things honest and doable.
If you like turning a fresh loaf into something extra, try a little twist with this sourdough garlic bread recipe for a fast, loved-by-all upgrade.
Why This Is a Recipe You’ll Keep
Most days I want bread that does not argue. This one asks for time, not fuss. There is resting. There is a gentle rhythm of stretch and folds. That is it.
It fits long days. You mix one evening, sleep on it in the fridge, and bake in the morning. No complicated tools. No weird ingredients. And yes, the overnight rest matters.
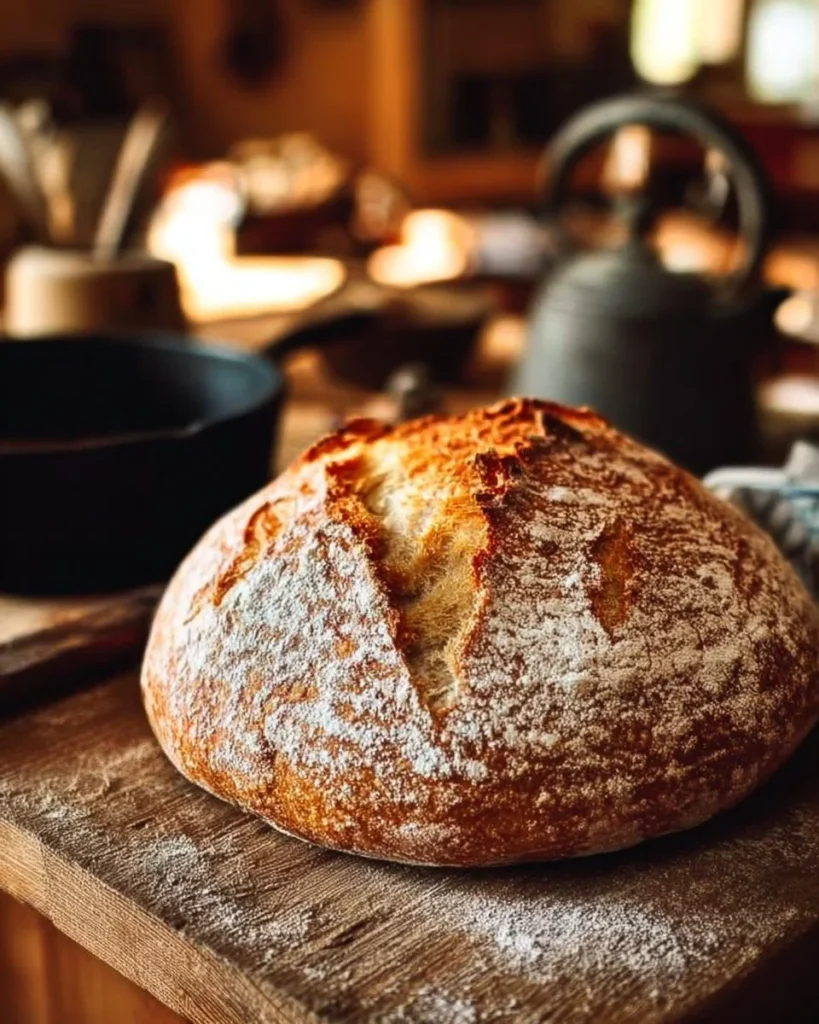
You end up with a loaf that has a crisp crust and a soft, open crumb. It eats well plain. It plays nicely with butter, soup, or sandwiches. That’s why this gets made again and again.
How This Dish Comes Together
Here’s the thing. You start with flour and water, then you let fermentation do the heavy lifting. You help it a bit with folds. Then you shape and chill. The slow cold rest builds flavor and structure.
If you have leftover dough or want a fun Sunday project, you can use the same starter for a sweet pull-apart like this sourdough monkey bread. It is a good way to stretch what you already made.
The full List Of Ingredients You’ll Need
- 4 cups (500 g) bread flour or all-purpose flour
- 1⅔ cups (375 g) warm water
- 1 cup (200 g) active sourdough starter
- 2 teaspoons (10 g) salt
Making the Dish {name} Step-by-Step Instructions
- In a large mixing bowl, combine 4 cups of flour and 1⅔ cups of warm water.
- Stir until a shaggy dough forms, then let it rest for 30 minutes.
- After resting, add 1 cup of active sourdough starter and 2 teaspoons of salt.
- Mix well until everything is fully combined.
- Cover the bowl with a clean towel or plastic wrap.
- Let the dough sit at room temperature.
- Every 30 minutes for 2 hours, perform a set of stretch and folds.
- To stretch and fold, pull one side of the dough upward and fold it over itself.
- Turn the bowl a quarter turn and repeat three more times.
- After the final fold, cover the bowl again and let the dough rise for 6 to 8 hours.
- It should double in size and appear bubbly and puffy.
- Gently transfer the dough to a lightly floured surface.
- Shape it into a round or oval loaf by folding and tucking the edges underneath.
- Place the shaped dough seam-side up into a floured proofing basket or towel-lined bowl.
- Cover and refrigerate for 8 to 12 hours.
- The next day, place a Dutch oven into your oven and preheat to 450°F (232°C).
- Remove the dough from the fridge and turn it out onto parchment paper.
- Score the top of the dough with a sharp knife or razor blade.
- Carefully lower the dough into the hot Dutch oven using the parchment paper.
- Cover and bake for 20 minutes.
- Remove the lid and bake uncovered for another 25 minutes.
- Take the bread out of the Dutch oven and let it cool completely on a wire rack before slicing.
Follow those steps and you will get a loaf that looks and tastes like it took more work than it did. Trust the rise. Trust the fridge rest.
How We Like to Serve It?
Slice it thick and toast it. Slather butter on a still-warm slice. Make thick, simple sandwiches. Warm slices tucked into soup.
For a light snack, I spread ricotta and a drizzle of honey. For dinner, I tear it into big pieces for stew. If you want something different, try it with a quick flatbread idea like this 2-ingredient cottage cheese flatbread the textures pair nicely.
Keep it simple. No need to fuss with presentation. A wooden board, a knife, and a pot of something warm works every time.
Saving What’s Left And Freezing Tips
Wrap cooled slices tightly in plastic wrap or beeswax wrap if you have it. Place in a zip-top bag and keep in the fridge for a few days. It will soften and be fine for sandwiches.
For longer storage, freeze slices flat on a tray, then move them to a bag once solid. Toast from frozen. No thawing needed. Whole loaves freeze okay too. Cool fully. Wrap well. Thaw at room temperature and refresh in a hot oven for 5 to 10 minutes.
If you slice before freezing, you will use less of the loaf and waste less. I do this more nights than not.
Small Kitchen Tricks From Experience
Use a bowl with a little extra room. Dough grows. It gets messy otherwise.
If your starter seems sluggish, give it a feed a few hours before you mix. It helps. And yes, room temperature matters more than the exact minute. I learned this the hard way.
Dust your hands with flour when shaping, but not too much. Too much flour makes the crust dry. A light touch keeps the crumb soft.
If you do not have a proofing basket, line a bowl with a well-floured towel. It works fine. And if you want a meaty twist later, take a look at these carnivore bread recipes for ideas on dense breads that need a different handling. Not necessary here, but useful if you like experimenting.
Common Mistakes to Avoid
Underproofing. If the dough does not show bubbles or has not roughly doubled, it needs more time. Oven spring will suffer.
Overproofing. If it collapses when you handle it, it went too far. Still edible. Will be dense. Not ideal.
Too much flour while shaping. This kills the blisters in the crust. Use just enough to keep it from sticking.
Putting a cold loaf straight into a cold oven. Heat matters. Your Dutch oven should be hot when the dough goes in.
Scoring with a dull knife. It rips rather than opens. A sharp blade makes neat ears and a better rise in the oven.
Simple Changes and Adaptations You Can Make
Swap half the water for milk for a softer crust. Use whole wheat for up to 25 percent of the flour for a nuttier flavor. Add a tablespoon of honey or olive oil if you want a slightly softer crumb.
Fold in seeds at the shaping step for texture. Keep additions small so they do not weigh the dough down. These are optional. No one will mind the plain loaf either.
Questions That Usually Come Up
Q. How active should my starter be?
A. It should double in a few hours after a feeding and look bubbly. That gives the best rise.
Q. Can I speed up the rise?
A. A warmer room helps. Try 75°F if you can. Do not rush the fridge rest. Flavor needs time.
Q. My bread is dense. Why?
A. Likely underproofed or too much flour during shaping. Also check starter activity.
Q. Do I need a Dutch oven?
A. It gives the best crust. A heavy pot with a lid works. You can also bake on a hot baking stone and toss in steam early in bake time.
Q. How do I know when it is done baking?
A. It should sound hollow when tapped on the bottom and the internal temp should be around 205°F to 210°F if you use a thermometer.
Q. Can I make smaller loaves?
A. Yes, divide dough after the first rise and adjust bake time down a bit. Keep an eye on color and internal temp.
A Quiet Closing Note
If it does not come out perfect the first time, that is all right. Bread teaches patience. You will learn tiny things each time. Keep one jar of starter and a good towel. That is the beginning of many loaves.
If you want a gentle walkthrough that explains the background and steps in plain language, this guide at Sourdough Bread: A Beginner’s Guide is a solid reference. For another step-by-step beginner friendly approach, see Homemade Sourdough Bread, Step by Step.
Print
Sourdough Bread
- Total Time: 8 hours 45 minutes
- Yield: 8 servings
Description
A simple and reliable sourdough loaf perfect for busy nights, delivering a crisp crust and soft crumb that pairs well with butter, soup, or sandwiches.
Ingredients
Main Ingredients
- 500 g 4 cups bread flour or all-purpose flour
- 375 g 1⅔ cups warm water (Warm water helps activate the sourdough starter.)
- 200 g 1 cup active sourdough starter (Starter should be bubbly and active.)
- 10 g 2 teaspoons salt
Instructions
Preparation
- In a large mixing bowl, combine 4 cups of flour and 1⅔ cups of warm water.
- Stir until a shaggy dough forms, then let it rest for 30 minutes.
- After resting, add 1 cup of active sourdough starter and 2 teaspoons of salt. Mix well until everything is fully combined.
- Cover the bowl with a clean towel or plastic wrap and let the dough sit at room temperature.
- Every 30 minutes for 2 hours, perform a set of stretch and folds.
- To stretch and fold, pull one side of the dough upward and fold it over itself. Turn the bowl a quarter turn and repeat three more times.
- After the final fold, cover the bowl again and let the dough rise for 6 to 8 hours until it doubles in size and appears bubbly and puffy.
Shaping and Resting
- Gently transfer the dough to a lightly floured surface.
- Shape it into a round or oval loaf by folding and tucking the edges underneath.
- Place the shaped dough seam-side up into a floured proofing basket or towel-lined bowl.
- Cover and refrigerate for 8 to 12 hours.
Baking
- The next day, place a Dutch oven into your oven and preheat to 450°F (232°C).
- Remove the dough from the fridge and turn it out onto parchment paper.
- Score the top of the dough with a sharp knife or razor blade.
- Carefully lower the dough into the hot Dutch oven using the parchment paper.
- Cover and bake for 20 minutes.
- Remove the lid and bake uncovered for another 25 minutes.
- Take the bread out of the Dutch oven and let it cool completely on a wire rack before slicing.
Notes
For storage, wrap cooled slices in plastic wrap and keep in the fridge for a few days. For longer storage, freeze slices and toast from frozen. Dust hands with flour while shaping, but avoid excess flour.
- Prep Time: 30 minutes
- Cook Time: 45 minutes
- Category: bread, Snack
- Cuisine: American, Baking
Related posts:
 Strawberry Crunch Cheesecake Tacos
 Strawberry Kiss Cookies: Cute Valentine’s Day Cookies Everyone Loves
 Crack Chicken Sliders on Hawaiian Rolls – Easy Game Day Sandwiches
 Crispy Buffalo Wings Recipe, Easy Homemade Wings with Classic Buffalo Sauce
 Honey Curry Roasted Cauliflower
 Moist Rhubarb Cake with Butter Sauce

 Main Dishes
 Drinks & Wellness