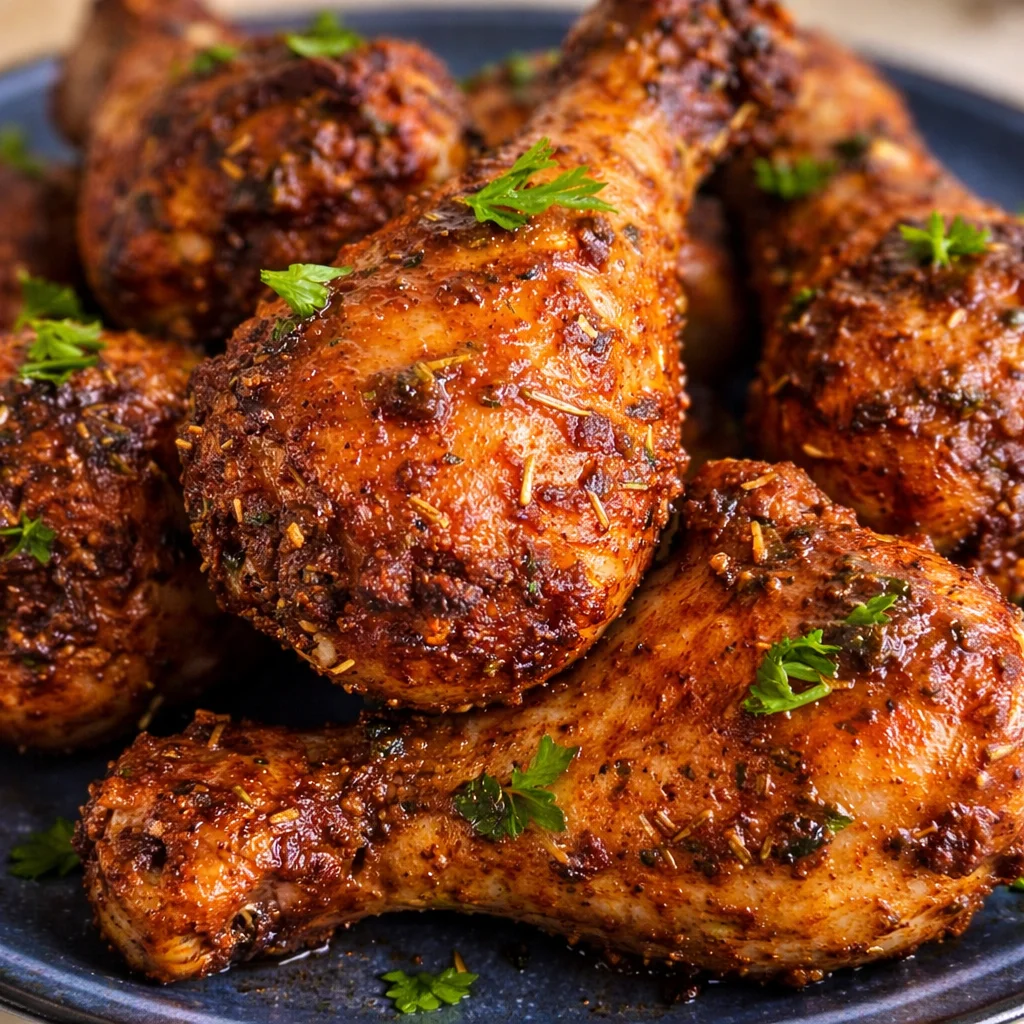
Baked Chicken Legs are my answer to those nights when I want real comfort food but I do not want to babysit a pan on the stove. You know the vibe: everyone is hungry, the kitchen is already a little messy, and you just need something that feels like a win. These drumsticks come out with crispy skin, juicy meat, and that cozy smell that makes people wander into the kitchen asking when dinner is ready.
I have made them for busy weeknights, game days, and even that random Sunday when I just wanted leftovers for tomorrow. If you have ever ended up with pale skin or dry chicken, do not worry. I will walk you through exactly what works for me, every single time.
Ingredients You Need (Chicken Drumsticks, Oil/Butter, Paprika, Garlic, Herbs)
I keep this recipe simple on purpose. You can always dress it up later, but the base is easy and dependable. Here is what I use most often, and yes, you can adjust based on what is in your pantry.
- Chicken drumsticks (about 2 to 3 pounds)
- Oil or melted butter (oil gives great crispiness, butter gives rich flavor)
- Paprika (regular or smoked)
- Garlic (garlic powder is easiest, fresh minced works too)
- Herbs (dried oregano, thyme, parsley, or an Italian blend)
- Salt and black pepper
If you like an easy baked chicken dinner vibe, you might also like these baked chicken tenders for quick meals when you want something even faster than drumsticks.
Best Seasonings for Baked Chicken Legs (BBQ-Rub Style, Herb & Garlic, Spicy)
This is where you can make the same pack of drumsticks feel brand new each time. I rotate seasonings depending on the mood of the house and what sides I have.
My three go to seasoning directions
BBQ-rub style: paprika, brown sugar, garlic powder, onion powder, chili powder, salt, pepper. This one smells amazing while it bakes.
Herb and garlic: garlic, thyme, oregano, parsley, lemon zest if you have it. Tastes clean and goes with almost anything.
Spicy: paprika, cayenne, black pepper, garlic, and a tiny pinch of sugar. Add hot sauce at the end if you want more punch.
If you are on an oven chicken kick, I also make these oven baked chicken thighs when I want a slightly richer, more tender cut with similar seasoning options.
Equipment Setup for Extra Crispiness (Baking Sheet + Foil + Oven-Safe Rack)
Let us talk about crispiness, because that is the whole point, right? The setup matters more than people think. My favorite method is using a baking sheet lined with foil and an oven-safe rack on top. The rack keeps the chicken lifted so hot air can move around it.
Here is the simple setup:
Baking sheet for stability, foil for easy cleanup, and a rack for airflow. If you do not have a rack, you can still bake them, but flip them once and expect slightly less crisp skin underneath. Either way, you will still get tasty drumsticks.
Prep Steps for Crispy Skin (Pat Dry, Skin Positioning, Even Coating)
This part is small but it changes everything. If you want Baked Chicken Legs with skin that actually crackles a bit, do not skip the dry step.
First, pat the drumsticks dry with paper towels. I do it twice. Yes, twice. Moisture is the enemy of crisp skin.
Next, pay attention to the skin. If some skin is bunched up, gently pull it so it covers more of the meat. You do not need perfection, just avoid big folds where seasoning cannot reach.
Finally, coat evenly. I toss the drumsticks in a bowl with oil and spices. You want a glossy, seasoned look all over, not clumps of seasoning in one spot.
Step-by-Step: How to Bake Chicken Legs in the Oven
This is my reliable method. It is easy, it works, and it does not require fancy tricks to get juicy meat.
1) Heat the oven and prep the pan with foil and a rack.
2) Pat drumsticks dry and place them in a bowl.
3) Add oil or melted butter plus your seasonings. Toss well.
4) Arrange drumsticks on the rack with a little space between them.
5) Bake until the skin is crisp and the meat is cooked through.
6) Rest for 5 minutes before serving. This keeps the juices where they belong.
If you love creamy sauces with baked chicken, you should peek at creamy oven baked chicken thighs sometime. Different cut, same cozy energy.
Best Oven Temperature & Time for Drumsticks (400°F vs 425°F) + Internal Temp Guide
I have tried both 400°F and 425°F, and each has its place.
400°F: slightly gentler, great if you are baking sides in the oven too and do not want things to over brown. Expect around 35 to 45 minutes depending on size.
425°F: my favorite for crisp skin. It browns faster and renders the skin better. Expect around 30 to 40 minutes.
Do not rely on time alone. Drumsticks can vary a lot in size. The safest move is checking internal temperature at the thickest part, without touching bone. I pull them when they hit 175°F to 185°F. Chicken is safe at 165°F, but drumsticks taste better a bit higher because the meat gets more tender.
Pro Tips for Ultra-Crispy Chicken Legs (Rack Airflow, Oil Spray, Broil Finish)
If you want that wow factor when you bite into the skin, here are the tricks I actually use, not the ones that sound good but do nothing.
Rack airflow: I know I said it already, but it is the biggest one. Air moving around the chicken helps the skin dry and crisp.
Oil spray: halfway through baking, I sometimes give the skin a light spray of oil. Not a soak, just a quick mist. It helps browning and crisping.
Broil finish: when the chicken is basically done, I broil for 1 to 3 minutes. Watch it closely. This step can go from perfect to too dark fast. But when it hits right, it is so good.
Optional “Crispy Booster” Techniques (Baking Powder Method, Herb Butter Finish)
If you are chasing extra crispiness, here are two optional add-ons. You do not need them, but they are fun when you want to level up.
Baking powder method: add 1 to 2 teaspoons of baking powder to your dry seasoning mix for about 2 to 3 pounds of drumsticks. It helps the skin get crispier. Important: use baking powder, not baking soda, and make sure it is aluminum free if you are sensitive to that taste.
Herb butter finish: melt butter with a little garlic and herbs, then brush it on right after the chicken comes out. You still get crisp skin, but with that rich buttery smell. I do this when I am serving guests and want the plate to feel extra special.
Flavor Variations (Garlic Parmesan, Smoky Paprika, Lemon Herb, Honey Mustard, BBQ)
Once you have the base method down, you can play. Here are a few flavor paths that I love. They all work with the same baking method.
Garlic Parmesan: add extra garlic powder, then sprinkle parmesan on during the last 5 minutes. It gets toasty.
Smoky paprika: use smoked paprika, add a tiny pinch of cumin, and finish with a squeeze of lime. So good.
Lemon herb: add lemon zest and dried herbs, and serve with lemon wedges. Bright and simple.
Honey mustard: whisk a little honey and mustard, brush it on during the last 10 minutes so it does not burn.
BBQ: bake with a dry rub first, then brush with BBQ sauce for the last 8 to 10 minutes. This keeps the sauce from getting bitter.
If you are into bold flavors, you might also like a saucy dinner like bang bang chicken on nights when you want something with a little kick.
Air Fryer Chicken Legs Option (Time, Temp, How to Keep Them Juicy)
Sometimes I do not want to heat the whole oven, especially in warmer months. Air fryer drumsticks are a great option and still give you that crisp bite.
My basic air fryer plan: cook at 380°F for 10 minutes, flip, then 380°F for another 8 to 12 minutes depending on size. If you want extra crisp skin, bump it to 400°F for 2 to 3 minutes at the end.
To keep them juicy, do not overcrowd the basket, and let the chicken rest a few minutes before eating. Also, just like the oven method, pat them dry first. It matters.
What to Serve With Baked Chicken Drumsticks (Roasted Veg, Potatoes, Salads, Sauces)
This is the part where dinner feels complete. I like mixing something crunchy or fresh with something cozy.
- Roasted vegetables: broccoli, carrots, green beans, or Brussels sprouts
- Potatoes: wedges, mashed, or even quick roasted baby potatoes
- Salads: a simple garden salad, coleslaw, or a fruity salad for contrast
- Sauces: ranch, honey mustard, BBQ sauce, or a quick yogurt garlic sauce
If you want another fun baked chicken dinner idea for a different night, these crispy baked chicken tacos are a total crowd pleaser.
Storage, Reheating & Freezer Meal Prep (Keep Skin Crispy, Best Reheat Method)
Leftover Baked Chicken Legs are one of my favorite things to have in the fridge because they turn into easy lunches. But reheating matters if you want to keep the skin from going soft.
Fridge: store in an airtight container for up to 3 to 4 days.
Best reheat method: oven or air fryer. Reheat at 375°F until warmed through, usually 10 to 15 minutes. If you have a rack, use it again. Microwave works in a pinch, but the skin will soften.
Freezer: cool completely, then wrap well and freeze for up to 2 to 3 months. Thaw in the fridge overnight before reheating. If you freeze them with sauce, expect less crisp skin, so I usually freeze them dry and add sauce later.
Common Questions
1) Do I need to flip drumsticks while baking?
If you use a rack, you usually do not need to. If you bake directly on a sheet, flipping once halfway through helps.
2) Why are my drumsticks not crispy?
Most often it is moisture. Pat them dry, do not overcrowd the pan, and try baking at 425°F. A quick broil at the end also helps.
3) Can I marinate them first?
Yes, but pat them dry again before baking. Marinades add moisture, so drying is key for crisp skin.
4) How do I know they are done without cutting them open?
Use a meat thermometer. Aim for 175°F to 185°F for the best texture in drumsticks.
5) Can I use this same method for thighs?
Yep. Thighs cook a bit differently, but the same crisp skin tricks work great.
Worth Turning On the Oven For
If you try this, you will see why I keep coming back to it. Baked Chicken Legs are simple, budget friendly, and they make dinner feel handled even on chaotic days. Keep the skin dry, use a rack if you can, and do not be shy about finishing with a quick broil for that crisp bite. If you want another solid reference point, I have also used tips from Baked Chicken Legs – Tender and Juicy! – Julie’s Eats & Treats ® when I was comparing times and temps. Now go grab those drumsticks and make your kitchen smell amazing tonight.
Print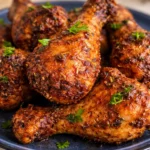
Baked Chicken Legs
- Total Time: 55 minutes
- Yield: 4 servings
Description
Baked Chicken Legs are a comforting and effortless dinner option, featuring crispy skin and juicy meat that makes for a delightful meal any day of the week.
Ingredients
Main Ingredients
- 2–3 pounds Chicken drumsticks (Approximately 2 to 3 pounds, adjust based on serving size.)
- 2 tablespoons Oil or melted butter (Oil gives crispiness; butter adds flavor.)
- 1 teaspoon Paprika (Regular or smoked based on preference.)
- 1 teaspoon Garlic (Garlic powder is easiest, fresh minced works too.)
- 1 teaspoon Dried herbs (Oregano, thyme, parsley, or an Italian blend.)
- to taste Salt and black pepper
Instructions
Preparation
- Preheat the oven to 400°F or 425°F based on preferred crispiness.
- Prepare a baking sheet lined with foil and place a rack on top.
- Pat drumsticks dry with paper towels, twice, ensuring moisture is minimized.
- If needed, adjust the skin positioning on the drumsticks, ensuring even coverage.
- Coat the drumsticks evenly with oil or melted butter and seasonings in a bowl.
- Arrange the drumsticks on the rack with space in between for airflow.
Cooking
- Bake for 30-45 minutes until the skin is crispy and meat is cooked through, checking the internal temperature at 175°F to 185°F.
- Let the chicken rest for 5 minutes before serving to retain juices.
Notes
For added crispiness, consider spraying a light mist of oil halfway through baking. A broil finish for 1 to 3 minutes can also enhance the crispiness.
- Prep Time: 15 minutes
- Cook Time: 40 minutes
- Category: dinner, Main Course
- Cuisine: American
Related posts:
 Sweet Potato Bowl Recipes 2025: 10 Viral Ideas to Try at Home
 Crockpot Sausage and Green Beans: Dump-and-Go Recipe
 Why This Crockpot Chicken Pot Pie Is the Easiest Comfort Food
 Cajun Potato Soup for Holidays and Cold Weather
 Delicious Shrimp and Corn Chowder That Will Warm Your Heart
 Crunchy Crispy Air Fryer Chicken & Mozzarella Wraps | Easy Air Fryer Recipe

 Main Dishes
 Drinks & Wellness