Warm light on the counter. A bowl of berries looking like little jewels. I wanted something that felt bright and honest, something you could eat with your hands and not think too hard about. Greek Yogurt Popsicles fit that moment perfectly.
If you like simple treats that lean on fresh fruit, you might also enjoy my take on chocolate strawberry Greek yogurt clusters they are a fun, quick cousin to this.
Why This Dish Caught My Eye
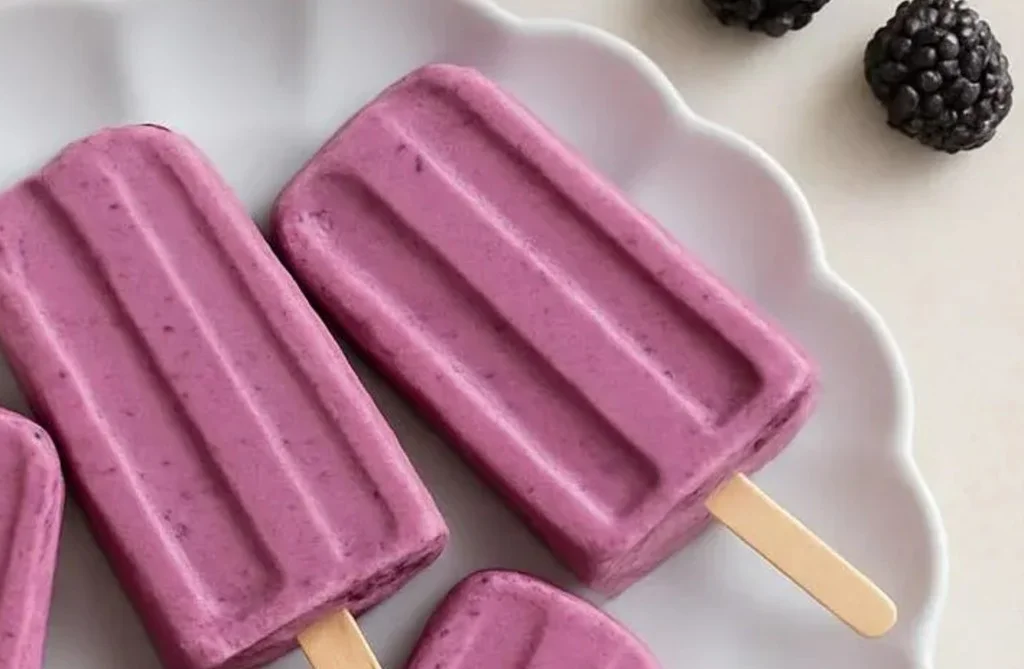
The color stopped me first. Deep berry blues and pinks swirling into creamy white. Texture matters here. The yogurt holds a soft, almost silky body while the fruit gives flashes of grainy seed and a little burst of juice. Contrast feels lively. Smooth meets a tiny crunch. Cold meets a quick melt.
I like the way the light plays on a frozen surface. Shiny, glassy edges. A matte center where the fruit hides. It looks simple, but it feels intentional. And yes, the tiny scatter of berry seeds always makes me smile.
How the recipe unfolds
This is not a fussy thing. You toss yogurt, honey, and fruit in a blender, taste, then freeze. Small choices make it feel like yours. Blend until you have a smooth, pale purple mix, or leave flecks of fruit for texture. Either way, it feels homemade.
No rush. No perfect swirl. Let the mixture tell you when it is ready. If you like a thicker pop, use slightly less fruit. If you want a slushier bite, add a tablespoon or two of milk. I learned this the hard way once when I forgot to taste before freezing.
Ingredients to Have Ready In Your Kitchen
- 2 cups full-fat Greek yogurt
- 1/4 cup honey (omit if using sweetened yogurt)
- 3 cups fruit (e.g., fresh berries)
Lay these out on the counter. See the colors. That helps.
Bringing it together with easy steps
Add the Greek yogurt, honey, and fruit to a high-powered blender. Blend until well combined either completely smooth or slightly chunky, depending on your preferred texture.
Pour the mixture evenly into 8 ice pop molds. Insert the popsicle sticks and freeze for about 5–6 hours, or until fully set.
To serve, dip the bottoms of the molds in hot water for a few seconds to easily release the popsicles. Enjoy!
Serving ideas that feel natural and flexible
These pops work on their own. Eat them straight from the mold. They also feel nice on a small plate with a few extra berries scattered around. For a casual brunch, set a bowl of granola nearby and let people crumble it over the pops as they eat. That little crunch is a nice counterpoint.
If you want a savory contrast, serve one while someone else brings warm Greek chicken bowls to the table. Sweet, cold, and bright can calm down a salty main in the best way.
Keeping leftovers for later
Store leftover pops in an airtight container or a zip-top bag. I like to line a box with parchment so they do not stick together. Keep them in the back of the freezer where the temperature stays steady. They keep best for up to one month. After that they still taste good, but the texture slowly shifts.
If you unmold a pop and have a small broken piece, wrap it well and use it in a smoothie. Frozen yogurt bits melt into a very creamy drink. Trust me.
Small details that matter and tips that help
Use full fat yogurt for creaminess. It may sound obvious, but low fat versions freeze harder and feel icier. Use ripe fruit. Overripe makes a deeply flavored pop. Under ripe makes it tart and flat.
If your blender struggles with frozen berries, let them sit for 10 minutes to soften. Or add a splash of milk to help the blades move. If the mixture looks too thin, freeze it for 30 minutes in a shallow dish, then stir and pour back into molds. This step can save a watery pop. One tip I always try: wipe the rims of the molds before inserting sticks so nothing makes the surface bumpy.
Also, if you want a layered look, pour a spoonful of plain yogurt first, freeze until tacky, then spoon fruit mix on top. It takes more time, but it gives those pretty stripes. I do that when I am feeling patient.
Greek potatoes with lemon taught me to think about how acid and fat play together. The same idea works here in small, sweet ways.
Prep tips that help saving time
Prep the fruit the night before. Freeze berries on a tray in a single layer so they don’t clump. Keep measured honey in a little jar so you can pour and go. Have popsicle sticks ready in a cup near the molds.
If you use disposable paper cups as molds in a pinch, cover each cup tightly with foil before inserting a stick. That keeps things upright and tidy. Most days I do the blender work while coffee brews and then walk away for the freeze time.
5 Easy variations you can try right now
- Mango and lime: swap the berries for mango and add a teaspoon of lime zest. Bright and juicy.
- Banana swirl: mash a ripe banana into part of the mix and swirl it in for spots of soft sweetness.
- Honey and fig: use chopped fresh figs and a bit more honey for a deeper, caramel like flavor.
- Mint and cucumber: blend in a few mint leaves and a quarter cup of peeled cucumber for a garden fresh pop.
- Chocolate ripple: stir in a tablespoon of cocoa powder or a few chocolate chips after blending for flecks of chocolate.
Try one. Or try all five over a few weekends. No judgment here.
Choosing the right pan or dish
The mold shape changes the way you hold a pop. Thin molds give a quick, crunchy bite. Thick molds feel huskier and take longer to melt. Clear molds show off the color; opaque ones make pops feel like a little secret. Plastic molds are light and easy. Metal molds freeze fast but need a bit more force to remove.
If you do not have molds, use small paper cups or even an ice cube tray for bite sized treats. The size matters. Small sizes freeze faster and give a different rhythm to eating. I like medium size best because they cool you down without disappearing too fast.
Questions that come up
Q: Can I use fat free yogurt?
A: You can. It will freeze firmer and feel icier. If that is okay with you, go for it.
Q: Do I need a high powered blender?
A: No. It helps if you like a very smooth texture, but a regular blender or even a sturdy fork for mashing soft fruit will work.
Q: How long will they last in the freezer?
A: Up to one month for best texture. They stay safe longer but the mouthfeel changes.
Q: Can I make them without honey?
A: Yes, omit the honey if your yogurt is already sweet. You can also use maple syrup or agave.
Q: What if I want no seeds?
A: Strain the blended mixture through a fine mesh before pouring into molds. It removes seeds and gives a creamier pop.
A thought before you go
If you make a batch, notice how they change over a week. The first is always the most photogenic. The third one tastes like a memory. Keep it easy. Have a napkin nearby. Let the yogurt melt slightly on your tongue and listen to the small sounds the freezer makes when you open it. It matters.
If you want to see another simple take, I like this three ingredient version at Greek Yogurt Popsicles (3 Ingredients) – Eating Bird Food. For a fresh fruit spin with pretty layers, check out Fresh Fruit Greek Yogurt Popsicles – Amee’s Savory Dish.

Greek Yogurt Popsicles
- Total Time: 6 hours 10 minutes
- Yield: 8 popsicles
Description
A refreshing and creamy summer treat made with Greek yogurt and fresh fruit, perfect for hot days.
Ingredients
Main Ingredients
- 2 cups full fat Greek yogurt (Use full fat for creaminess.)
- ¼ cup honey (Omit if using sweetened yogurt.)
- 3 cups fresh mixed berries (Can substitute with other fruits as desired.)
Instructions
Preparation
- Add Greek yogurt, honey, and fruit to a high-powered blender and blend until combined. Adjust blending time based on desired texture.
- Pour the mixture into 8 ice pop molds, add popsicle sticks, and freeze until solid (about 5-6 hours).
- To serve, dip the bottoms of the molds in hot water for a few seconds to release the popsicles.
Notes
Store leftovers in an airtight container for up to one month. Use ripe fruit for optimal flavor and adjust freezing time for desired consistency. If there are leftover pieces, they can be added to smoothies.
- Prep Time: 10 minutes
- Cook Time: 6 hours
- Category: Dessert, Snack
- Cuisine: American
Related posts:
 Strawberry Crunch Cheesecake Tacos
 Strawberry Kiss Cookies: Cute Valentine’s Day Cookies Everyone Loves
 Crack Chicken Sliders on Hawaiian Rolls – Easy Game Day Sandwiches
 Crispy Buffalo Wings Recipe, Easy Homemade Wings with Classic Buffalo Sauce
 Honey Curry Roasted Cauliflower
 Moist Rhubarb Cake with Butter Sauce

 Main Dishes
 Drinks & Wellness