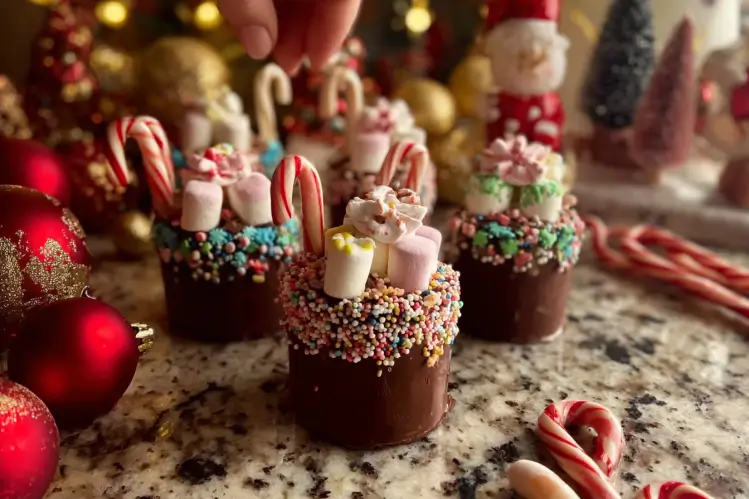
Christmas Chocolate Hot Cups saved me last year on a chilly Sunday when the power flickered and the kids were restless. I needed something warm, sweet, and fun, and I didn’t want to fuss with a complicated dessert. These little chocolate cups are cozy, giftable, and ridiculously satisfying. You pour hot milk over them, they melt into creamy cocoa, and the marshmallows pop up like a surprise. If you’ve ever wanted a treat that doubles as a tiny party, this is it. Let’s make a batch you’ll be proud to share.
By the way… if you’re planning your whole holiday spread, I tucked this recipe inside my big list of 25 Christmas Appetizers For The Best 2025 Holiday Dinner Ever . It’s such a fun lineup – worth peeking at while you prep!
Why These Chocolate Hot Cups Are the Ultimate Winter Treat
They’re simple, festive, and a little magical. When the chocolate melts and the marshmallows float, it feels like childhood in the best way. They taste rich without being heavy, and you can make them as sweet as you like. I love that they’re hands-on but not high pressure. These are the kind of treats you can make while chatting with family or watching a movie.
Another win is how easily they fit different tastes. You can go classic with semi-sweet chocolate or switch things up with dark or flavored chocolate. And yes, I’ll say it out loud: Christmas Chocolate Hot Cups are total show-stoppers when you bring them to a holiday gathering. They look fancy but are secretly beginner-friendly.
Christmas Chocolate Hot Cups
- Total Time: 45 minutes
- Yield: 10 cups
Description
Cozy and giftable chocolate cups that melt into creamy cocoa when hot milk is poured over them, topped with mini marshmallows and festive decorations.
Ingredients
Chocolate Shell Ingredients
- 16–20 oz semi-sweet or dark chocolate chips, bars, or couverture (Use quality chocolate for best results.)
Cocoa Mix
- 3/4 cup unsweetened cocoa powder
- 3/4 cup powdered sugar
- 1 tbsp cornstarch
- 1/8 tsp fine salt
Fillings and Decorations
- 1 cup mini marshmallows (For filling.)
- 1/4 cup crushed candy canes or peppermint candies (For decoration.)
- 1/4 cup sprinkles or edible glitter (Optional.)
Optional Flavor Boosters
- 1 tbsp espresso powder (For mocha flavor.)
- 1 tsp cinnamon (For warmth.)
- 1 tsp vanilla powder
- 1 tbsp orange zest (Adds freshness.)
- 1 pinch sea salt
Instructions
Preparation of Chocolate Shells
- Chop the chocolate into small pieces if using bars. Microwave in 15 to 20 second bursts, stirring often, until mostly melted.
- Spoon a generous teaspoon of melted chocolate into each mold cavity. Brush the chocolate up the sides to coat evenly.
- Chill for 5 to 7 minutes, then add a second coat of chocolate and chill until set.
Fill and Set
- Mix cocoa powder, powdered sugar, cornstarch, and salt. Taste and adjust sweetness. Add optional flavor boosters if desired.
- Drop a teaspoon or two of cocoa mix into each chocolate shell followed by mini marshmallows.
- Chill for 3 minutes to firm before sealing.
Seal and Decorate
- Rewarm remaining chocolate until fluid and spoon on top to seal the cups.
- Decorate with sprinkles or crushed candy canes while chocolate is still soft.
- Chill until completely set, then carefully pop from the molds.
Notes
Store in an airtight container for up to 2 weeks. Gift wrapped with instructions for use.
- Prep Time: 30 minutes
- Cook Time: 15 minutes
- Category: Dessert, Holiday Treat, Snack
- Cuisine: American, Holiday
Easy to personalise for holidays, gifts or cozy nights in
Think of these as little blank canvases. Want bright and playful? Add colorful sprinkles. Want classy? Try a dusting of cocoa and a twist of orange peel. You can tie them in clear gift bags with a cute ribbon and a little tag that says “Just add hot milk.” They work for teachers, neighbors, or that one cousin who has everything. For a quiet night, I like to add crushed peppermint for a subtle cool finish and sip while the tree lights glow.
Ingredient List: What You’ll Need for Chocolate Hot Cups
Keep it simple. Quality chocolate makes the biggest difference. Here’s what I use for one standard batch that makes 8 to 10 cups, depending on mold size.
- Chocolate: 16 to 20 oz semi-sweet or dark chocolate chips, bars, or couverture
- Cocoa mix: 3/4 cup unsweetened cocoa powder + 3/4 cup powdered sugar + 1 tablespoon cornstarch + 1/8 teaspoon fine salt
- Mini marshmallows
- Crushed candy canes or peppermint candies
- Sprinkles or edible glitter (optional)
- Optional flavor boosters: espresso powder, cinnamon, vanilla powder, orange zest, sea salt
That cocoa blend makes a silky drink and dissolves easily. It plays so nicely with the chocolate shell that you’ll feel like you’re sipping from a cafe. I repeat myself a lot about this, but it’s worth it: use real chocolate if you can. It melts beautifully and tastes richer. This is key to great Christmas Chocolate Hot Cups.
Add-ins and decorations: marshmallows, candy canes, sprinkles
Inside the cups, I usually go with mini marshmallows and a teaspoon or two of cocoa mix. For decorations, press a few sprinkles on top while the chocolate is still soft. Crushed candy canes are festive and give a mild crunch. If you want more drama, drizzle with a contrasting chocolate and add a pinch of edible glitter. Keep toppings light so they don’t weigh down the shell.
Equipment and pantry staples you should have
You don’t need special gear. A silicone cupcake pan or silicone half-sphere molds make the process easy. A small pastry brush or spoon helps spread chocolate. A microwave-safe bowl is a must, or use a double boiler. Piping bags are handy but not essential. Have parchment, a baking sheet, and a clean, dry workspace. Moisture is the enemy of smooth chocolate, so wipe everything before you start.
Step-by-Step Instructions: Make the Chocolate Cups
Here’s the rhythm I follow when making Christmas Chocolate Hot Cups. It’s relaxed, efficient, and perfect for a lazy afternoon.
Prep the chocolate shells
Chop the chocolate into small pieces if using bars. Microwave in 15 to 20 second bursts, stirring often, until mostly melted with a few soft chunks. Stir to finish melting. If you prefer the stovetop, use a bowl over barely simmering water and stir gently.
Spoon a generous teaspoon of melted chocolate into each mold cavity. Brush or swirl the chocolate up the sides to coat evenly. Chill 5 to 7 minutes, then do a second coat for strength. Chill again until set and firm.
Fill and set
Mix the cocoa powder, powdered sugar, cornstarch, and salt. Taste and adjust sweetness. Add a pinch of cinnamon or espresso powder if you want a flavor twist.
Drop a teaspoon or two of cocoa mix into each chocolate shell. Add a few mini marshmallows. Keep the rim clear so the top seals properly. If your kitchen is warm, pop the tray back into the fridge for 3 minutes so nothing melts prematurely.
Seal and decorate
Rewarm the remaining chocolate until fluid. Spoon a little on top of each filled shell and spread to the edges, sealing all the way around. Jiggle the tray to smooth the tops. Decorate while the chocolate is still soft with sprinkles or crushed candy canes. Chill 10 minutes until completely set, then carefully pop the cups out of the mold.
Choosing the right chocolate: semi-sweet, dark, candy melts
Semi-sweet (around 55 to 65 percent) is the most crowd-pleasing. It’s sweet enough for kids and rich enough for adults. Dark chocolate (70 percent or higher) gives a bold, bittersweet sip that’s lovely for grown-up nights. Candy melts are easier to work with and set fast, but they taste less chocolatey. If taste is your priority, pick real chocolate chips or bars. If styling and quick setting matter most, candy melts are fine. You can also mix the two to balance flavor and ease.
Milk vs water vs plant-based alternatives
Hot milk creates the creamiest result. I like whole milk for lux texture, but 2 percent is still great. If you choose water, increase the cocoa mix by a teaspoon to boost body. For plant-based options, oat milk is my favorite for its natural creaminess; almond milk is lighter and slightly nutty; coconut milk gives a richer, sweeter finish. Heat your liquid until steaming but not boiling for the smoothest melt.
Marshmallows, sprinkles, candy-cane handles – how to decorate
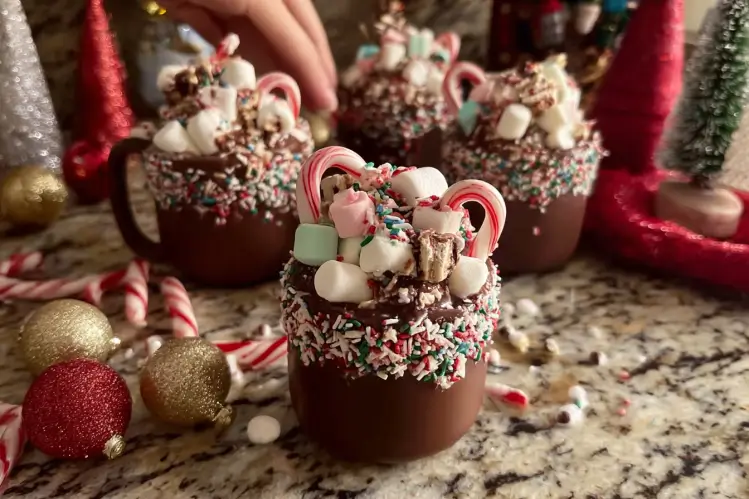
To make an adorable handle, snap a mini candy cane and use the curve. Dab a little melted chocolate on the side of the cup, press on the candy cane piece, and hold for 10 seconds. Set in the fridge for a minute to secure. Add a tiny drizzle of white chocolate across the top and shower with sprinkles. Keep the decorations sturdy enough to survive packaging but not so heavy that they crack the shell.
Variations & Flavor Twists
Try mocha with a pinch of espresso powder. Make salted caramel by drizzling a little caramel sauce inside the shell and finishing with flaky salt. Orange lovers can add zest to the cocoa mix and top with a candy orange peel. Chili-chocolate is amazing too: a tiny pinch of cayenne plus cinnamon warms the whole cup in a cozy way.
Holiday themed versions: peppermint, candy-cane rim, Christmas sprinkles
For a peppermint version, mix crushed candy canes into the cocoa blend and decorate with a red and white drizzle. For a candy-cane rim, melt white chocolate, dip the cup rim, then press into crushed peppermint for a pretty, crunchy edge. Christmas sprinkles are an instant festive lift. Add a mini peppermint stick as a stirrer when serving for extra charm.
Mini vs full-size cups, gift-ready packaging ideas
Mini cups are perfect for kids or smaller mugs. Pair two minis for a big mug. Full-size cups are best for 8 to 10 ounces of hot milk. For gifts, wrap each cup in a small cellophane bag with a ribbon. Add a tag with instructions: “Place one cup in a mug. Pour 8 to 10 oz hot milk over the top. Stir, sip, smile.” Tuck a candy cane or cinnamon stick inside the bag for a finishing touch.
Serving Suggestions & Presentation Ideas
- Warm your mug first with hot water, then dry it for a longer-lasting cozy drink.
- Top with whipped cream, a pinch of cocoa, or grated chocolate.
- Stir with a peppermint stick or cinnamon stick for gentle flavor.
- Set up a mini topping bar: marshmallows, sprinkles, crushed cookies.
- Serve with shortbread, biscotti, or gingerbread for dunking.
When you’re hosting, line a tray with parchment and set the cups in neat rows. It looks inviting and keeps things tidy. People love the little reveal as the chocolate melts, and it makes the whole room smell like a hug. I always keep a couple of extra Christmas Chocolate Hot Cups near the kettle because refills happen fast.
Storage, Make-Ahead & Gifting Tips
Store the cups in an airtight container at cool room temperature for up to 2 weeks if you used well-tempered chocolate. If your kitchen runs warm, keep them in the fridge but let them come to room temp before gifting to prevent condensation. For mailing, cushion well and include an instruction card. For make-ahead, batch the shells and freeze them unfilled for up to 3 months, then fill and seal the day before gifting. Always label flavors if you make a mixed box.
Troubleshooting: Common Issues & How to Fix Them
Not melting smoothly
Use hotter milk and make sure the cup has a thin enough shell to melt quickly. Stir from the bottom of the mug to help the chocolate disperse. Pre-warm the mug so the temperature doesn’t drop too fast.
Grainy or separated texture
Graininess usually comes from overheated chocolate or too cool milk. Heat the milk until it’s steaming, not boiling. Stir gently and steadily, and avoid adding cold toppings straight away. If separation happens, a quick whisk usually pulls it back together.
Cups not melting properly in milk – tips to ensure smooth melt
Make the shells thin but sturdy by doing two light coats instead of one thick coat. Use milk that’s hot enough to steam. Pour the milk directly onto the cup, not just around it, so the heat hits the chocolate. If your chocolate was overheated during melting, it can set too hard and resist melting, so melt low and slow. Stir with intention for 15 to 20 seconds and the melt should be silky.
Mix too grainy or separation in milk – how to prevent
Sift the cocoa and powdered sugar together so no clumps hide inside. Add a tiny pinch of cornstarch to help emulsify. Don’t boil the milk. For dairy milk, a small splash of cream can smooth things out. If using water, add an extra teaspoon of cocoa mix for body and whisk well.
How do I make dairy-free or vegan hot cups?
Use dark chocolate that’s labeled dairy-free and double-check the ingredients. For the drink, use oat milk or almond milk. Replace marshmallows with a vegan brand if marshmallows are important to you. Sweeten slightly more if using almond milk since it’s lighter. The result is still rich and cozy, just plant-based friendly.
Common Questions
With standard cupcake molds, you’ll get about 8 to 10 cups. Mini molds can yield 14 to 18.
You can, but your drink will be lighter. I recommend at least a teaspoon of the cocoa blend for a real hot chocolate experience.
Not required. Just melt chocolate gently and avoid scorching. If you like precision, aim to keep chocolate warm and fluid, not hot.
Heat until steaming with little bubbles at the edges. If it’s boiling, let it rest for 20 seconds before pouring.
Yes. White chocolate melts differently and is sweeter, so consider adding a pinch of salt or a little more cocoa mix inside.
A Sweet Little Wrap-Up You Can Sip
We covered everything from choosing chocolate to sealing, decorating, storing, and fixing common hiccups. These cups are friendly to make, easy to personalize, and guaranteed to delight. Whether you’re gifting or treating yourself, Christmas Chocolate Hot Cups bring warm, happy energy to any winter day. I hope you try a batch and make them your own. When you do, save one for later and thank yourself during the next cozy night in. Take a look in this board for more Christmas inspirations.
Related posts:
 Christmas Cranberry Roll Ups Recipe
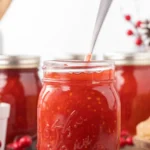 Amish Christmas Jam Recipe
 Cranberry Brie Bites : Easy 5-Ingredient Christmas Appetizer
 Pepper Jelly and Cream Cheese Bites: Easy 3-Ingredient Appetizer Everyone Loves
 Mini Brie Christmas Trees – The Christmas Appetizer Everyone Loves
 Holiday Pigs in a Blanket: A Fun Party Treat!

 Main Dishes
 Drinks & Wellness