Stained Glass Cookies always sound like some Pinterest-only wizardry, right? I totally get it. I honestly thought I’d have to sell my soul or buy fancy kitchen stuff to get them right. Not true! The struggle of crumbly dough and gooey, bubbling centers was real (been there, had some ugly ones), but with a few easy tricks, these gorgeous cookies really do belong in your family’s holiday lineup. If you’ve ever wanted show-off cookies that get all the oohs and ahhs (and disappear fast), this is the one to try.
TL;DR: Stained Glass Cookies
- Total Time: About 20 minutes bake time + chilling
- Best Hard Candy: Jolly Ranchers or Life Savers
- Oven Temp: 350°F (177°C)
- Cookie Dough: Chill before cutting to keep shapes sharp
- Filling Tip: Finely crushed candy melts evenly without bubbling
- Cooling: Let candy centers set completely before handling
- Storage: 5 days airtight in a dry spot
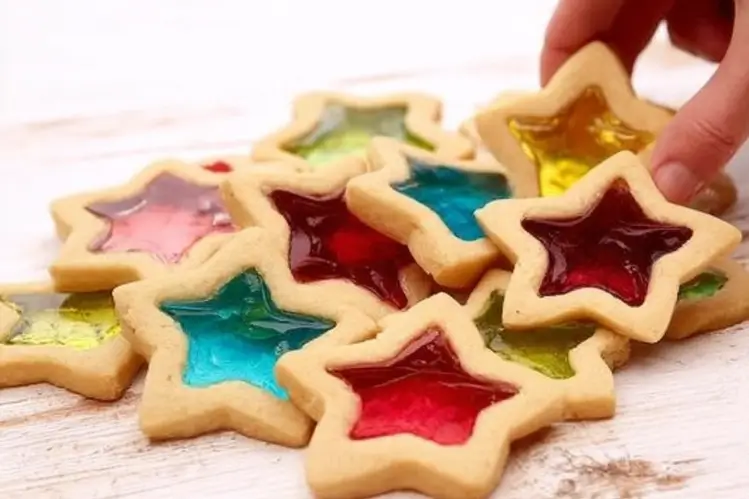
These stained glass sugar cookies are simple holiday showstoppers made with hard candy centers that melt into clear, light-catching windows. Perfect for gifting, cookie swaps, and even edible tree ornaments.
Why These Stained Glass Cookies Are a Christmas Favorite
You know that feeling when the cookie platter comes out and there’s one treat everyone grabs first? Stained Glass Cookies are that cookie during the holidays. Something about those shiny, see-through centers makes people go wild. In my house, these are basically Christmas magic on a plate. And let’s be real, they’re way easier than they look. Kids think it’s absolute wizardry (maybe adults too), and I love that they double as tree ornaments. Check out my spooky pumpkin cookies if you want more holiday cookie fun, but trust me, these stained glass beauties always steal the show.
Print
Stained Glass Cookies
- Total Time: 40 minutes
- Yield: 24 cookies
Description
These stunning Stained Glass Cookies are a holiday favorite, featuring colorful candy centers that look impressive but are easier to make than they appear. Perfect for parties and as edible ornaments!
Ingredients
- 2 cups all-purpose flour
- 1 cup unsalted butter, softened
- 3/4 cup granulated sugar
- 1 large egg
- 1 teaspoon vanilla extract
- 1/2 teaspoon salt
For the stained glass centers
- 1 cup crushed hard candies (e.g., Jolly Ranchers, Life Savers) (Crushed to fine pieces for best results)
Instructions
Preparation
- In a large bowl, mix flour, sugar, salt, and softened butter until the mixture is creamy.
- Add in the egg and vanilla extract, mixing until well combined.
- Chill the dough for at least 30 minutes.
Shaping and baking
- Preheat the oven to 350°F (175°C).
- Roll out the chilled dough on a floured surface to about 1/4 inch thickness.
- Cut cookies into desired shapes and cut out smaller shapes in the centers.
- Place cookies on a lined baking tray.
- Crush the hard candies and fill the cutouts with the crushed candy.
- Bake in the preheated oven until the edges are just golden, about 7-10 minutes.
- Allow cookies to cool completely before removing them from the tray.
Notes
Chill the cookies on the tray before baking to keep shapes crisp. Use individual colors of candy in different sections for bright results.
- Prep Time: 30 minutes
- Cook Time: 10 minutes
- Category: Dessert, Snack
- Cuisine: American, Holiday
What You Need to Make Stained Glass Cookies
First off, you really don’t need anything you can’t find at a regular grocery store. Here’s the skinny: you’ll want classic cookie dough stuff (flour, butter, sugar… nothing too wild). The real game changer? The hard candies for those dazzling “glass” centers. No secret ingredients needed, honestly. Just make sure you bring your patience for rolling the dough; it’s worth it for crisp edges. Make sure you’ve got a couple of cookie cutters, a good rolling pin, and if you have a baking mat or parchment paper, you’re golden. You might have most of this stuff already (score!).
Best Hard Candies for Stained Glass Centers (Jolly Ranchers, Life Savers, etc.)
Honestly, Jolly Ranchers are my ride-or-die for making stained glass cookies. They melt cleaner than most and come in the best colors. If you can’t find those, Life Savers work, too. Just stay away from anything weirdly chewy or filled. Trust me, I once used a knock-off brand for a bake sale… and let’s just say, it was a sticky disaster. Stick with those classic clear hard ones if you want that beautiful light-catching effect for your stained glass cookies. By the way, if you’re also into seasonal flavors, try my pumpkin chocolate chip cookies recipe for a cozier twist.
Recommended Cookie Cutters, Rolling Pin, Baking Mats, Cooling Rack
Let me keep this quick and honest. Basic metal cookie cutters work best here, especially for crisp shapes like stars or snowflakes. Grab a small cutter for the center “window.” A wooden or silicone rolling pin will do. For the baking surface, I swear by baking mats but parchment does fine if that’s what you’ve got. Cooling racks are nice, but your counter will work in a pinch. Fancy stuff’s fun but not needed…promise.
How to Make Stained Glass Cookies Step-by-Step
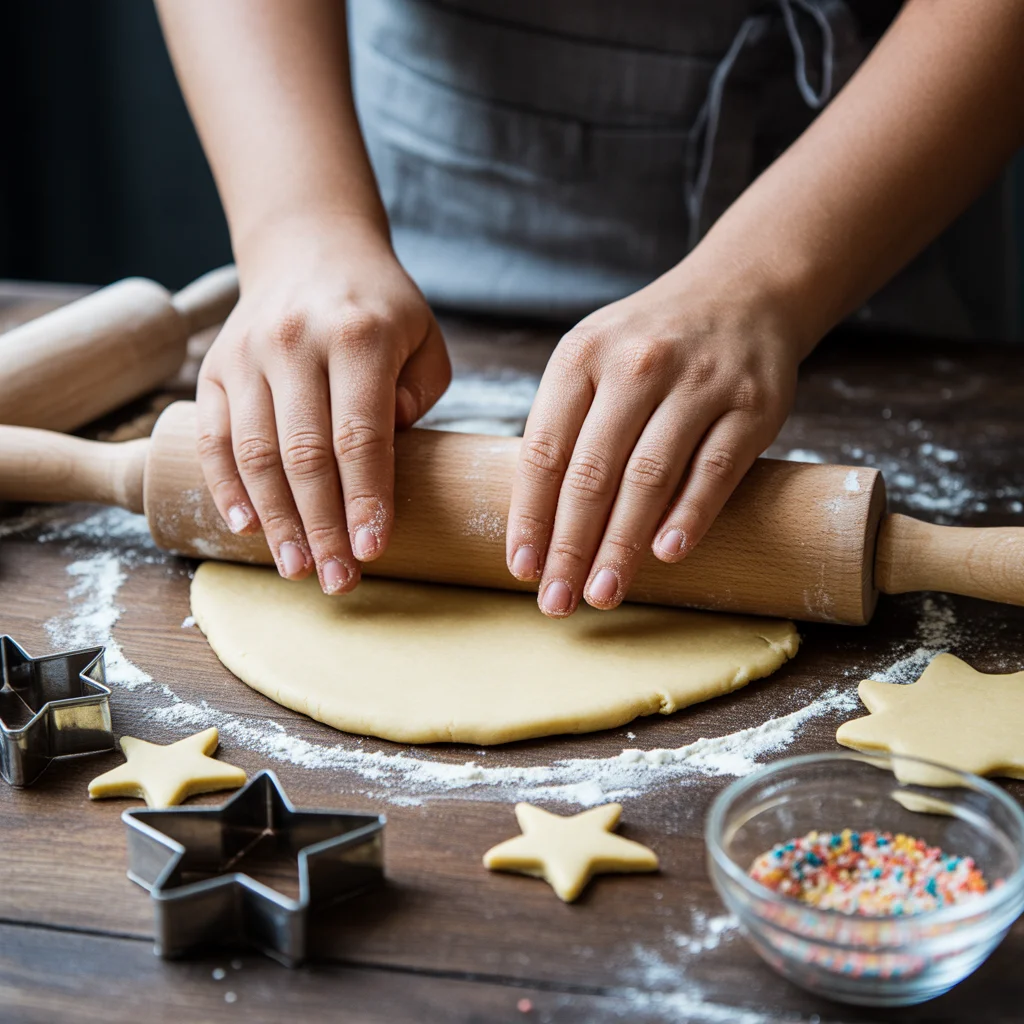
Alright, ready to jump in? Whip up your favorite sugar cookie dough (chill it so it doesn’t turn to mush). Roll it out, not too thick, not too thin, maybe just under a quarter inch. Cut big shapes, then smaller shapes in the centers for your “glass.” Lay them on your lined tray. Smash up those Jolly Ranchers or Life Savers, use a zip bag and a rolling pin or even a hammer if you must. Fill the cutouts with crushed candy dust (easy does it, a little goes a long way). Bake them at 350 until the edges are golden and the candy’s just melted. Wait for them to cool so you don’t burn your tongue. Then stand back and admire your work. Feels like a five-star restaurant kitchen for a sec.
Tips for Perfect Stained Glass Window Cookies Every Time
The biggest secret I’ve learned? Chill the cut cookies on the tray before baking. That keeps the shapes crisp. Don’t mound too much candy in the center or it bubbles up (that’s a mess, especially when cleaning your baking tray). If you want really bright colors, use separate candies for separate sections, mixing can get muddy, not magic. And always let them cool all the way before picking up, trust me on this one.
Avoid Candy Spreading or Bubbling
Here’s the thing: melted candy loves to wander. Keeping the candy inside the window means crushing it really fine and not overfilling. A little gap around the edge helps, and chilling the tray (seriously, I do ten minutes in the freezer) helps too. If the dough is room temp, edges get fuzzy and the whole thing slides around like a mudslide. Uh, lesson learned the hard way. Don’t repeat my mistake.
Standard Oven Instructions
Set your oven at 350 degrees Fahrenheit. These bake quick, keep an eye after 7 minutes. Sugar cookie edges should just barely get golden by the time the candy is clear and glassy. Every oven is a little wonky, so peek if you’re unsure, and rotate your tray if you’re going for perfection. If the candy starts bubbling a lot, just take them out, or the middle can get cloudy.
How to Keep Edges Sharp and Shapes Clean
Want bakery-perfect cookies? Use chilled dough, and don’t overhandle it. I do one or two roll-outs per batch before the dough gets too tough. Cut your shapes quickly and peel away scraps gently. For the crispest shapes, use metal cutters and dip them in flour if they get sticky. Sharper edges just look better, fact.
Stained Glass Cookie Variations & Fun Designs
Don’t get stuck making just stars or circles. Do snowflakes, trees, bells…seriously, whatever cookie cutters you’ve got. The centers can be any shape, too, not just round. My kids did weird hearts and moons last year and honestly, they were total showstoppers in our holiday cookie tray. If you want a different flavor vibe, go wild with different flavored candies. Why not, right? If you love festive bakes, pumpkin spice cookies recipe is perfect for fall holidays, too.
Christmas Trees, Stars, Snowflakes & Holiday Shapes
Nothing says “it’s the holidays” like a tray of cookies shaped like snowflakes and trees. The cool thing about stained glass cookies is you get to be artsy without real painting skills (phew). Add sprinkles before the candy melts to get those jewels stuck around the “window.” Or try colored sanding sugar on the dough for a frosted look. Even if every cookie’s a little different, people will think you’re a holiday baking genius.
How to Attach Strings & Make Edible Cookie Ornaments
If you wanna hang these as ornaments, poke a hole in the dough with a straw before baking. Trust me, make the hole a bit bigger than you think, the cookies puff up and close it some. After baking, thread some pretty ribbon or twine through, and boom, edible Christmas decorations. I’ve even gifted these as edible tree ornaments and people go wild for it.
Decorating Ideas for Stained Glass Christmas Cookies
You can go as simple or fancy as you want. Sometimes I edge each cookie in white icing for a frosted window look, or I keep things easy and just dust with powdered sugar. Tiny silver dragees (those little metallic balls that dentists probably hate) look so pretty on the edges. Or just leave ‘em plain, those centers do all the wowing for you.
Make-Ahead & Freezing Instructions
Here’s some real talk: dough freezes beautifully. Roll and cut your cookies, then freeze them raw on a tray. When ready to bake, just place them straight into the oven with the candy. Baked cookies freeze well too, but wrap each with parchment between so they don’t stick. If you want that extra special “just baked” taste, do everything but the candy part, freeze, and finish on baking day.
How long they stay fresh
These cookies stay fresh in a container about 5 days, if you hide them from curious snackers. The candy part’ll get sticky if it’s humid, though, so toss in a packet of desiccant from a seaweed snack pack if you have one. Otherwise, keep them somewhere cool and dry. I’ve had a batch survive a whole week once. Kinda rare, honestly.
Preventing humidity from clouding the center
Living where it gets muggy? Keep the cookies stored airtight, seriously. Extra dry spots are best. If you notice the glass looking cloudy, pop the cookies in a 200-degree oven for 2-3 minutes, let them cool, and most of the cloudiness will vanish. Magic, right? That trick’s saved my batches way more than once.
Serving Suggestions for Holiday Parties & Gifting
Big family gathering coming up or baking for a crowd? These stained glass cookies are real show-stealers. Here’s what I do:
- Stack ‘em in a fancy jar for teacher gifts.
- Hang a few on the tree (or even pop them on light strings!).
- Bring a whole colorful platter to Christmas cookie swaps.
- Tie them up in parchment and ribbon for neighbor gifts, they look five-star, no joke.
For cute fall parties, don’t sleep on my pumpkin chocolate chip cookies recipe, which are always a crowd hit too.
Scaling the Recipe for Cookie Exchanges & Events
If you’re new to scaling up, my main advice: don’t double everything blindly. Make two separate dough batches instead of one giant one; the dough gets hard to manage and overworked otherwise. Fill two trays at a time if your oven allows and switch racks halfway through baking. Stained glass cookies keep their wow-factor even at big parties, so go for it!
Safety Tips When Baking With Hard Candy
Here’s my big PSA: melted candy is HOT. Like, blister-hot. Never touch the centers until totally cool. If you’ve got kiddos helping, give them jobs like unwrapping candies or picking cutter shapes. Smashing the candies? Adults only. Don’t ask how I found out (spoiler…it hurt).
Kid-friendly baking advice
Let younger kids cut shapes or sprinkle in the candy, but always supervise during the actual baking and cooling. Let older kids do the windows with supervision. For many, the most fun is smashing the candy, supervised chaos, but totally worth it. My little ones LOVE making different color combinations.
Can I use different types of candy?
You can experiment! Jolly Ranchers and Life Savers are the safest bets. Some folks use lollipops or generic hard candies in a pinch. Avoid chewy or filled candy, though, it just oozes and gets gross.
Can I make these ahead for Christmas gifts?
Yes! These are perfect for gifting. Bake a couple of days beforehand and keep them airtight. They look spectacular in cellophane bags with ribbon. For another unique cookie gift, try my spooky pumpkin cookies recipe.
Common Questions
Usually, it’s humidity or overbaked candy. Try storing in a dry place and baking a little less next time.
They should! Just use your favorite blend, but you may need to chill the dough a bit longer.
Yep, but honest tip: make two separate batches, it gets weird if you try one huge bowl.
Please do. Warm dough spreads out and loses its shape, and nobody wants blob cookies.
Absolutely. Kids love the colors and smashing the candy. Supervise for hot trays, though!
You’ll Bake These Again and Again
If you love cookies that look like a million bucks but only take a little extra patience, stained glass cookies are your new best friend. Once you figure them out, you’ll find excuses to make them for every occasion, not just Christmas. Borrow a trick or two from other holiday cookies like my pumpkin spice cookies recipe to keep the fun going. If you get stuck, I always check for inspiration at Serious Eats or browse Pinterest for new cutter ideas. Give these a go, your cookie tray will thank you, and honestly, your family’s faces will light up (bad pun, but you get it). Happy baking!
Related posts:
 Christmas Sugar Cookie Cheesecake Recipe
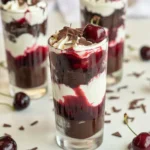 Christmas Black Forest Trifle Recipe
 Deliciously Fun Snowmen Truffles for Your Christmas Party
 Crumbl Christmas Sugar Cookies Easy Recipe
 Orange Chocolate Truffles Recipe: Easy Homemade Holiday Treat
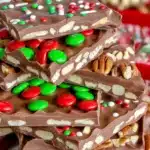 Christmas Crack Recipe (Saltine Toffee) – The Ultimate Holiday Treat

 Main Dishes
 Drinks & Wellness