
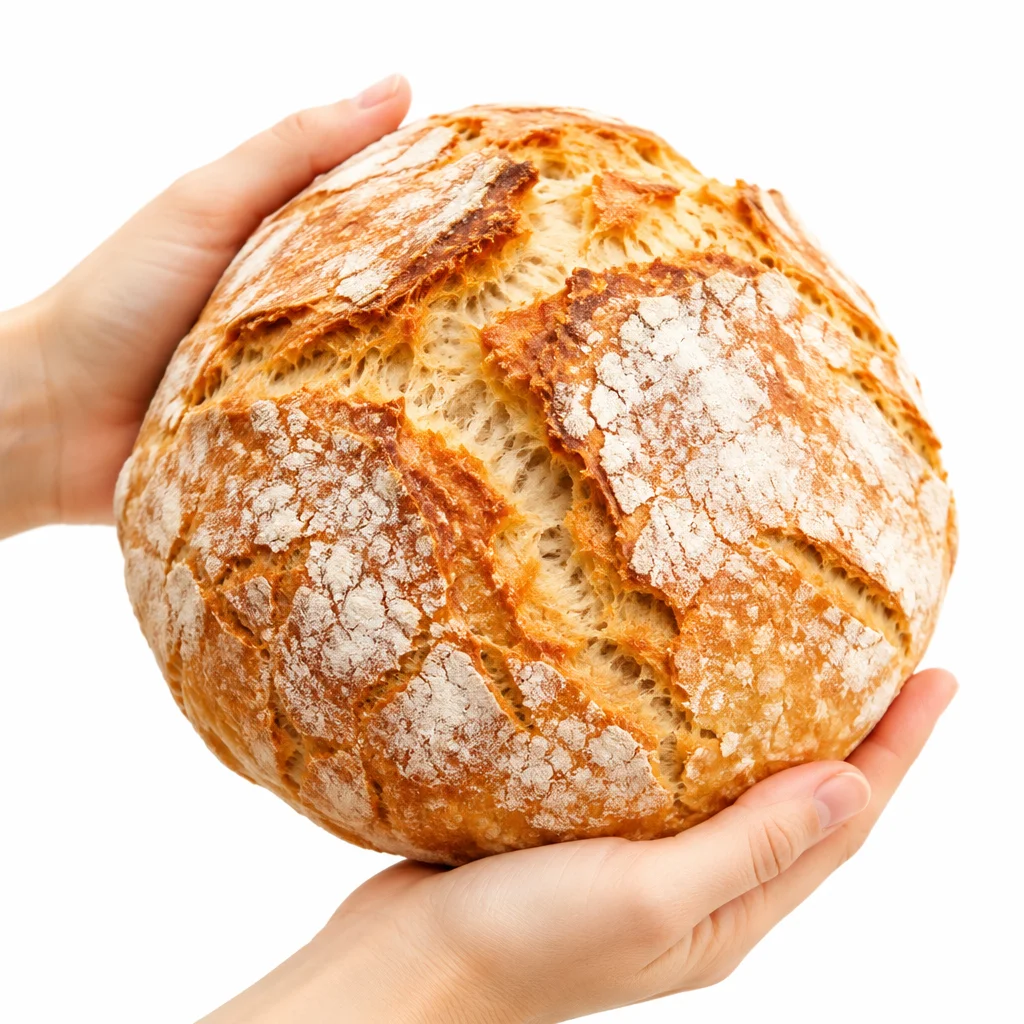
no knead bread is my weeknight secret when I want something that feels bakery level but I do not have the energy to fuss with it. You know that moment when you are staring at a sad loaf from the store and thinking, I just want real bread with a crackly crust? This is for that moment. The dough looks messy, your hands get a little sticky, and then somehow you pull a gorgeous loaf out of the oven like you planned it all along. I have made this on busy Sundays, lazy Wednesdays, and even last minute before friends came over.
Why No Knead Bread Works
The magic is time. Instead of kneading to build structure, you let the dough sit long enough that it builds itself. A wet dough plus a long rise creates those airy holes and that chewy bite we all want in a rustic loaf.
It also helps that we bake it in a screaming hot environment so the crust sets fast and gets crispy. That trapped steam is a big deal, and it is why this style feels like an artisan bakery trick even though it is not complicated.
If you like simple bread projects, you might also love this quick 2 ingredient cottage cheese flatbread for when you want something fast and pan friendly.
The Four Essential Ingredients
This is the part I adore. The shopping list is short, and the results are big. Here is what you need for the classic version:
- Flour: all purpose works great, bread flour gives a slightly chewier crumb.
- Water: room temp is fine, just not hot enough to kill the yeast.
- Salt: do not skip it, it is where the flavor lives.
- Yeast: a tiny amount goes a long way because we are giving it time.
I usually start with 3 cups flour, 1 and 1 quarter cups water, 1 and 1 quarter teaspoons salt, and 1 quarter teaspoon yeast. That makes one medium loaf that disappears quickly in my house.
Active Dry Yeast vs Instant Yeast
You can use either. I have used both and nobody at the table could tell which one I grabbed.
Here is the simple difference:
Instant yeast can be mixed right into the flour and tends to rise a bit faster. Active dry yeast</b traditionally gets dissolved first, but for no knead bread you can still mix it into the dry ingredients and it will wake up during the long rise.
If your kitchen is chilly and you are using active dry, just know it may take a little longer to get bubbly and puffy. That is not a failure, it is just yeast doing its thing at its own pace.
Best Equipment for Artisan Bread
You do not need a fancy setup, but a couple things make life easier.
Dutch oven is the big one because it traps steam and helps you get that crispy artisan crust. I use a 5 to 6 quart heavy pot with a lid. If you do not have one, do not worry, I have a whole section below on how to bake without it.
Other helpful items:
A large mixing bowl, a wooden spoon or spatula, parchment paper (optional but very handy), and a kitchen towel. That is really it.
How to Mix Sticky No Knead Dough
This dough is supposed to be sticky. If it looks shaggy and a little rough, you are right on track.
Mix the flour, salt, and yeast first so the salt is not sitting directly on the yeast in one spot. Then pour in the water and stir until you do not see dry flour. I scrape the sides once, then stop. Overmixing is not a big risk here, but there is no prize for extra stirring.
Cover the bowl with a lid, plastic wrap, or a damp towel. Now walk away. Seriously, the dough needs alone time.
Room-Temperature Rise vs Overnight Refrigeration
I do both depending on my schedule. If I am home, I let it rise at room temp for 12 to 18 hours. If I want more flexibility, I do a shorter counter rise, then tuck it into the fridge.
Room temp is easier and quicker. Overnight refrigeration can give you a slightly deeper flavor and makes the dough less sticky when shaping.
Here is a simple rhythm that works:
Mix at night, rise overnight on the counter, bake the next day. Or mix in the morning, let it rise all day, bake for dinner. This is the most forgiving bread I know.
How to Shape the Dough Without Kneading
Shaping sounds fancy, but you are basically folding. Flour your counter generously. Turn out the dough, then use floured hands to fold it over itself a few times, like you are making a rough little package. Do not punch it down hard.
Then shape it into a round by tucking the edges under. If it looks imperfect, good. Rustic is the goal.
Let it rest for about 30 to 60 minutes while your oven preheats. This rest helps it puff a bit and makes the crumb lighter.
How to Preheat a Dutch Oven Safely
This part matters because the pot gets extremely hot. Put the Dutch oven with the lid into the oven while it preheats. I do 450 F for at least 30 minutes so the whole pot is hot, not just the air in the oven.
Safety tips I follow every time:
Use thick oven mitts, clear your path from oven to counter, and set a heat safe spot to place the lid. If you are using parchment, you can lift the dough into the pot without getting your hands too close.
Also, please do not add cold water or ice to the hot pot. We are aiming for steam from the dough itself, not a dramatic science experiment.
How to Bake No Knead Bread for a Crispy Crust
Once the pot is hot, carefully drop the dough in, cover, and bake. Covered baking traps steam, which keeps the crust from setting too early and helps the loaf rise higher.
My usual timing at 450 F:
30 minutes covered, then 12 to 18 minutes uncovered until deep golden brown. If you want extra crunch, leave it uncovered a few more minutes, but keep an eye on it.
This is the moment when no knead bread goes from pale and soft to crackly and gorgeous. Your kitchen will smell like an actual bakery, and it is kind of a mood booster.
How to Make No Knead Bread Without a Dutch Oven
You can still get a great loaf. You just need to create steam another way.
Option 1: Use a heavy oven safe pot with a lid, like a deep oven safe casserole. Not quite the same, but close.
Option 2: Use a sheet pan and add steam. Place your loaf on a parchment lined sheet pan. Put a metal pan on the bottom rack while the oven preheats, then carefully pour in hot water right after you load the bread. Close the door quickly to trap steam.
Option 3: Use a large oven safe bowl as a cover. Put the loaf on a hot stone or sheet pan and cover it with a big heat safe bowl for the first half of baking.
It will not be identical to the Dutch oven method, but you will still get a nice rise and a crust with character.
How to Tell When the Loaf Is Fully Baked
I go by color, sound, and temperature if I feel like being extra sure.
Signs it is done:
Deep golden brown crust, not light tan. When you tap the bottom, it should sound hollow. If you have a thermometer, aim for about 205 to 210 F in the center.
Then the hardest part: let it cool. If you slice too soon, the inside can turn gummy because it is still setting. I try to wait at least 45 minutes, even though it is torture.
Troubleshooting Dense, Flat, or Gummy Bread
If your loaf did not come out how you hoped, you are not alone. Bread can be moody, but the fixes are usually simple.
Dense loaf can happen if the dough did not rise long enough, your yeast is old, or your kitchen was cold. Give it more time, or move it to a slightly warmer spot.
Flat bread can happen if the dough overproofed and lost strength, or if it spread too much during shaping. Next time, use a bit less water or do a couple extra folds during shaping to build tension.
Gummy center is usually from slicing too early or underbaking. Bake a few more minutes uncovered and let it cool fully.
I thought I ruined it because the dough was so sticky, but it baked up with the crunchiest crust I have ever made at home. Now I make it every weekend. My family literally hovers near the oven.
Flavor Variations and Mix-Ins
Once you get the basic loaf down, it is fun to play. Add mix ins when you first stir the dough together.
Ideas I actually use:
Chopped rosemary and flaky salt on top, garlic powder and parmesan, or a handful of olives. For a cozy vibe, I love adding a little cinnamon and raisins, kind of like a not too sweet breakfast slice.
If you are in a baking mood, this apple bread recipe is such a good one for fall weekends, and it pairs ridiculously well with coffee.
How to Store and Freeze Homemade Bread
Homemade bread is at its best the first day, but you can keep it good for longer.
For the counter: let it cool completely, then store it in a paper bag or loosely wrapped in a clean towel for a day or two. Plastic traps moisture and softens the crust, so I only use plastic if I am okay with a softer bite.
For freezing: slice the loaf once it is fully cooled. Freeze slices in a bag. Then you can toast straight from frozen. It is a lifesaver on busy mornings.
If you love quick baked breakfasts, my go to freezer friendly treat is these banana bread muffins in 30 mins. They disappear fast.
Serving Ideas for Fresh Artisan Bread
This is where you get to feel smug about how good your kitchen smells.
My favorite ways to serve it:
- Warm slices with butter and flaky salt
- Toasted with olive oil and a rub of garlic
- Alongside soup, especially lemony soups
- As the base for an egg sandwich with crispy edges
- With a board of cheese, fruit, and something briny
If you want the perfect soup pairing, try this bright and cozy avgolemono greek lemon chicken soup recipe. That combo feels like a restaurant meal at home. And if you are more of a flatbread person some nights, this arugula asparagus flatbread is fresh, simple, and really pretty on the table.
Common Questions
Can I use whole wheat flour?
Yes, but start with replacing only 1 cup of the flour. Whole wheat absorbs more water, so you may need an extra tablespoon or two of water if the dough looks dry.
Why is my no knead bread dough so wet?
It is meant to be sticky. If it is like soup, measure your flour again and make sure you did not over pour the water. Different flours also absorb differently, so tiny adjustments are normal.
How long can it rise before it is too long?
At room temp, I try to keep it under about 18 to 20 hours. If you need longer, move it to the fridge after the first rise to slow it down.
Do I have to score the top?
No. Scoring can help control how it opens, but this loaf will still crack naturally in a pretty way. If you do score, use a sharp knife and do it quickly.
How do I keep the crust crispy after day one?
Reheat slices in a toaster or warm the whole loaf in a 350 F oven for about 10 minutes. That brings back the crunch.
A Little Push to Try It This Week
If you have been nervous about bread, no knead bread is the easiest confidence builder I know, and that crispy artisan crust is such a payoff for basically stirring and waiting. Keep it simple the first time, then play with flavors once you have your rhythm. If you want more inspiration, I have leaned on recipes like No Knead Bread Recipe (Easy + Homemade!) – Pinch of Yum and The BEST No Knead Bread Recipe! | Gimme Some Oven when I am comparing bake times or just craving more bread reading. Make a loaf, let it cool, and then tear off a warm piece and tell me you do not feel a little proud. You have totally got this.
Print
No Knead Bread
- Total Time: 10 hours
- Yield: 1 loaf 1x
Description
A simple, fuss-free no knead bread that yields a rustic, artisan-style loaf with a crispy crust and chewy interior, perfect for any night of the week.
Ingredients
Main Ingredients
- 3 cups all-purpose flour (Can also use bread flour for a chewier crumb.)
- 1.25 cups room temperature water (Not too hot to kill the yeast.)
- 1.25 teaspoons salt (Essential for flavor.)
- 0.25 teaspoon yeast (Active dry or instant yeast works.)
Instructions
Mixing and Rising
- Mix flour, salt, and yeast in a large bowl. Pour in water and stir until no dry flour remains.
- Cover the bowl with a lid, plastic wrap, or a damp towel, and let it sit for 12 to 18 hours at room temperature.
Shaping the Dough
- Flour your counter generously. Turn out the dough and fold it over itself a few times.
- Shape it into a round by tucking the edges under and let it rest for 30 to 60 minutes.
Preheating and Baking
- Preheat your Dutch oven at 450°F for at least 30 minutes.
- Carefully place the dough into the hot pot, cover, and bake for 30 minutes.
- Remove the lid and bake for an additional 12 to 18 minutes until deep golden brown.
Cooling
- Remove the bread from the pot and let it cool for at least 45 minutes before slicing.
Notes
If you don’t have a Dutch oven, you can use other steam-trapping methods such as a heavy oven-safe pot or by adding water to a tray in the oven. Ensure bread cools completely before storing to avoid moisture buildup.
- Prep Time: 10 minutes
- Cook Time: 42 minutes
- Category: bread, Snack
- Cuisine: American, Bakery
Nutrition
- Calories: 120
- Sodium: 200
- Fat: 0.5
- Carbohydrates: 24
- Fiber: 1
- Protein: 3

Related posts:
 Deliciously Simple Candied Orange Slices
 Decadent Hot Cross Bun Recipe
 Irresistibly Super Moist Chocolate Chip Banana Bread Recipe
 Crispy Air Fryer Churro Bites- Sweet & Simple
 Vegan Gluten-Free Lemon Sandwich Cookies with Lemon Curd (Easy Healthy Recipe)
 Easy Witches’ Fingers Cookies Recipe for Halloween





 Appetizers & Sides
 Main Dishes
 Drinks & Wellness
 Desserts & Baking