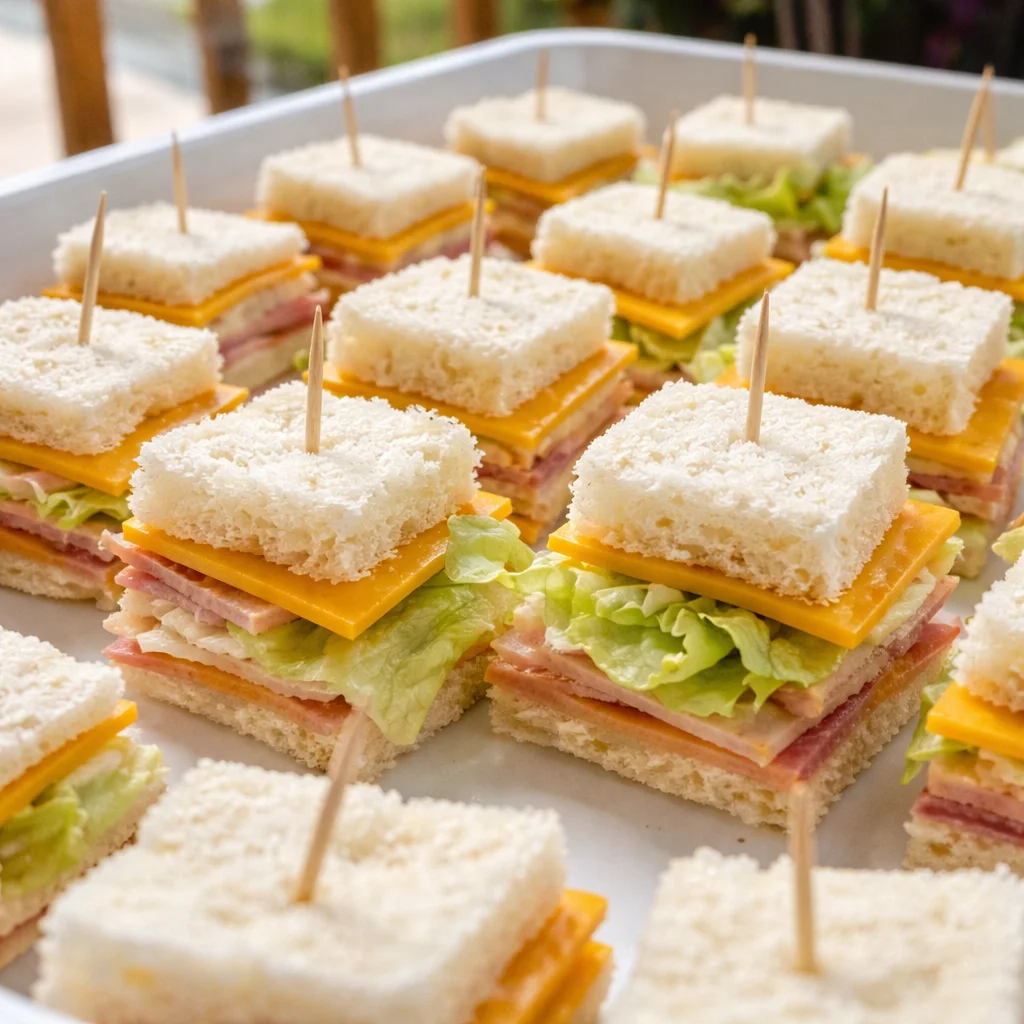
Salami and Cheddar Beach Snacks are my answer to that familiar summer problem: you want something filling at the beach, but you do not want a whole cooler full of messy food. I have tried the chips situation, the soggy sandwich situation, and the snack bar situation, and none of them hit quite right. These little salty, cheesy mini sandwiches are the one thing I can make fast, pack easily, and actually look forward to eating. They are simple, but they feel like a treat when you are sitting in the sun with sandy toes. Plus, they are super flexible, so you can make them your way without stressing it.
Ingredients You’ll Need for Salami and Cheddar Snacks
I like keeping the ingredient list short, mostly because beach day mornings can get chaotic. You really only need a few basics, then you can add extras if you feel like it.
- Salami (slices or a small stick you can slice yourself)
- Cheddar cheese (sliced or cut into small squares)
- Bread (small rolls, slider buns, or sturdy sandwich bread)
- Butter or mayo (optional, but it helps with flavor and texture)
- Crunch or tang like pickles, lettuce, or thin onion (optional)
If you want a warm, cozy side for a non beach day version of this snack, I am obsessed with anything cheddar based like broccoli cheddar soup. Not beach food, but a great pairing at home when you are craving the same flavors.
Best Salami, Cheddar, and Bread Options
Best Salami, Cheddar, and Bread Options
Let us talk about the choices that make these snacks taste extra good. Salami can be mild, peppery, smoky, or garlicky, and they all work. I usually grab a medium thickness slice so it does not tear when I bite in.
For cheddar, I like sharp cheddar because the flavor actually stands up to the salami. Mild cheddar is fine, but it can disappear a bit next to a bold salami. If you can, buy a block and slice it yourself. It tastes fresher and you can control the thickness.
Bread matters more than people think. The beach is not kind to delicate bread. I usually go with slider buns, mini ciabatta rolls, or even sturdy sandwich bread cut into small squares. Soft white bread can get squished and sad. If you are doing a long drive, pick bread that holds up.
When I want a heartier snack day, I sometimes plan a full picnic vibe with something like black beans and rice with sausage later at home. Similar salty comfort, just in dinner form.
Optional Add-Ins: Lettuce, Mayo, Hummus, and More
Optional Add-Ins: Lettuce, Mayo, Hummus, and More
This is where you can make Salami and Cheddar Beach Snacks feel like your personal thing. The add ins are not required, but they can take these from simple to seriously snackable.
Here are the ones I use most:
Lettuce is nice if you are eating right away. If you are packing for hours, it can wilt, so I usually skip it for long beach days.
Mayo makes it richer and helps the bread stay soft. Just do not overdo it, because too much can make the bread slide around.
Hummus is my favorite swap when I want something creamy without mayo. It also adds a little protein and keeps the snack from feeling too heavy.
Pickles or banana peppers give you that tangy bite that cuts through the cheese. I pat them dry first so they do not soak the bread.
Mustard is a classic with salami. If you like a little kick, spicy brown mustard is perfect.
And if you are a sweet and salty person, I will say it: toss a little treat into the cooler too. Something like bunny bait snack mix is fun year round, not just for holidays.
Step-by-Step Instructions to Make Salami and Cheddar Snacks
This is my no fuss method. It is fast, and it keeps the mini sandwiches from turning into a messy pile in your container.
1. Choose your bread size. If you are using slider buns, great, you are already there. If you are using regular bread, cut it into quarters so each piece is handheld.
2. Add a thin spread. A light layer of butter, mayo, hummus, or mustard gives flavor and also acts like a little moisture barrier.
3. Layer salami first. I usually fold the slices once so you get some texture and it looks nice. Two to three slices per mini sandwich is my sweet spot.
4. Add cheddar. Use one slice folded, or a couple small squares. Do not make it too thick or it will feel awkward to bite.
5. Add any extras. If you are using pickles or peppers, pat them dry first. If you are using lettuce, add it only if you will eat within an hour or two.
6. Close and press gently. I lightly press each one so it holds together.
7. Pack tight. Put them in a container so they do not slide around. If you have gaps, fill them with a napkin or parchment so everything stays neat.
Tips for Making Perfect Mini Sandwiches Every Time
I have made these enough times to learn what actually helps, especially when you are packing them for a hot day.
Keep it dry. Moisture is the enemy of beach sandwiches. If you are adding anything juicy like tomatoes or pickles, dry them off first.
Slice cheese a bit thicker than you think. Thin cheese disappears. A slightly thicker slice gives you that real cheddar bite.
Do not overstuff. Mini sandwiches are cute until they fall apart. Keep them simple and sturdy.
Use a cooler pack. Even if it is a small one. Salami is fairly durable, but cheese still needs to stay cool to taste its best and stay safe.
Bring napkins. This sounds obvious, but salty fingers and sunscreen hands are a real thing. Future you will be grateful.
Creative Variations of Salami and Cheddar Snacks
If you get hooked on these, you will probably start riffing on them, and you should. Here are a few versions I rotate through depending on my mood.
Italian picnic style: salami, sharp cheddar, a little mustard, and a few arugula leaves if you are eating soon.
Spicy version: salami, cheddar, spicy mayo, and a couple banana pepper rings.
Crunchy version: add thin cucumber slices, but only if you pat them dry and eat within a couple hours.
Snack box version: skip the bread and pack salami and cheddar cubes with crackers. It is still the same idea, just more snacky.
Sometimes I turn beach day into a whole theme and make something bold for later, like a spicy tuna salad sandwich for whoever wants a second option. Not everyone is team salami, apparently.
Pairing Ideas: Drinks, Sides, and Appetizers
Salami and cheddar are salty and rich, so I like pairing them with things that feel fresh or crisp.
Drinks: sparkling water with lemon, iced tea, or a simple lemonade. If you are doing something for adults later, keep it light and citrusy.
Sides: grapes, apple slices, baby carrots, or a bag of kettle chips. Fruit is honestly the best here because it balances the salt.
Appetizer vibes: if you are at a beach house or you are feeding a group, add a simple dip and some crunchy stuff to scoop. I also like browsing ideas in appetizers and sides when I want to round out the spread without overthinking it.
How to Make Your Snacks Portable for Beach and Picnic Days
This part is everything. You can make the best mini sandwiches in the world, but if they get warm and smashed, the magic is gone.
Use a flat container. I like a wide, shallow container so the sandwiches stay in one layer. If you must stack, separate layers with parchment.
Wrap smart. If you are packing them individually, use parchment paper or sandwich paper. Foil works too, but parchment keeps the bread from getting sweaty.
Pack a tiny knife. Not for cutting, just for spreading if you bring condiments separately. It makes everything easier and cleaner.
Keep cold items together. Put the snacks right next to the ice pack in the cooler, not in the warm outer pocket of a bag.
Do a quick food safety check. If the day is super hot, try not to let the snacks sit out for hours. Keep them in the cooler and pull out a few at a time.
Storage Tips: Keep Salami and Cheddar Snacks Fresh
If you want to make these ahead, you totally can. I do it all the time, especially before early morning plans.
Fridge: Store the assembled mini sandwiches in an airtight container for up to 24 hours for the best texture. They are still okay the next day, but the bread can start to dry out.
Keep wet ingredients separate: If you know you are making them far ahead, pack pickles, tomatoes, or lettuce separately and add them right before eating.
Cheese and salami only prep: Sometimes I pre slice everything and pack it like a build your own kit. Then everyone makes their own at the beach, which is weirdly fun.
Freezing: I do not recommend freezing assembled Salami and Cheddar Beach Snacks. The bread gets odd, and the cheese texture changes. If you need to prep way ahead, just prep the ingredients.
Common Questions
Can I make Salami and Cheddar Beach Snacks the night before?
Yes. Keep them in a tight container in the fridge. If you are adding lettuce or anything juicy, add it right before you leave.
What is the best cheddar to use?
Sharp cheddar is my favorite because it stands out next to the salami. Medium works too if that is what you have.
How do I stop the bread from getting soggy?
Use a thin spread like butter or mayo as a barrier, and pat dry any pickles or peppers. Also avoid tomatoes unless you add them at the last minute.
Are these okay without a cooler?
I would still bring a small ice pack if you can. If you cannot, keep them in the shade and eat them fairly soon, especially on a hot day.
Can I make these gluten free?
Definitely. Use your favorite gluten free rolls or crackers and turn it into a snack box.
A Little Beach Day Send Off
If you try these Salami and Cheddar Beach Snacks, you will see why I keep coming back to them every summer. They are quick to make, easy to pack, and they actually feel satisfying when you are hungry after swimming. Keep the ingredients simple, keep things cool, and do not skip the little tricks that prevent sogginess. And if you want another take and extra ideas, I like checking out Salami and Cheddar Beach Snacks – The Tipsy Housewife for more inspiration. Now go enjoy your beach day, and may your snacks stay cool and your sandwiches stay intact.
Print
Salami and Cheddar Beach Snacks
- Total Time: 10 minutes
- Yield: 4 servings
Description
These salty, cheesy mini sandwiches are perfect for beach days, easy to make, pack, and enjoy in the sun.
Ingredients
Main Ingredients
- 8 slices Salami (Mild, peppery, smoky, or garlicky options work well.)
- 8 slices Cheddar cheese (Sharp cheddar is recommended for flavor.)
- 4 rolls Small rolls or slider buns (Use sturdy bread that holds up in the heat.)
- 2 tablespoons Butter or mayo (Optional, for extra flavor and moisture.)
Optional Add-Ins
- Pickles or thin onion (Adds a crunchy or tangy bite.)
- Lettuce (Best if eaten immediately.)
- Mustard (Spicy brown mustard adds a kick.)
- Hummus (A creamy alternative to mayo.)
Instructions
Preparation
- Choose your bread size. Cut regular bread into quarters if not using slider buns.
- Spread a thin layer of butter, mayo, hummus, or mustard on the bread.
- Layer salami first, folding slices for texture and appearance.
- Add cheddar cheese, using one folded slice or a few small squares.
- If using, add any extras like pickles or lettuce.
- Gently close and press each sandwich.
- Pack in a container, filling gaps with napkins or parchment paper.
Notes
Keep sandwiches dry to avoid sogginess. Use thicker cheese slices for a better bite. Always keep cold items together.
- Prep Time: 10 minutes
- Category: Appetizer, Snack
- Cuisine: American


 Main Dishes
 Drinks & Wellness