The kitchen looked warm. A thin strip of sun hit the flour jar and made the top look like little hills. I had a bubbly jar of starter on the counter and the idea felt right. That first sticky pull between my fingers. The soft slump of dough. Quiet, simple work.
I tried a Beginners Sourdough Bread Recipe: High Starter Method once and I kept coming back to it. It is honest bread. Big flavor from a short list of things. No fancy gear, just patience and a few stretches. If you like watching dough change under your hands, this will do that for you.
I also like to tinker. If you want something soft and garlicky later, there is a great sourdough garlic bread recipe that I link to when I want to jazz this loaf up. It is an easy follow-up.
Why This Dish Caught My Eye
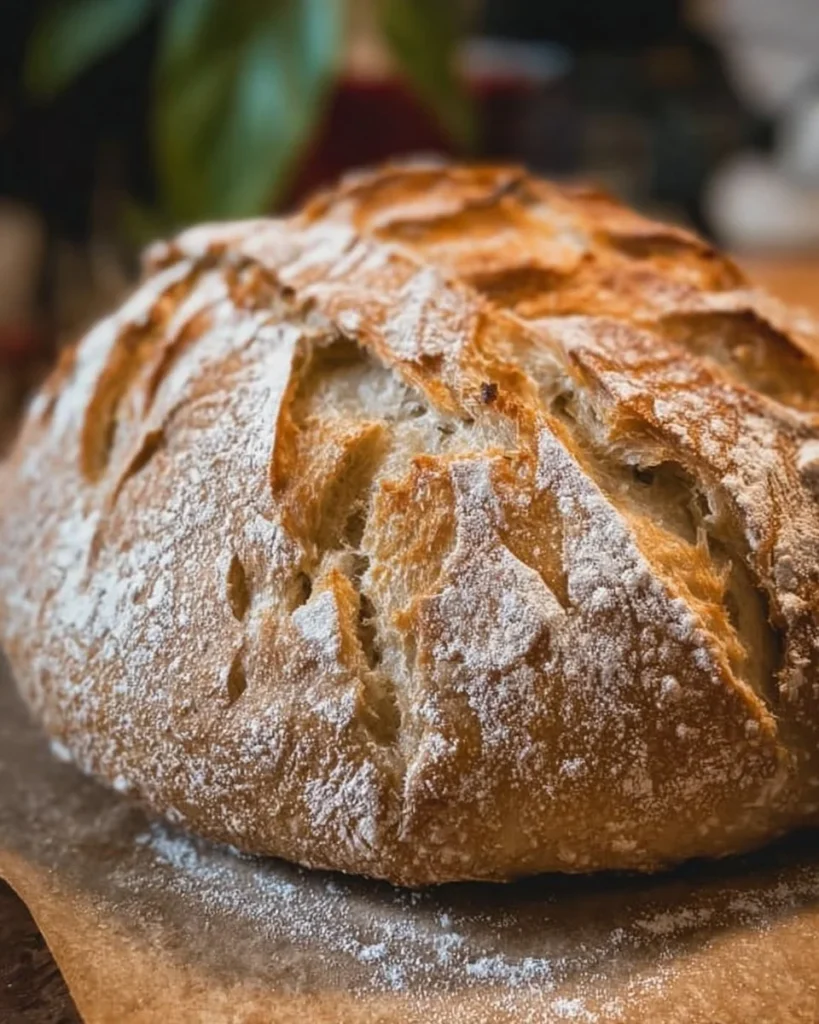
The crust caught my eye first. A golden, almost caramelly color with a few pale flakes where the dough split. Then the crumb big open bubbles and a chew that feels good. Texture and contrast. Shiny inside, dry and crisp outside. I love the way a scored loaf looks like a little map.
There is also a softness to the method. It asks for hands, not machines. The dough moves slowly. You can watch it wake up. And yes, this part matters.
How the Recipe Unfolds
No pressure. You feed your starter, wait until it sings, then mix and rest. The steps are long but relaxed. You make a shaggy dough, rest, then do a few rounds of stretch and fold. Each set makes the dough quieter, smoother. You shape, chill overnight, and bake in a hot covered pot. The lid steams the dough at first and then you uncover for a bronzed finish.
Most days the whole thing feels like taking care of something soft. There are no tight rules about exact timing. Temperature nudges things. Warmer rooms speed it up. Cooler rooms slow it down. Trust your eyes and your hands.
Ingredients to Have Ready In Your Kitchen
- 2 cups active sourdough starter (400 g), active and bubbly, made from equal parts flour and water;
- 3 cups sifted all-purpose flour (360 g);
- 1 cup warm water (240 g);
- 1½ teaspoons salt (about 9 g).
Bringing this Bread Together With Easy Steps
- In a large mixing bowl (not metal), add 2 cups (400 g) of 100% hydration active sourdough starter. For an active starter, feed it and keep it out of the fridge for at least 4 hours or overnight until bubbly. Add 1 cup warm water and whisk until well combined with the starter. Add 3 cups sifted all-purpose flour (sift or fluff the flour before measuring so it isn’t too compact) and 1½ teaspoons salt (Himalayan pink salt works well). Mix with a large spoon until a wet, biscuit-like dough forms.
- Cover the shaggy dough with a clean damp kitchen towel and let it rest in a warm place for 2 hours, or in a warm oven (about 80°F / 27°C) for about 1 hour.
- First stretch and fold: Uncover the dough. With wet hands, pick up one side of the dough and fold it over the other side. Turn the bowl 90 degrees and repeat 4–6 times, stretching and folding all sides of the dough.
- Cover with a clean towel or plastic wrap and let the dough rise for about 45 minutes, or until doubled in size.
- Second stretch and fold: Uncover the dough, wet your hands, and repeat the stretch-and-fold process 4–6 times while rotating the bowl. The dough will start to feel more bread-like.
- Cover again and let the dough rise until doubled.
- Third stretch and fold: Repeat the same stretch-and-fold process 4–6 times. The dough will feel smoother and stronger.
- Cover and let the dough rise again until doubled.
- Fourth stretch and fold: Repeat the stretch-and-fold process one last time. The dough should now be fluffy and elastic.
- Shape the dough into a round loaf. Dust a towel or proofing basket generously with flour and place the dough inside. Dust the top lightly with flour and cover with a clean towel.
- Place the dough in the refrigerator and let it chill and rise for 4–8 hours.
- Preheat the oven to 400°F (200°C) and place your Dutch oven inside so it heats up as well.
- Cut a 2-foot piece of parchment paper and place it on your counter. Gently turn the chilled dough onto the parchment paper.
- Using a very sharp knife or razor, score a design into the top of the dough.
- Carefully remove the hot Dutch oven from the oven. Lift the dough into the Dutch oven using the parchment paper (it’s fine if the parchment hangs over the sides) and place the lid on.
- Bake at 400°F (200°C) for 25 minutes with the lid on. Remove the lid and bake for another 25 minutes until golden brown.
- Let the bread cool before slicing, then enjoy.
Serving Ideas That Feel Natural and Flexible
Tear the loaf warm. A little butter melts into the holes. Or toast thick slices and rub with garlic. A simple bowl of olive oil and flaky salt makes everyone happy. For a meal, slice and serve with roasted vegetables or a simple soup.
If you want to use this loaf for something playful and sticky, try a sweet pull-apart next time. I followed a similar idea when I made a sourdough monkey bread and it was a hit.
Keeping Leftovers for Later
Cool the loaf fully before you cover it. If you wrap a warm loaf you get steam and soft crusts. I like to keep a loaf in a cloth bag for one to two days. For longer storage, slice and freeze. Toast straight from frozen. It wakes up nicely.
If the crust goes soft, a short blast in a 350 degree oven for 5 to 10 minutes brings back the crust.
Small Details That Matter and Tips That Help
Salt matters. It tones the flavor and tightens the dough slightly. Use about 1.5 teaspoons as written. I often use Himalayan salt because it looks pretty on the counter. Tiny visual thing. Tiny difference.
Wet hands really help with stretch and folds. I learned this the hard way. Dry hands grab the dough and leave you with a mess. Wet hands let the dough slide.
Use a very sharp knife or razor to score. If your blade drags, the dough will tear. A clean cut gives a nicer rise. Also, scoring is a bit like drawing you can make it pretty, but a quick slash works fine.
If your starter isn’t lively, give it two feedings before you bake. If it is lively, bake. Trust it.
I sometimes use the extra time while the dough chills to start a simple side, like this 2-ingredient cottage cheese flatbread. It pairs well for a casual lunch.
Prep Tips That Help Saving Time
Feed your starter the night before. Put the jar where it will get a little warmth and cover it loosely. In the morning it will be bubbly and ready.
Measure flour by spooning and then leveling. Sifting helps avoid compacted flour. You will get a more consistent dough.
Do your first mixing in a plastic or glass bowl. Metal can feel colder to the hands. The recipe says not to use metal for a reason it feels better in a warm bowl.
If you are short on time, you can shorten the fridge rest to 4 hours. The loaf still improves with the chill but will be slightly less developed.
5 Easy Variations You Can Try Right Now
- Olive and rosemary: Press a handful of chopped olives and a sprinkle of rosemary into the top before chilling.
- Sesame crust: Brush the dough lightly with water and press sesame seeds onto the top before baking.
- Cheesy twist: Fold grated hard cheese into the dough during the second stretch and fold. Small pockets of flavor.
- Sweet cinnamon: After shaping, lightly brush with melted butter and dust with cinnamon sugar before chilling. Slightly different texture.
- Seeded mix: Add a tablespoon of sunflower and pumpkin seeds to the dough. It changes the crunch and makes each bite more interesting.
Choosing the Right Pan or Dish
A heavy Dutch oven works best. The weight traps steam and gives you that glossy, blistered crust. Use a light-colored pot if you want an even crust color. Darker pots brown faster. If you don’t have a Dutch oven, an oven-safe pot with a lid or a deep rimmed baking dish covered with a metal bowl will work in a pinch.
Size matters. Use a pot that fits the dough but leaves enough room to lift it out on parchment. If the pot is too small the loaf will stick to the lid. If it is too big the crust can spread thin.
If you bake on a baking stone instead, introduce steam by placing a pan with hot water below the stone for the first 10 minutes.
For an easy dinner that goes well with this bread, try serving it with roasted chicken thighs. I often think of this loaf when I pull a baked chicken thighs recipe from the oven.
Questions That Come Up
How active should my starter be?
It should double and look bubbly within a few hours of feeding. If it smells bright and yeasty, it is likely ready.
Can I use whole wheat flour?
You can replace part of the flour with whole wheat but expect a denser crumb. Try 25 percent whole wheat to start.
What if my dough never doubles?
Check warmth. Cooler kitchens slow fermentation. Try a warm oven or a warm spot. Also check your starter strength.
Do I need a Dutch oven?
No, but a heavy lidded pot gives the best rise and crust. Alternatives work but results vary.
Can I bake this same day without refrigerating?
Yes. You can let it proof at room temperature until doubled. The flavor will be less developed but still good.
A Thought Before You Go
There is something quiet about watching dough change under the light. It gets smoother. It breathes. You get to touch it and then wait. Little actions. Little rewards. If you bake a loaf today, notice the crack along the score. Notice the crumbs when you tear a slice. It feels good.
For more gentle, step-by-step guidance I liked the clear photos and calm voice in Beginner’s Sourdough Bread (With Video) | The Perfect Loaf when I wanted to see each stage. If you want another simple primer with tips for starters and feeding, I found Sourdough Bread: A Beginner’s Guide – The Clever Carrot helpful.
Print
Beginners Sourdough Bread
- Total Time: 2 hours 50 minutes
- Yield: 8 servings
Description
A simple yet flavorful sourdough bread made with active starter, water, flour, and salt, perfect for those who enjoy hands-on baking.
Ingredients
Bread Ingredients
- 2 cups Active Sourdough Starter (400 grams) (active and bubbly, made from equal parts flour and water)
- 3 cups Sifted All-Purpose Flour (360 grams) (Sift or fluff your flour before measuring)
- 1 cup Warm Water (240 grams)
- 1.5 teaspoons Salt (≈9 grams) (Himalayan Pink Salt is recommended)
Instructions
Preparation
- In a large mixing bowl (not metal), add 2 cups (400 grams) of active sourdough starter.
- Add 1 cup warm water and whisk till well combined with the starter.
- Add 3 cups sifted flour and 1.5 teaspoons salt.
- Use a large spoon to mix ingredients together into a wet, biscuit-like dough.
- Cover the shaggy dough with a clean damp kitchen towel and let it rest in a warm place for 2 hours.
Stretch and Fold
- After 2 hours of rising, uncover the dough and wet your hands, then pick up one side of the dough and fold it in half.
- Turn the bowl 90 degrees and repeat 4-6 times on all sides.
- Cover with a clean towel and let rise for about 45 minutes or until doubled.
Shaping
- Uncover the dough, wet your hands, and perform a second stretch and fold as before.
- Cover with a clean towel and let the dough rise till doubled again.
- Repeat the stretch and fold process for a total of four times, allowing dough to rise between each stretch.
- Once the dough is fluffy, shape it into a round loaf.
- Place in a dusted proofing basket, cover with a clean towel, and refrigerate for 4-8 hours.
Baking
- Preheat the oven to 400 degrees F and place a Dutch oven inside to preheat as well.
- Cut a 2-foot section of parchment and place it on the counter.
- Turn out the chilled sourdough ball onto the parchment paper and score the top with a sharp knife.
- Carefully place the dough into the hot Dutch oven using the parchment paper.
- Bake covered for 25 minutes, then remove the lid and bake for an additional 25 minutes.
- Let cool and enjoy!
Notes
For a softer version, consider making sourdough garlic bread. Store leftovers wrapped in cloth for 1-2 days or freeze slices. Recrisp crust in a 350-degree oven for 5-10 minutes.
- Prep Time: 2 hours
- Cook Time: 50 minutes
- Category: bread, Snack
- Cuisine: American, Baking
Related posts:
 The best Healthy snack! Frozen Grapes
 Strawberry Crunch Cheesecake Tacos
 Strawberry Kiss Cookies: Cute Valentine’s Day Cookies Everyone Loves
 Crack Chicken Sliders on Hawaiian Rolls – Easy Game Day Sandwiches
 Crispy Buffalo Wings Recipe, Easy Homemade Wings with Classic Buffalo Sauce
 Honey Curry Roasted Cauliflower

 Main Dishes
 Drinks & Wellness