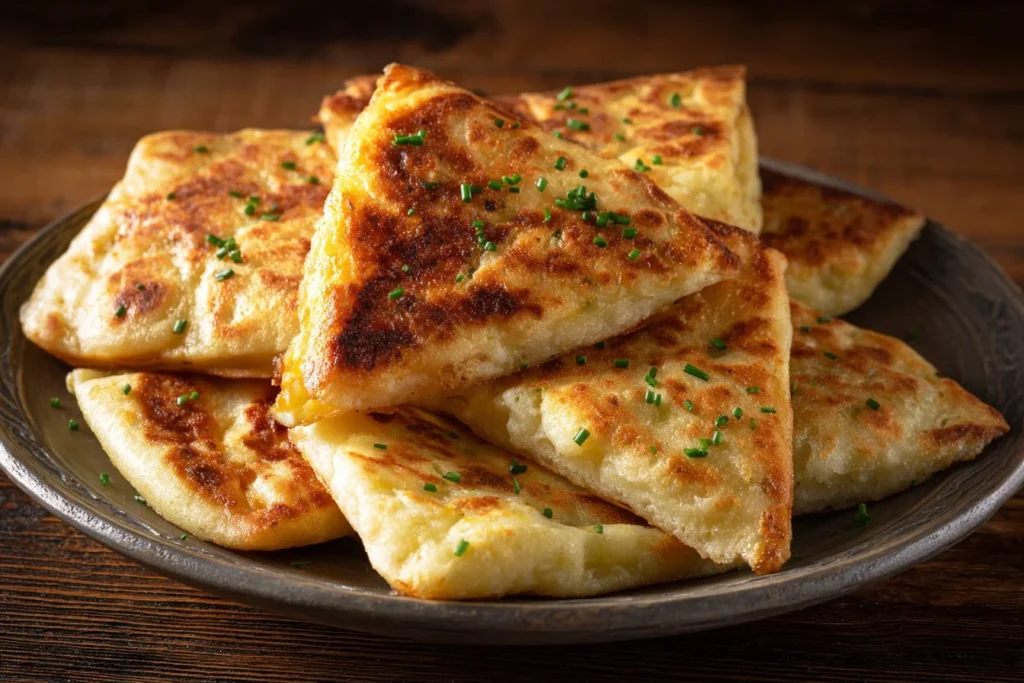
The light that morning hit the countertop warm and low. I had a pan on the stove and two spare potatoes, so I made Irish Potato Farls without thinking too hard. The edges crisp first. The centers stay soft. That contrast gold and pale, crunchy and pillowy, felt like the whole point.
Potatoes are honest. They take butter well. They forgive mistakes. If you want something to come together while you sip coffee, this is it. I sometimes pair these with a bowl of simple potato soup when the house wants comfort in two textures.
How the Recipe Unfolds
This is calm, not loud. You boil, you mash, you mix, you press into discs. Then you cook until the outside goes golden. That’s the whole arc.
No need for a dozen bowls. I like that. It frees up the hands to notice small things, the way the mashed potato looks satin under the light, the tiny flour flecks on your fingers. And yes, this part matters.
Take it slow if you can. Or hurry if you must. Either way, the result rewards patience.
Ingredients to Have Ready
2 large potatoes, 1 cup all-purpose flour, 1 teaspoon baking powder, Salt to taste, Butter for frying
Lay them out. Let the butter sit within reach. Little rituals make the cooking feel lived-in.
Bringing This Dish Together With Easy Steps
- Boil the potatoes until tender, then drain and let cool.
- Peel the potatoes and mash them in a bowl.
- Mix in the flour, baking powder, and salt until a dough forms.
- Divide the dough into portions and roll each into a circle about 1/2 inch thick.
- Cut each circle into quarters.
- Heat butter in a skillet over medium heat and fry the farls for about 3-4 minutes on each side until golden brown.
- Serve warm with eggs, bacon, or butter.
Follow the steps in order and the rhythm will show you what to do next. No strict timing beyond the fry time. Watch for color. That’s the cue.
Serving Ideas That Feel Natural and Flexible
Keep it simple. Butter and salt finish them well. Crispy edges meet soft middles, so pair these with something runny or smoky.
- Sunny-side eggs. The yolk spills into the soft potato.
- Crispy bacon. For balance.
- Sharp cheddar. Grated on hot farls, it melts into little pockets.
- Smoked salmon and a smear of sour cream for a lighter note.
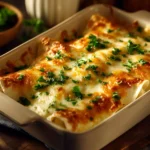
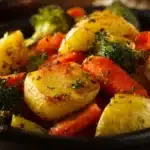
If you want a bowl, a side of roasted vegetables or one of my favorite winter soups works too. Try a contrasting bowl like a sweet potato burger bowl for a lunch that feels grassy and bright. Keep it loose. No need for fuss.
Keeping Leftovers for Later
These keep well. Cool them first. Stack them with parchment between layers so they don’t stick.
Store in an airtight container in the fridge for up to 3 days. Reheat in a skillet over medium heat to regain crispness. The microwave makes them gummy. I’ve done it. Don’t do it unless you must.
Want to freeze? Flash-fry for a minute per side, cool, then freeze in a single layer. Transfer to a bag once solid. Reheat straight from frozen in a hot pan. It works pretty well. If you’re making soups to go with them, a bowl like butternut squash and sweet potato soup pairs beautifully.
Small Details That Matter and Tips That Help
Salt the mash while it’s still warm. It’s simple but it brightens everything. Use a fork or ricer for a slightly smoother mash. I use a fork most days because it feels homey.
Don’t overwork the dough. Mix until it comes together. If you over-knead, the farls can feel heavy. Light and tender is the goal.
Butter in the pan gives color and a nutty taste. Clarified butter works if you like a higher smoke point. If you want seasoning, a pinch of black pepper or a shower of chopped chives after cooking lifts the flavor.
For a crispier edge, press the farls down gently with a spatula while frying. And yes, flipping only once helps them develop a better crust.
I once rushed the cooling step. They fell apart. Learn from me.
For a little twist, stir a spoonful of finely chopped onion or cooked bacon into the mash before shaping.
If you want something bolder, pair with a peppery soup like a Cajun potato soup. The spice cuts through the butter.
Prep Tips That Help
Set up a small assembly line. Potatoes, butter, flour, bowl. Keep your workspace clear so you can press and cut without fuss.
Boil with the skins on for less water absorption. It saves a step and keeps the mash dryer. Cool enough to handle before peeling. Warm potatoes mash easier. If they steam themselves in a towel for a minute, the texture improves.
Measure the flour into a bowl and sprinkle a bit over your hands when shaping if the dough sticks. A light dusting does the trick.
Easy Variations You Can Try
- Add a handful of grated cheddar to the mash for cheesy farls.
- Fold in chopped herbs parsley or chives for fresh green flecks.
- Replace some flour with oats for a rustic texture (start small).
- Make smaller rounds for snack-sized pieces.
Simple switches keep the method the same. That’s the point. Keep it easy.
Choosing the Right Pan or Dish
A heavy skillet matters. Cast iron gives the best brown. It holds heat and makes the crust even. Nonstick works for a softer crust. Stainless steel needs a little more butter and attention to avoid sticking.
Size matters too. A wide pan lets you cook several farls at once. But don’t crowd the pan. Give them room to breathe so they brown, not steam.
Color of the pan: a dark pan shows color better. You notice the golden edges more against it. Little sensory things like that make the cooking feel alive.
Questions That Come Up
Q: Can I use mashed potatoes from a different recipe?
A: Yes. As long as they aren’t too wet. If they have lots of butter or milk, add a touch more flour. Trust your hands.
Q: Can I make them gluten-free?
A: Substitute a 1:1 gluten-free flour blend and test the dough. Texture will change a bit but it can work.
Q: Do they need baking powder?
A: The baking powder adds a very light lift. Skip it and they’ll still be good denser, though.
Q: How thin should I roll them?
A: About 1/2 inch thick. That gives a soft center and crisp edge. Thinner means crispier overall.
Q: Can I bake them instead of frying?
A: Yes. Brush with butter and bake at 400°F until golden. They’ll be less crisp than a pan fry.
Q: Are they suitable for breakfast only?
A: Not at all. They work for dinner with a stew or a simple salad. Versatile is the word here.
A Thought Before You Go
The thing I love about this is how forgiving it is. A dough that isn’t perfect still makes something warm and lovely. The butter, the crunch, the way a fork sinks into the center those are small, quiet moments.
If you make these, notice the light on your counter. Take a breath. Let the edges get golden. Then eat.
If you want a classic, trusted reference while you cook, I like this Authentic Irish Potato Farls Recipe – – Bigger Bolder Baking.
Print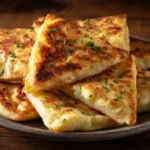
Irish Potato Farls
- Total Time: 23 minutes
- Yield: 4 pieces
Description
A comforting and easy recipe for Irish Potato Farls featuring crispy edges and soft centers, perfect for pairing with breakfast or dinner.
Ingredients
Main Ingredients
- 2 large large potatoes (Boiled until tender)
- 1 cup all-purpose flour (Plus more for dusting if needed)
- 1 teaspoon baking powder (For lightness)
- to taste Salt (Adds flavor)
- as needed Butter (For frying)
Instructions
Preparation
- Boil the potatoes until tender, then drain and let cool.
- Peel the potatoes and mash them in a bowl.
- Mix in the flour, baking powder, and salt until a dough forms.
- Divide the dough into portions and roll each into a circle about 1/2 inch thick.
- Cut each circle into quarters.
Cooking
- Heat butter in a skillet over medium heat and fry the farls for about 3-4 minutes on each side until golden brown.
- Serve warm with eggs, bacon, or butter.
Notes
Cool leftovers and stack with parchment between layers for storage. Reheat in a skillet for best results. Can also be frozen for later use.
- Prep Time: 15 minutes
- Cook Time: 8 minutes
- Category: Breakfast, Side, Snack
- Cuisine: Irish


 Main Dishes
 Drinks & Wellness