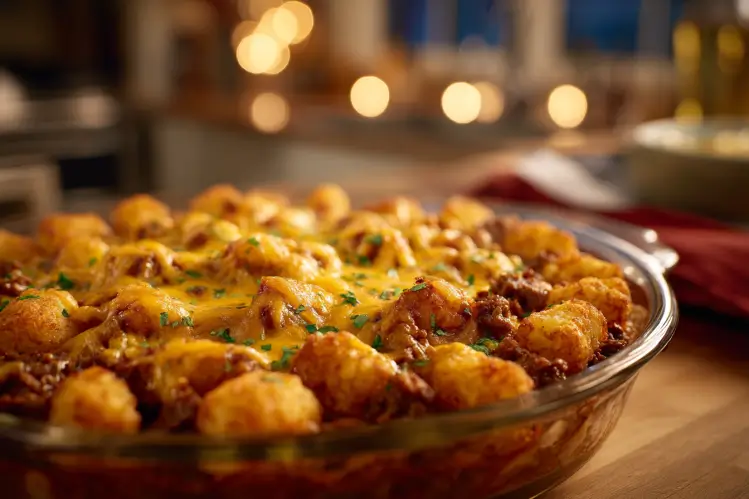
Chili Cheese Tater Tot Casserole is the kind of dinner that solves weeknight hunger without drama. Picture a bubbling pan of hearty chili, melty cheese, and a golden blanket of crispy tots. It’s budget friendly, kid approved, and the leftovers taste amazing. If you’ve ever wished dinner could be both easy and a little nostalgic, this is it. I’ve made different versions over the years, but this one hits that cozy, crowd pleasing sweet spot. Pull out a 9×13 dish, crank up the oven, and let’s make something delicious together.
Essential Ingredients for the Best Chili Cheese Tater Tot Bake
Pantry and Protein Essentials
- Ground beef or turkey: 1 to 1.25 pounds. Choose 85 to 90 percent lean for the best balance of flavor and minimal grease.
- Onion and garlic: Adds real depth to the chili base.
- Canned tomatoes: Diced or crushed for saucy texture.
- Tomato paste: Concentrated richness that helps the chili cling to the tots.
- Beans: Kidney, pinto, or black beans. Use what you love.
- Chili powder, cumin, smoked paprika: Your flavor backbone.
- Salt and pepper: Taste and adjust at the end.
Fresh Toppers and Finishing Touches
- Frozen tater tots: Keep them frozen until the moment they go on the casserole.
- Cheese: Sharp cheddar for classic tang, pepper jack for a kick, or a blend.
- Green onions, jalapeños, sour cream, cilantro: For a fresh, bright finish.
Pro tip: If your chili looks very watery, simmer it uncovered for a few minutes to reduce. A thicker chili keeps the bottom from turning soggy.
Choosing Your Base: Homemade vs. Canned Chili for a 50-Minute Meal
Homemade Chili Base
If you have 15 extra minutes, browning meat with onion and stirring in spices makes a huge difference. You control the salt, spice, and thickness. I like a quick simmer with tomatoes and beans until it’s thick enough to coat a spoon. That texture is key for a sturdy layer under your tots.
Canned Chili Shortcut
Want a 50 minute total cook? Use canned chili. Choose a thicker brand, and if it seems runny, stir in a spoonful of tomato paste or a handful of cheese to tighten it up. Taste it before baking and tweak with a little chili powder or cumin so it tastes like your kitchen, not a can.
Either way, the goal is hearty and scoopable, not soupy. That’s the foundation of a successful Chili Cheese Tater Tot Casserole.
How to Get the Crispiest Tater Tots: Pro Tips for Golden Perfection
Keep tots frozen until you need them. Hot oven meets cold tots equals steam release and crisp edges. Spread them in a single, tight layer so they brown evenly. If you want extra crunch, prebake the tots on a sheet pan for 10 minutes while your chili simmers, then transfer to the casserole for the final bake. A quick broil at the end, just 1 to 2 minutes, makes them restaurant level crispy. If your oven has convection, use it for the last 10 minutes.
Bonus: Place the casserole on a preheated baking sheet. It helps the bottom stay hot, which keeps the chili from making the tot layer soggy.
Step-by-Step Instructions for Assembling Your Chili Tot Casserole
Preheat the oven to 400°F. If making homemade chili, brown your meat with onion and garlic, then stir in spices, tomatoes, and beans. Simmer until thick. Lightly grease a 9×13 dish or a large cast iron skillet. Spread the chili in an even layer. Sprinkle a thin layer of cheese over the chili; this acts like edible glue for the tots. Arrange frozen tater tots on top, tight and neat. Bake for 35 to 40 minutes until the tots are deep golden. Add a final handful of cheese during the last 5 minutes so it melts into the nooks. Let it rest for 5 minutes before topping and serving.
Best Cheese Blends: From Sharp Cheddar to Spicy Pepper Jack
Sharp cheddar gives the classic diner vibe and stands up well to chili spice. Monterey jack melts silky and smooth. Pepper jack brings a little heat that wakes up the whole pan. Colby jack is mellow and stretchy. For a craveable blend, use two parts sharp cheddar to one part pepper jack. If you’re sensitive to spice, stick with cheddar and Monterey jack mixed together.
Tip: Shred your own cheese if you can. Pre-shredded is convenient, but the anti-caking powder can keep it from melting as beautifully.
Flavorful Variations: Lean Turkey, Vegetarian, and Chili Dog Styles
Leaner dinners still taste amazing here. Ground turkey keeps things light but satisfying. Vegetarian friends love a two bean version with black and pinto beans, plus a handful of corn for sweetness. And if your house loves ballpark flavors, try chili dog style: stir sliced hot dogs into the chili and finish the baked casserole with mustard drizzle and chopped onions. It’s playful and perfect for game night.
The Loaded Experience: Best Toppings Like Jalapeños and Sour Cream
Go big on toppings and let everyone make their own plate. I set out sliced jalapeños, sour cream, green onions, cilantro, and diced avocado. A quick squeeze of lime brightens it all up. If you like crunch, crush a few tortilla chips or corn chips on top. Hot sauce on the table is always a good idea, too.
One-Pan Magic: Using a Cast Iron Skillet vs. 9×13 Baking Dish
Cast iron holds heat like a champ. If you assemble and bake in a big skillet, the edges get extra caramelized and the bottom stays hot, which protects your crunch. A 9×13 dish is perfect for larger families and easy serving, especially if you’re bringing the casserole to a potluck. Both work; just remember to grease the pan and watch for browning in the last few minutes.
If you like this skillet style comfort, you might also enjoy my favorite cozy dinner buddy, the French Onion Chicken Orzo Casserole. It has the same warm, baked happiness, just with a different twist.
Make-Ahead and Freezer-Friendly Tips for Busy Weeknights
Assemble in the morning and refrigerate, covered, up to 24 hours. Add 5 to 10 minutes to the bake time if going straight from fridge to oven. For the freezer, assemble without the fresh toppings. Wrap tightly in plastic, then foil, and freeze up to 2 months. Bake from frozen at 375°F, covered for 45 minutes, then uncover and bake 20 to 30 minutes more until hot and bubbly. Add cheese during the last 5 to 10 minutes. Let rest before topping so it slices cleaner.
Reheating Guide: Keeping Tots Crunchy the Next Day
For best results, reheat slices in a 375°F oven for 10 to 15 minutes. Air fryer works great at 350°F for 6 to 8 minutes. If you must microwave, heat a serving until warm, then pop it in a hot skillet or air fryer for a few minutes to revive the crisp. Store leftovers in an airtight container up to 3 days. Heat to 165°F in the center for food safety.
Pairing Suggestions: What to Serve with Chili Cheese Casseroles
This is a full meal, but a fresh side balances the richness. A crunchy slaw with lime dressing, simple green salad, or corn and tomato salad pairs perfectly. For family nights, offer carrot sticks and ranch. If you’re feeding a crowd, set out a platter of sliced fruit. And when you want a sweet finish that still feels cozy, check out this breakfast-for-dessert idea, the Best Blueberry French Toast Casserole. It’s a fun way to round out the night.
Cooking Methods: Oven-Baked, Slow Cooker, and Air Fryer Instructions
- Oven baked: 400°F for 35 to 40 minutes. Broil 1 to 2 minutes at the end for extra crunch.
- Slow cooker: Layer chili, cheese, and tots. Cook on high for 2 to 3 hours. Tots soften more in the slow cooker, so finish under the broiler for a minute or two if your insert is oven safe, or air fry a handful of tots and add on top for crunch.
- Air fryer: Use a shallow, air fryer safe dish. Cook at 360°F for 18 to 22 minutes until the tots are deeply golden and the center reaches 165°F. Work in batches if needed to avoid overcrowding.
Note: Every appliance runs a little different. Start checking 5 minutes early and trust your eyes. Crispy tots and bubbling edges are your green light.
Common Mistakes to Avoid: Preventing a Soggy Casserole Bottom
Thin chili is the top culprit. Reduce it a bit on the stove or stir in tomato paste. Don’t thaw the tots; keep them frozen. Avoid piling them too high or they’ll steam. Use a hot oven and let the casserole rest for 5 minutes before serving so the layers set. And try not to cover the pan while baking. Trapped steam softens your tot crown.
Common Questions
Can I make this dairy free? Yes. Use a dairy free shredded cheese that melts well and top with dairy free sour cream. The rest of the recipe works the same.
What’s the best meat to use? I like 85 to 90 percent lean ground beef. Ground turkey works great too. If using very lean meat, add a teaspoon of olive oil for browning.
How do I make it spicier? Add minced jalapeño to the chili, use pepper jack, and finish with hot sauce. A pinch of cayenne in the chili also helps.
Can I use leftover chili? Absolutely. Leftover chili makes this a super fast dinner. If it’s very thick, you’re good to go. If it’s thin, simmer for a few minutes to reduce.
How do I scale this down? Halve everything and bake in an 8×8 dish. Start checking at 25 minutes.
A Cozy Wrap Up You Can Taste
There’s something about a pan of bubbling chili, stretchy cheese, and crunchy tots that makes the whole table lean in. This recipe keeps things simple, flexible, and weeknight friendly while still delivering that big comfort payoff. If you’re craving more cozy flavors, you might also love a lighter bowl like the Best White Chicken Chili Recipe on a different night. And if you want another take on this classic, I found helpful tips in this guide to Tater Tot Casserole that align with the approach here. Grab a bag of tots and make tonight easy, warm, and seriously satisfying.

Chili Cheese Tater Tot Casserole
- Total Time: 55 minutes
- Yield: 6 servings
Description
A hearty and nostalgic dinner featuring bubbling chili, melty cheese, and crispy tater tots, perfect for weeknight meals.
Ingredients
Pantry and Protein Essentials
- 1 pound Ground beef or turkey (1 to 1.25 pounds, 85 to 90 percent lean) (Choose lean to minimize grease.)
- 1 Onion (Adds depth to the chili.)
- 2 cloves Garlic (Enhances flavor.)
- 1 can Canned tomatoes (diced or crushed) (For a saucy texture.)
- 2 tablespoons Tomato paste (Concentrated richness.)
- 1 can Beans (kidney, pinto, or black) (Use your favorite.)
- 2 tablespoons Chili powder (Flavor backbone.)
- 1 teaspoon Cumin (Adds warmth.)
- 1 teaspoon Smoked paprika (For depth of flavor.)
- to taste teaspoon Salt and pepper (Adjust to taste before serving.)
Fresh Toppers and Finishing Touches
- 32 ounces Frozen tater tots (Keep them frozen until ready to use.)
- 2 cups Cheese (sharp cheddar, pepper jack, or a blend) (For topping.)
- to taste Green onions (For garnish.)
- to taste Jalapeños (For garnish.)
- to taste Sour cream (For garnish.)
- to taste Cilantro (For garnish.)
Instructions
Preparation
- Preheat the oven to 400°F.
- If making homemade chili, brown the ground meat with onion and garlic.
- Stir in the spices, tomatoes, and beans. Simmer until thick.
- Lightly grease a 9×13 dish or a large cast iron skillet.
- Spread the chili in an even layer.
- Sprinkle a thin layer of cheese over the chili.
- Arrange frozen tater tots on top in a tight and neat layer.
Cooking
- Bake for 35 to 40 minutes until the tots are deep golden.
- Add a final handful of cheese during the last 5 minutes.
- Let rest for 5 minutes before topping and serving.
Notes
For a crispier tot layer, keep tots frozen until baking. If your chili is watery, simmer uncovered to reduce. Serve with toppings like jalapeños, sour cream, and fresh herbs.
- Prep Time: 15 minutes
- Cook Time: 40 minutes
- Category: dinner, Main Course
- Cuisine: American
Related posts:
 Sweet Potato Bowl Recipes 2025: 10 Viral Ideas to Try at Home
 Crockpot Sausage and Green Beans: Dump-and-Go Recipe
 Why This Crockpot Chicken Pot Pie Is the Easiest Comfort Food
 Cajun Potato Soup for Holidays and Cold Weather
 Delicious Shrimp and Corn Chowder That Will Warm Your Heart
 Crunchy Crispy Air Fryer Chicken & Mozzarella Wraps | Easy Air Fryer Recipe

 Main Dishes
 Drinks & Wellness